Adjusting Exposure
| Exposure is the most fundamental aspect of photography, since it refers to the amount of light that strikes the camera's sensor. Most cameras control exposure automatically and do a good job, but they can be fooled, producing an underexposed (too dark) or overexposed (too light) image. If that happens, you'll want to use iPhoto's Exposure and Levels (discussed on the next page) sliders. To adjust the exposure of a photo:
What the Exposure slider doesThe photo of this statue in Santa Fe in Figure 4.51 is somewhat underexposed, since I took it at dusk. By increasing the exposure in Figure 4.52, I've lightened the photo without giving the photo a whitish cast, as would have happened with the Brightness slider. Figure 4.51. This photo is underexposed, although not terribly so.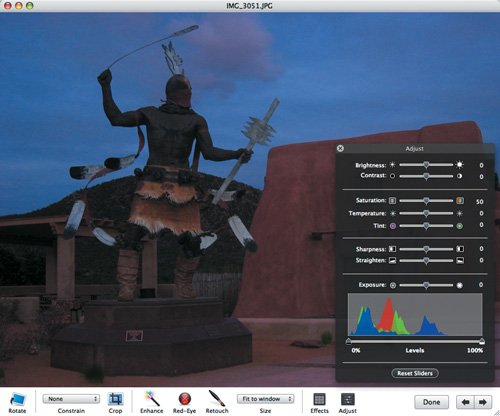 Figure 4.52. By increasing the exposure so the scene appears, I rescued the photo from instant deletion. Increasing exposure squishes the mountain ranges and slides them to the right (and decreasing exposure makes them taller and moves them left), but keeps the end points that define the blackest black and whitest white the same. In contrast, the Brightness slider simply slides the mountain ranges left or right, changing the black and white points and losing pixels that fall off either end of the histogram. Tip
|