| The Home section is also a block of formatted text that loads into the Tech Bookstore using LoadVars. The text is loaded into a TextArea component instance. In this section, you create a SWF file that loads into the front of the Tech Bookstore website. You reuse some of the content that you already created in earlier exercises. Because reusing assets makes for fast development, it is easiest to simply make a copy of the News section and modify it as needed rather than starting from scratch. So, in this exercise, you duplicate the News page and convert it into the Home page. 1. | Open news.fla (created in the previous exercise). Save a new version of the file as home.fla in the TechBookstore folder.
By using news.fla as a starter file, you can skip a lot of steps while you create the new file, and you save having to retype out the ActionScript code from scratch. All you need to do is resize the Stage and TextArea component and modify the instance names and ActionScript slightly, thus saving some time.
Open up the copy of news.fla you created in the previous exercise. Choose File > Save As from the main menu. Enter home.fla as the new filename for the document and then click the Save button. Save this file into the same TechBookstore folder as the previous document.
| 2. | Resize the dimensions of both the Stage and TextArea instance in the document.
Because the Home page on the Tech Bookstore site already has a featured book module, it is necessary to resize the home.fla document so it fits the bookstore properly. Using the Selection tool, click the TextArea component instance on the Stage and use the Property inspector to set the width of the component instance to 570 pixels. Leave the height at 325 pixels and the x and y coordinate at 10 pixels. Click on the Stage and change the dimensions of the document to 580 pixels by 345 pixels.
 | 3. | Enter a new instance name for the TextArea instance and change the ActionScript on the actions layer.
Select the TextArea component instance on the Stage and enter a new instance name of home_txt into the Property inspector. Because you changed the instance name for the component instance, you have to change the references to the TextArea in your ActionScript. You also have to change any references to news_lv to home_lv. Your finished modified code should look like the following:
var flash_css = new TextField.StyleSheet(); flash_css.load("styles.css"); flash_css.onLoad = function(success:Boolean) { if (success) { home_txt.styleSheet = flash_css; } else { trace("Error loading CSS file."); } }; var home_lv:LoadVars = new LoadVars(); home_lv.load("home.txt"); home_lv.onLoad = function(success:Boolean) { if (success) { home_txt.text = this.content; } else { trace("unable to load text file."); } }; home_txt.html = true; home_txt.editable = false;
This ActionScript is almost identical to that of the news.fla. The only thing that needed to be changed was the instance names and the filename of the external text file being loaded.
The second-to-last line of ActionScript makes sure that the home_txt instance on the Stage displays HTML-formatted text correctly. This allows you to use images, bold text, italics, and bulleted lists to give your text some extra formatting. The final line of code sets the editable property to false so that users can't modify the text on their screen.
| 4. | Copy home.txt, home01.jpg, and home02.jpg from the lesson09/assets folder on the CD-ROM to the TechBookstore folder.
Before you can properly test your Flash document, you need to either copy or create a text file that can be loaded in using LoadVars. A text file is adequate for the front of the Tech Bookstore and can be found on the CD-ROM, so you don't have to type in a whole bunch of content for the front page. Naturally, you can create whatever it is you want for the front of the Tech Bookstore if you so choose and want to type in the text. Or you can use the home.txt file from the CD-ROM. Locate the lesson09 folder on the CD-ROM and copy the home.txt file and the two images home01.jpg and home02.jpg into the TechBookstore folder on your hard drive. Open the text file and look at the HTML markup.
Note The two image files are used within the HTML formatted text and are loaded into the SWF file using the <img> tag in the home.txt file. If you're creating your own text file to load into the Tech Bookstore, you can make the HTML and formatting as simple or as complex as you like. Flash supports a small subset of HTML version 1.0 tags that include the following:
Anchor <a>: Allows you to add links to your Flash text fields. The <a> tag also supports the use of the target attribute, which allows you to specify the frame or window in which the link should open. If you're using a style sheet, you can also specify colors and attributes for a:link, a:hover, and a:active.
Bold <b>: Displays the text in bold.
Break <br>: Adds a line break at the specified point.
Font <font>: Allows you to change the current font, size, and color. This tag is very useful if you're not using style sheets and want to add some formatting to your text.
Image <img>: Allows you to add images to your text fields. This tag supports loading local or external image files, SWF files, or even symbols from the library (by assigning the symbol a Linkage Identifier).
Italics <i>: Displays the text in italic.
List Item <li>: Slightly different from HTML, the <li> does not appear between a pair of <ol> (ordered list) or <ul> (unordered list) tags. Flash's <li> tag allows you to easily create bulleted lists.
Paragraph <p>: Allows you to add a new paragraph.
Span <span>: Allows you to assign styles to a block of code.
TextFormat <textformat>: Allows you to build simple tables in Flash.
Underline <u>: Underlines a section of text.
Although Flash supports only about a dozen tags, combining them with Flash's built-in CSS support can lead to some fairly impressive results when it comes to formatting text for your sites.
Tip When you load an image only into the TextArea, and the image is larger than the TextArea instance dimensions, scrollbars do not appear. You must have some text following the image for the scroll bars to activate. When you're loading large images and you want to scroll through them, you must use the ScrollPane component instead. Or write your own ActionScript with a movie clip that does the same thing. If you want to use this file as is, close it. Otherwise, make any modifications to this file now that you know how it is being formatted.
| 5. | Make sure that everything works properly in the Flash document. Save the file and then publish home.fla so an SWF file is generated in the TechBookstore folder.
Make sure that the FLA file works properly by selecting Control > Test movie to test the file in the testing environment.
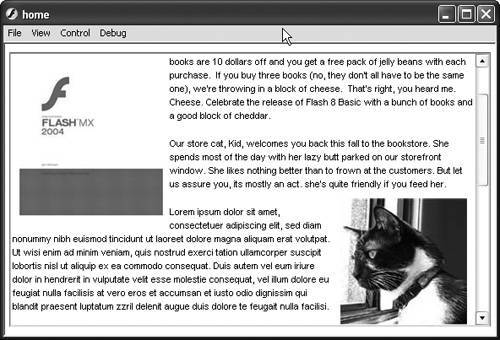 After you confirm that everything works in the SWF file and your formatting works correctly, return to the authoring environment and then save and publish the FLA file. A SWF file generates into the TechBookstore folder. After you confirm that everything works in the SWF file and your formatting works correctly, return to the authoring environment and then save and publish the FLA file. A SWF file generates into the TechBookstore folder.
|
|