| In this section, you create two new catalog pages that will import into the catalog.fla file you will create in the following exercise. The catalog pages are fairly simple pages that contain information on each book that is sold in the Tech Bookstore. You need to make only a couple of books for the catalog, but you can make many more if you want to. Each catalog page uses a couple of buttons to open additional pages: One button opens a table of contents, and the second button opens a sample chapter. You created these buttons earlier in this book out of movie clips. The catalog pages also include an image of the book's cover and a short description of its contents. You can add whatever graphics you want to make the catalog pages look and feel customized. 1. | Create a new folder in the TechBookstore folder called catalog. Open bookstore12.fla and save a new version of the file as bookstore13.fla.
First, create a new folder called catalog on your hard drive that's inside the TechBookstore folder. This is where you will save a couple of new FLA and SWF files you create in this exercise that will ultimately be loaded into the main Tech Bookstore application.
Open bookstore12.fla, either from the TechBookstore folder on your hard drive or from this CD-ROM's lesson09/start directory. Select File > Save As to save a new version of bookstore12.fla as bookstore13.fla into the TechBookstore folder on your hard drive.
| 2. | Create a new document called catalog01.fla and save it in the catalog folder within the TechBookstore folder. Open the Publish Settings dialog box and turn off the HTML check box under the Formats tab. Resize the Stage.
When you publish the document, you don't need an HTML page generated. You only need to use the SWF file that is created when you choose to publish the document because eventually the SWF file will be loaded into another SWF file. Therefore, choose File > Publish settings, deselect the HTML option in the Formats tab, and click OK when you're done. Using the Property inspector, resize the Stage to 490 x 325.
| 3. | Drag the two movie clip buttons from the library in bookstore13.fla into the library of catalog01.fla.
In catalog01.fla, launch your document library if it is not already open. Press the New Library Panel button and select bookstore13.fla from the library drop-down list in the new panel. Drag an instance of mcSampleChapter and mcToc from the bookstore13.fla library and into the catalog01.fla library.
 | 4. | Delete the Table of Contents and Sample Chapter buttons from the Tech Bookstore library and close the FLA file.
When the mcSampleChapter and mcToc symbols are in the catalog01.fla document, you can delete them from bookstore13.fla's library by selecting each symbol and dragging them over the trash can icon located at the bottom of the library.
Tip You always want to delete any symbols that are not being used in an FLA file so you can attempt to keep the FLA file size to a minimum. Deleting symbols does not affect the size of the published SWF file because any unused symbols are not compiled into the SWF file when you publish the Flash document. This is not true, however, of components. Components will be published with the SWF unless you specifically delete the unused components from your Library. | 5. | Copy catalog01.png and catalog02.png from the lesson09/assets folder on the CD-ROM onto your hard drive.
Located within the lesson09/assets folder on the CD-ROM are files called catalog01.png and catalog02.png that contain images of Training from the Source book covers. Copy both files onto your hard drive.
| 6. | Rename Layer 1 to pages and drag an instance of the Loader component into the layer. Change its contentPath parameter to catalog01.png. Insert a new layer above pages and rename the new layer buttons. Select the buttons layer and drag the two buttons onto the Stage. Add a layer called static text. Using the Text tool, create a new static text field on the Stage and then lay out all the items on the Stage.
First, rename Layer 1 pages. Expand the components panel and drag an instance of the Loader component onto the Stage. Position it near the upper-left side of the Stage similar to the following figure, and give it a width of 120 and a height of 150. Set its contentPath parameter to catalog01.png, and set its autoScale property to false.
Tip When you click away from the Loader component, it appears to disappear. To see its position when it is deselected, turn on the View Outlines option on your Layers pane. Create a new layer above pages and rename it buttons. With the buttons layer selected, drag the two movie clip button instances from the library onto the Stage. Position the two movie clip buttons under the Loader component instance on the Stage. Position the second movie clip button underneath the first button.
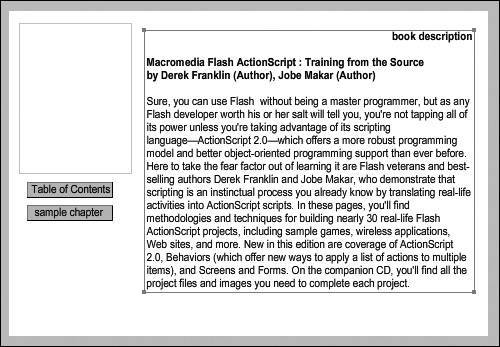
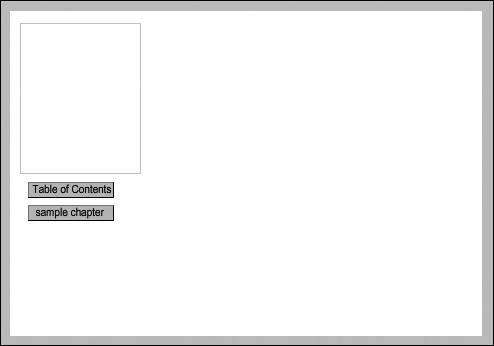 Finally, click the Text tool in the Tools panel and open the Property inspector. Set the Text type to static and the font to Arial 10 pt black. Select Anti-alias for readability as the font-rendering method. Select the static text layer and create a text field on the Stage that is the correct width of the field by clicking and then dragging. When you enter text into this field, it will create additional lines vertically. Type some text into the static text field you created. It doesn't matter what you typeyou can use lorem ipsum text as placeholder text, open the completed catalog01.fla, and use the text you find in the finished FLA file, or find the actual book description online.
 | 7. | Give the two movie clip buttons new instance names. Then insert a new layer called actions and add functions to make the two buttons work.
Using the Selection tool, click each of the buttons near the top of the Stage and give them instance names. Enter an instance name of toc_mc for the table of contents button. Then enter an instance name of samplechapter_mc for the sample chapter button. Select the top layer in the FLA file and insert a new layer. Rename the new layer actions, expand the Actions panel, and add the following ActionScript to the Script pane:
stop(); samplechapter_mc.onRelease = function() { getURL("http://www.trainingfromthesource.com/flashTFS/samplechapter.html", ¬ "_blank"); } toc_mc.onRelease = function() { gotoAndStop("toc"); }
 This ActionScript stops the playhead on the current frame and defines two functions. One moves the playhead to a specific frame label, and the other opens a browser window. If the user clicks the sample chapter button, the browser opens and goes to a page containing a sample chapter; if the user clicks the table of contents button, the playhead moves to the frame that will be labeled toc in the following step.
| 8. | Insert a new layer and rename it labels. Then add frame labels toc on Frame 5, and home on Frame 1. Insert new blank keyframes on the pages and actions layers under the frame label, and add a stop action on Frame 5 of the actions layer.
Insert a new layer and move it directly below the actions layer. Rename the layer labels. Right-click (or Control-click on the Mac) on Frame 5 of this new layer in the Timeline, select Insert Blank Keyframe from the contextual menu, and give that frame a label of toc using the Property inspector. Select Frame 1 on the layer and add a frame label of home.
Insert a new blank keyframe (F6) on Frame 5 in the actions layer and type stop(); into the Actions panel. Add a new keyframe on Frame 5 of the pages layer by pressing F6. The text field from Frame 1 is copied onto Frame 5.
Note You don't need to extend the buttons layer to Frame 5 because you are making a page that's exclusively used to display the table of contents, not necessarily to open the sample chapter. 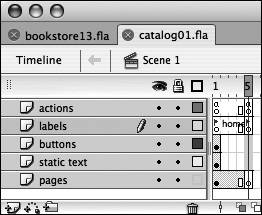 By adding a keyframe on this layer instead of a blank keyframe, you can change the text in the static text field on the Stage and be able to maintain the same positioning of the text field. It also allows you to keep all the elements in exactly the same place so the items don't shift when visitors navigate to the second area. Modify the text fields, so now it displays a table of contents instead of a book description. Finally, add a back button on the Stage onto the toc keyframe on the pages layer. Either create your own button or drag a Button component instance from the Components panel onto the pages layer.
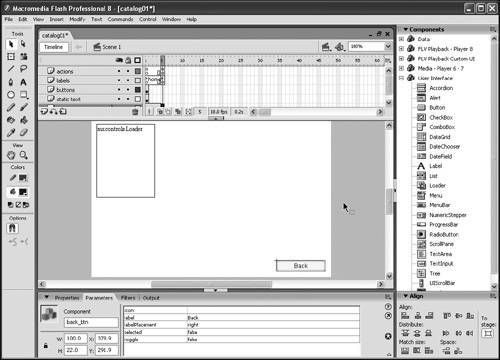 If you use a Button component instance, change the label parameter to Back and the instance name to back_btn. Select Frame 5 of the actions layer and type the following code into the Actions panel. If you use a Button component instance, change the label parameter to Back and the instance name to back_btn. Select Frame 5 of the actions layer and type the following code into the Actions panel.
back_btn.onRelease = function() { gotoAndStop("home"); }
 | 9. | Test catalog01.fla and then save and publish the file if there are no problems. Save a new version of catalog01.fla by selecting File > Save As and name the new file catalog02.fla and make sure it's saved in the catalog folder. Change the contentPath parameter of the Loader component to catalog02.png and modify the catalog's text fields.
Test catalog01.fla to make sure that the document works as expected. If there are no problems, save the file, and publish it by choosing File > Publish. After you have saved a new version of catalog01.fla as catalog02.fla, you need to make only a few minor modifications (detailed as follows) to the FLA file and then republish it.
Note If you don't want to create a second catalog page, you can always save catalog02.fla from the lesson09 folder on the CD-ROM into the TechBookstore folder on your hard drive and publish that file instead. But then everyone will call you lazy, and besides, you won't get any practice that way. Usually, the quickest way to rebuild any file (such as the catalog01.fla) while maintaining a consistent layout and feel is to save a new copy of it and change only what needs changing. It's the same principle as duplicating a movie clip symbol, really. This way, you can save a few steps by not having to re-create the entire file from scratch and then worry about positioning each element the same way.
Select the Loader component on the pages layer and change its contentPath parameter to catalog2.png. You'll need to do this at keyframe 5 of the pages layer as well. Lastly, change the text if you like in Frame 5 of the pages layer.
| 10. | Test catalog02.swf in a browser window. If the page works correctly, return to the authoring environment, save the FLA file, and publish it to create catalog02.swf in the catalog folder.
Test the catalog02.swf file in a browser window by pressing selecting File > Publish Preview > Default in the authoring environment. If everything looks OK and you can navigate to the different sections of the SWF file and open a new browser window, save the file and publish the FLA file to generate the new catalog02.swf file. You should now have two SWF files in the catalog folder that you will import into the Tech Bookstore later in this book.
|
|