Consuming a Web Service
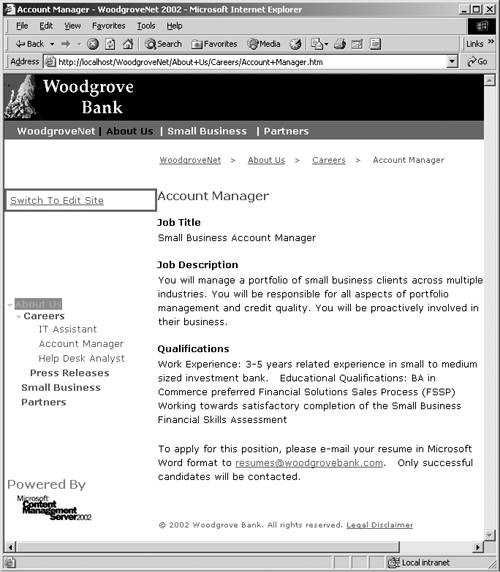
| If you haven't looked before, it may be helpful to see what a Woodgrove job posting looks like. Browse to the Careers section of the Woodgrove sample site. From anywhere on the Woodgrove site, we can choose Careers from the About Us menu option in the top navigation, or typing the following URL should get there: http://localhost/WoodgroveNet/About+Us/Careers/. A summary of existing job postings is shown. Clicking one of the postings should show a screen something like Figure 33-14. Figure 33-14. Woodgrove job posting
At the top of the posting is the display name for the posting (Account Manager, in this example) followed by four fields: Job Title, Job Description, Qualifications, and Application Instructions (this section is not labeled). Click the Switch to Edit Site link and then click the Edit link to see the actual placeholders that are being populated. These placeholders are named in the associated template in VS.NET. The BOTS AddChangeJob WebMethod only accepts a JobTitle and a JobDescription, so we will need to consolidate a few of these fields or leave off the content. We don't want the Posting to be incomplete, so we are going to concatenate the Woodgrove JobDescription, Qualifications, and ApplicationInstructions placeholder data into the single JobDescription field in the BOTS Web Service. When a Web Service is consumed, a proxy class is typically created that contains all the properties and methods that the Web Service exposes publicly. When the properties and methods on the proxy class are called, they handle the marshalling of the parameters into SOAP, sending the SOAP request over HTTP, receiving the response from the Web Service, and then unmarshalling the return value. In short, the proxy class will make the BOTS Web Service behave as if it were a local component. VS.NET makes creating this proxy class a snap. Creating a Proxy Class to the Web ServiceOpen the Woodgrove sample in VS.NET and right-click the References folder. Select Add and then Add Web Reference from the resulting pop-up menu. In the Add Web Reference dialog (Figure 33-15), type the URL of the BOTS Web Service we built in the last section, http://localhost/CmsJobsWebService/PostJobToBOTS.asmx, into the Address text box and press Enter. Figure 33-15. Add Web Reference dialog
We can see the DeleteJob and AddChangeJob WebMethods, so this is the Web Service that we want. The JobPosting class is not a Web Method, so it is not listed, but it is also available for use from the Web Service. Click the Add Reference button at the bottom of the dialog, and VS.NET will create a new folder called Web References in which the PostJob Web Service is loaded (Figure 33-16). Figure 33-16. Added Web Reference
Adding this Web Reference in VS.NET prepares the proxy class that we can use to refer to the Web Service public methods and objects locally, and the necessary code to interact with the actual Web Service will be created by VS.NET on our behalf. We simply need to refer to the proxy class methods and object. For instance, we will use localhost.Add ChangeJob(thisJob) to access the AddChangeJob Web Service. Consuming the AddChangeJob Web ServiceRemember, the requirements as depicted in Figure 33-8 show that the AddChangeJob Web Service WebMethod is invoked when a Woodgrove job posting is approved. The stub for the CmsPosting_Approved event can be found in the Woodgrove Global.asax file.
NOTE: Using the events in the Global.asax file is covered in depth in Chapters 6 and 31. Locate and populate the CmsPosting_Approved function in the Global.asax file with the following code: protected void CmsPosting_Approved(Object sender, ChangedEventArgs e) { try { //1. Grab the posting that is being Approved Posting cmsPosting = e.Target as Posting; //2. Check to see if it is in the Woodgrove Careers channel if (cmsPosting.Parent.Name == "Careers") { //3. Grab the object that will pass our data as XML to BOTS localhost.JobPosting jobToPost = new localhost.JobPosting(); //4. Populate the Employer and Posting characteristic fields jobToPost.JobEmployer = "Woodgrove Bank"; jobToPost.JobPostingID = cmsPosting.Guid.ToString(); jobToPost.JobPostingName = cmsPosting.Name.ToString(); jobToPost.JobPostingStartDate = cmsPosting.StartDate; jobToPost.JobPostingExpiryDate = cmsPosting.ExpiryDate; //5. Grab the approved Postings Title placeholder and // populate the JobTitle to pass to BOTS using the Html // placeholder property HtmlPlaceholder cmsPlaceholder = cmsPosting.Placeholders["Title"] as HtmlPlaceholder; jobToPost.JobTitle = cmsPlaceholder.Html; //6. Grab the approved Postings JobDescription placeholder // and assign its Html to a temporary variable cmsPlaceholder = cmsPosting.Placeholders["JobDescription"] as HtmlPlaceholder; string jobDescription = cmsPlaceholder.Html + "<br><br>"; //7. Grab the approved Postings Qualifications placeholder // and append its Html to the temporary variable cmsPlaceholder = cmsPosting.Placeholders["Qualifications"] as HtmlPlaceholder; jobDescription += cmsPlaceholder.Html + "<br><br>"; //8. Grab the approved Postings ApplicationInstructions // placeholder and append its Html to the temporary // variable cmsPlaceholder = cmsPosting.Placeholders["ApplicationInstructions"] as HtmlPlaceholder; jobDescription += cmsPlaceholder.Html + "<br><br>"; //9. Assign the temporary variable to the BOTS JobDescription jobToPost.JobDescription = jobDescription.ToString(); //10. Create the proxy object to PostJobToBOTS Web Service localhost.PostJobToBOTS postJobToBOTS = new localhost.PostJobToBOTS(); //11. Use the same credentials on BOTS that we are using in // Woodgrove. This is but one way to authenticate to the // Web Service. postJobToBOTS.Credentials = System.Net.CredentialCache.DefaultCredentials; //12. Invoke the BOTS WebMethod to Add or Change a Job postJobToBOTS.AddChangeJob(jobToPost); } } catch(Exception eError) { //13. Write Error to File System.IO.StreamWriter logFile = new System.IO.StreamWriter(<@>"C:<\\>ErrorLog.txt", true); logFile.WriteLine(eError.Message.ToString()); logFile.Close(); } } We use the CmsPosting_Approved event rather than the CmsPosting_Approving event because we want to call the Web Service after the local posting has been successfully approved rather than before that processing begins. Consuming the DeleteJob Web ServiceThe requirements as depicted in Figure 33-9 show that the DeleteJob Web Service WebMethod is invoked when a Woodgrove job posting is deleted. The stub for the CmsPosting_Deleted event can be found in the Woodgrove Global.asax file. Locate and populate the CmsPosting_Deleted function in the Global.asax file with the following code: protected void CmsPosting_Deleted(Object sender, ChangedEventArgs e) { try { //1. Grab the posting that is being Approved Posting cmsPosting = e.Target as Posting; //2. Check to see if it is in the Woodgrove Careers channel if (cmsPosting.Parent.Name == "Careers") { //3. Grab the object that will pass our data as XML to BOTS localhost.JobPosting jobToPost = new localhost.JobPosting(); //4. Populate the Employer and Posting characteristic fields jobToPost.JobEmployer = "Woodgrove Bank"; jobToPost.JobPostingID = cmsPosting.Guid.ToString(); //5. Create the proxy object to the PostJobToBOTS Web Service localhost.PostJobToBOTS postJobToBOTS = new localhost.PostJobToBOTS(); //6. Use the same credentials on BOTS that we are here postJobToBOTS.Credentials = System.Net.CredentialCache.DefaultCredentials; //7. Commit the pending delete. This is only necessary // because both CMS solutions are hosted on localhost and // there is a single transaction limit per CommitAll called e.Context.CommitAll(); //8. Invoke the BOTS WebMethod to Delete a Job postJobToBOTS.DeleteJob(jobToPost); } } catch(Exception eError) { //9. Write Error to File System.IO.StreamWriter logFile = new System.IO.StreamWriter(<@>"C:<\\>ErrorLog.txt", true); logFile.WriteLine(eError.Message.ToString()); logFile.Close(); } } We use the CmsPosting_Deleted event rather than the CmsPosting_Deleting event because we want to call the Web Service after the local posting has been successfully deleted rather than before that processing begins. It is important to note that the code under comment 7 is required only if the two CMS solutions are running on the same server. This is due to the fact that CMS only allows for a single posting to be deleted for each CommitAll. So, near the end of the CmsPosting_Deleted event, just before we call the Web Service, we simply explicitly commit the local posting's uncommitted deletion. This way when we call the Web Service and attempt to commit that posting's deletion we don't end up trying to commit both of them at the same time. Build the modified Woodgrove solution in VS.NET. |
EAN: 2147483647
Pages: 298