Section 4.3. Working with Objects
When you're working with pictures, text boxes, shapes , tables, and so on, Pages sees them all as objects and handles them in similar ways. Once you master resizing, rotating, and text wrapping around, say, a picture, you're ready to handle the same operations on shapes, tables, text boxes, and other objects.
4.3.1. Selecting Objects
Select an object by clicking it. Its selection handles appear, in effect saying, "I'm ready and waitingmold me to your whim!" The selection handles also tell you whether the object is fixed (eight open black squares), in-line (three open black squares), a group (eight solid gray squares), locked on the page (eight X marks), or a master object (eight solid blue squares). The most basic object maneuvers are moving and resizing.
4.3.2. Moving Objects
As long as an object isn't locked (see Section 4.3.9.3), you can move it by clicking inside it and dragging. You can drag fixed objects anywhere on the page or to another page in your document. When you drag in-line objects, you can only drop them into a line of text. Watch the insertion point at the tip of your arrow cursor as you drag; drop the object when your insertion point reaches the spot in the text where you want to move your object.
If you have to move an object very farto another page or to the other end of your documentselect the object and choose Edit  Cut. Scroll to the point in your document where you want to insert the object, and then do one of two things: to insert it as an in-line object, place the insertion point within the text and choose Edit Paste. To insert it as a fixed object, click the margin of the document so that the insertion point disappears, choose Edit Paste, and then drag the object into its final position.
4.3.3. Resizing Objects
When you place your arrow pointer over one of an object's open black selection handles, the cursor changes into a double-headed arrow, which means you can resize the object by dragging that handle. If the object in question is a picture or a movie, Pages locks its proportions to prevent you from stretching or squashing it while you resize. You're free to alter the proportions of other objectslike shapes and tableswhile you drag their selection handles. To force Pages to preserve their proportions , hold down the Shift key while you resize.
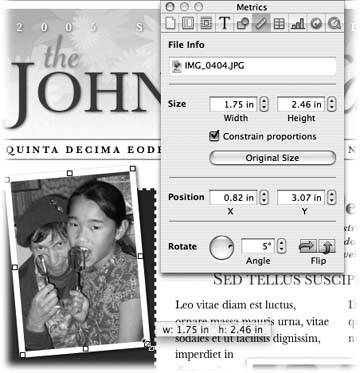
If you do want to stretch a picture, open the Metrics Inspector and turn off the checkbox for "Constrain proportions." You can always click the Original Size button to easily return to square one when you resize a picture or movie (Figure 4-15).
|
Note: The Metrics Inspector has nothing to do with the metric system. The word metric means measurementvarieties of which you find within this window.
Pages lets you set an object's size in this window by entering measurements in the Width and Height fields instead of dragging selection handles. This ability is especially useful when you need to match the dimensions of two or more pictures. Select two or more objects and enter width and/or height measurements. Presto: All your selected objects are now the same size. If "Constrain proportions" is turned on, you can enter only one of the dimensions; turn off that checkbox in order to enter both.
You can also use the Metrics Inspector to set an object's position on the page via the X and Y Position fields. X is the distance from the left edge of the object to the left edge of the page; Y is the distance from the top of the object to the top of the page (Figure 4-15).
When you're working with lines as fixed objects, Pages changes the Metrics Inspector's window to display the starting and ending coordinates of the line, letting you position a line by setting its X and Y coordinates. Pages assigns the Start coordinates to the upper-left end point of the line when it first appears in the document, and the End coordinates to the lower-right end point. These coordinates always apply to the same end of the lineeven if you later rotate or flip it.
4.3.4. Aligning Objects
Pages' virtual T-square, the alignment guides , helps you when you want to precisely align objects with text and with each other in the page layout. You can create as many non-printing vertical or horizontal alignment guides as you need. Click the document's margin so the insertion point disappears, and then drag from either ruler onto the page. Pages displays the blue alignment guide and a box showing the distance from the edge of the page to the guide. Drop the guide when you get it into the correct position.
Page alignment guides show only on one page. Reposition them by dragging (your insertion point or arrow cursor takes on the shape of a double bar between double arrows, indicating it's ready to reposition the guideline). When you're done lining things up, remove a guide by dragging it back to the ruler or off the page. A puff of smoke signals its demise.
Objects themselves also have built-in alignment guides. Choose Pages Preferences to see if and how Pages displays them. Pages normally has the checkbox turned on for "Show guide at object center." With this option on, page alignment guides appear when you drag an object so that its center crosses the horizontal or vertical center of the page. Center alignment guides also show up between objects as you drag one object, causing its center to align vertically or horizontally with the center of another object on the same page. All this alignment guide stuff is a little difficult to conceptualize if you've never seen these kinds of guidelines in action.
But they're worth using because they can be enormously helpful if you're trying to place an object just so; Figure 4-16 shows you how these lines work and what they look like.
|
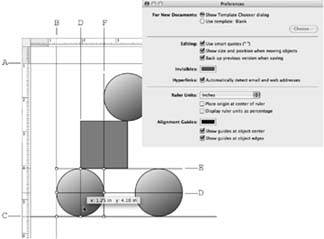
If you turn on the preference checkbox for "Show guides at object edges," page alignment guides appear when you drag an object so that one of its edges crosses the horizontal or vertical center of the page. Alignment guides also show between objects as you drag one object and its edge aligns vertically or horizontally with the edge of another object on the same page. Turn on both preference checkboxes to maximize your alignment options. Alignment guides then appear between the center of one object and the edge of another, as well.
Pages' automatic "snap to guideline" feature makes it quick and easy to accurately align objects. As you drag an object and its invisible center or edge guidelines approach another guidelinethe page center guidelines, another object's edge or center guidelines, or alignment guides you've added to the pagethe object's alignment guides appear and the object snaps into position, perfectly aligned with the guideline.
Sometimes, however, you may need to position an object very close to, but not exactly on, a guideline. In this case, Pages' guideline magnetism thwarts your positioning efforts. Temporarily turn off this feature by pressing ![]() while you drag, and you can position the object as you wish, without fear of it snapping to a nearby guideline.
while you drag, and you can position the object as you wish, without fear of it snapping to a nearby guideline.
Tip: The best way to carefully position fixed objects doesn't involve the mouse at all. Instead, select the object, and then use the four arrow keys to jog it one pixel at a time in any direction. Hold down the Shift key to jog objects 10 pixels for every press of an arrow key.
In Pages' preferences window, you can change the alignment guide color if you don't like the standard blueor if your document has a blue background. Click the Alignment Guides color well to invoke the Color Picker. Click a new color in the Color Picker, and Pages adds it to the color welland repaints the alignment guides on the page.
4.3.4.1. Automatic alignment
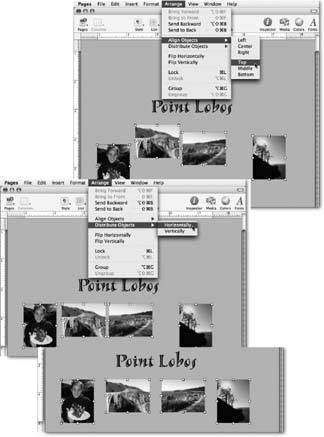
Pages can automatically align two or more objects either by their edges or their center lines. To align several objects, select them, choose Arrange Align objects, and then choose one of the commands from the submenu. The Left, Center, and Right commands align the objects vertically along their left sides, vertical centerlines, or right sides. The Top, Middle, and Bottom commands align objects horizontally along their tops, horizontal centerlines, and bottom sides. Figure 4-17 shows the effect.
4.3.5. Distributing Objects
Sometimes being spaced out is a good thing. Perhaps you have four objects and you want them evenly spaced across the page. Drag the objects into the approximate arrangement you want, placing the first and last objects in the series precisely. Hold the Shift key and click to select each of the objects. When they're all selected, choose Arrange Distribute Objects Horizontally (or Vertically). Pages adjusts the objects, equalizing the space between them. Then use the align command, described above, to straighten out the line.
If you're distributing objects horizontally (or left to right), they don't have to be aligned vertically (or up and down), and vice versa. Figure 4-17 illustrates this situation.
If you've lined up a group of objects vertically so they're directly above one another, and you choose Arrange Distribute Objects Horizontally, Pages moves the lower objects to the right, aligning the left edge of each object with the right edge of the object above it. Similarly, give the command to distribute objects vertically to a group of horizontally aligned objects, and Pages moves the right-hand objects downward, aligning the top of one object with the bottom of its neighbor to the left.
Tip: Shortcut menus also give you access to object alignment and distribution commands. Select the objects, Control-click (or right-click) one of them, and, from the pop-up menu, choose the alignment or distribution command.
|
4.3.6. Rotating Objects
Pages always adds new objects (except lines) to the page so that they're perfectly aligned with the rectangular margins of your document. If you've ever had to lay out a document the old-fashioned wayusing paste or wax to hold pictures and columns of text in placethis feature alone is cause for a few hosannas. Yet there are times you'd prefer a picture, a headline, or caption to appear in your document at a jaunty angleinstantly imparting an air of excitement, action, or even intentional sloppiness. Or perhaps you'd like to run your newsletter's headline vertically along the side or put the answer to this week's anagram upside down at the bottom of the page.
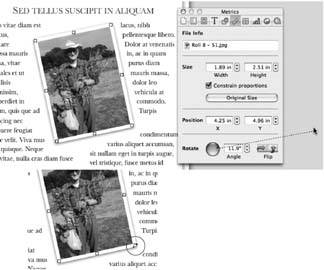
You can easily wrest your objects from the horizontal straight and narrow by pressing ![]() while dragging an object's corner selection handle (Figure 4-18). When you drag the handle, Pages turns the arrow pointer into a curved , double-headed arrow, indicating its willingness to twist the selected object. Drag a selection handle to swivel the object clockwise or counterclockwise. Press
while dragging an object's corner selection handle (Figure 4-18). When you drag the handle, Pages turns the arrow pointer into a curved , double-headed arrow, indicating its willingness to twist the selected object. Drag a selection handle to swivel the object clockwise or counterclockwise. Press ![]() -Shift to rotate in 45 increments .
-Shift to rotate in 45 increments .
Pages normally rotates an object around its center point. But press the Option key while you rotate, and Pages pivots the object around the selection handle opposite the one you're dragging. And yes, press ![]() -Option-Shift to pivot in 45 increments from the corner.
-Option-Shift to pivot in 45 increments from the corner.
The Metrics Inspector provides another approach to rotation. Select an object and use the Metrics Inspector's Rotate knob to twist it. You can also enter an angle measurement directly, or use the up and down arrows next to the Angle field to rotate in one-degree increments. The standard or right-side-up position is zero degrees. The angle increases as you rotate counterclockwise.
The Metrics Inspector's Rotate knob also provides the only way to rotate two or more selected objects simultaneously , which is very handy when you're trying to keep multiple objects equally off-kilter.
Instead of spinning the Rotate knob with your mouse, you can also just click the knob to move its angle indicator dot to that position. Unlike a compass where zero degrees occupies the top (North) position, Pages puts the zero degree indicator at the right (East) position to indicate horizontality.
Tip: You'll find it very difficult to use the Metrics Inspector's Rotate knob precisely with your cursor right on the knob. However, you can twist the knob with tenth-of-a-degree precision if you start rotating with your cursor on the knob, and then move the cursor several inches away from the knobin effect creating a much larger knob that you can adjust more precisely.
The final object controls you find in the Metrics Inspector are the two flip buttons in the lower-right corner. You can flip a selected object horizontally or vertically with these buttons, so you get a mirror image of the original. Or choose Arrange Flip Horizontally or Flip Vertically to do the same thing. This tool is great when you need to write a secret message in a text box that can be read only in a mirror. (If you flip-flop frequently, consider customizing your toolbar with the Flip horizontal or Flip vertical buttons.)
4.3.7. Wrapping Text Around Objects
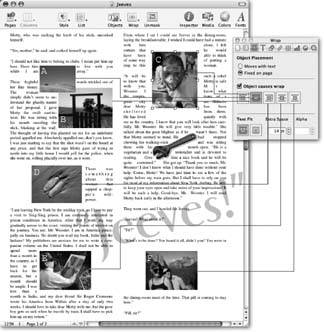
When you use objectswhether in-line or fixedon a page containing text, you have to determine if and how that text is going to flow or wrap around the object. You can choose to have the text run directly over the objectnot wrapping at allor wrap tightly, loosely, just on the top and bottom, or just on one side of the object. The Wrap Inspector provides a veritable "wrapper's delight" of options for controlling this effect (Figure 4-19).
|
To wrap or not to wrap: that is the question Pages asks of every object in your document. Answer it by selecting an object, opening the Wrap Inspector, and turning the checkbox for "Object causes wrap" on or off. Pages handles text wrapping differently on in-line and fixed objects. If you turn wrapping off for a fixed object, the text ignores the object completely, running blithely over the top of the object. You might choose to not wrap text around a fixed object when you're using an image as a background on the page, for example. People often use this technique with an image whose opacity is set very low, so it appears as a faded-out background (see Section 4.2.1).
In contrast, if you turn off text wrapping for an in-line object, the text doesn't run over the top of it, since an in-line object acts like a character in the line of text.
If you choose to use text wrapping, your next decision is which of the wrapping styles to use. Click the Wrap Inspector's buttons in turn to see their effect on the text around your object (see Figure 4-19 for a comparison of wrapping styles).
In-line wrapping styles differ slightly from their fixed-object counterparts, but they can produce wrapping results that are visually identical. Their vital distinction, of course, is that the object is tied to the text at the anchor point indicator and stays linked to that text, no matter how much you edit it.
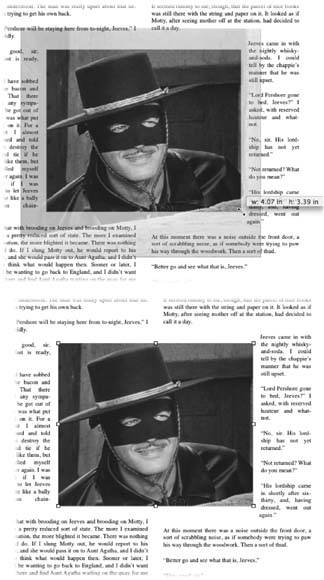
You can use the controls at the bottom of the Wrap Inspector to determine how tightly text wraps around an object. Use the up and down arrow buttons or enter a number in the Extra Space field to set the margin Pages creates between the object and the surrounding text.
The Text Fit buttons and the Alpha field apply only to objects that contain a transparent area known as an alpha channel (see the upcoming sidebar "Alpha Channels").
|
4.3.8. Masking Objects
Consider this common layout problem: you prepare a picture for your brochure, cropping it to just the right size before adding it to the layout. Later, when making the final adjustments to your design, you decide the picture needs to be a quarter inch taller and half an inch narrower. So you delete the picture, go back to your photo-editing program, open the original image again, recrop it, save the new cropped version, and reinsert it into your layout. Or, even worse , you go back to open the original picture and discover you only saved the cropped version. (This heartbreaking scenario can't happen if you use iPhoto, which always saves your original. Choose Photos Revert to Original to get it back.)
| POWER USERS' CLINIC Alpha Channels |
| Some image files contain an invisible stencil called an alpha channel that designates certain parts of the image as transparent. Only certain graphic file formatssuch as Photoshop, TIFF, or PDFsupport this kind of transparency. Many clip art graphics use alpha channels so that irregularly shaped objects aren't always surrounded by clunky -looking rectangular areas of white space. You can add alpha channels to graphics by using pricey image-editing software, such as Adobe's Photoshop or Illustrator. But you can also create alpha channelsand save yourself several hundred dollarsby using that essential $30 shareware program GraphicConverter, from Lemke Software (www.lemkesoft.com). The exact procedures used in the various programs differ, but essentially you create a transparent background regioninstead of a white oneand designate it an alpha channel. Once you've found or created an alpha-channel graphic, insert it in Pages like any other graphic, and use the Wrap Inspector to adjust its wrapping options. Use the left Text Fit button to ignore the alpha layer, instead wrapping to a rectangular border around the object. The right Text Fit button activates the alpha layer, wrapping text into the transparent regions of the object. If the object's alpha layer contains regions of partial transparency, adjust the percentage in the Alpha box to choose how transparent the region has to be to allow text to show through. |
Pages prevents all this shuffling back and forth to your photo program for cropping purposes. Instead, it lets you mask your photos right in your layout, cropping them by selecting the portion of the picture to display while hiding the rest of the picture from view. If you need to adjust the cropping later, just unmask the photo to reveal its full size again, and then recrop it by adjusting the mask.
Note: The only objects you can mask in Pages are pictures, and they must be placed as fixed objects. However, once you've completed the masking process, you can convert the resulting image into an in-line object if you go to the Wrap Inspector and select "Moves with text."
Using Pages' mask feature is pretty easy; just follow these steps:
-
Insert a picture in your document as a fixed object, or click an existing one to select it (see Section 4.2.2.3) .
-
Choose Format
Mask . Pages displays a masking rectangle inside your selected picture. Adjust its size with the selection handles. As you adjust, a dimension window appears, displaying the width and height of the mask (Figure 4-20). Press Shift as you drag to constrain the masks proportions. Rotate the mask by pressing
 as you drag a selection handle.
 You can also use the Metrics Inspector or the optional rotation key combinations to manipulate your mask. These methods work on masks just like they do when rotating a picture, as described on Section 4.3.6.
Click inside the mask's window and drag the mask to position on your picture; or drag the dimmed part of the picture to maneuver the picture under the mask. Pages displays blue guidelines when you center the mask vertically or horizontally on the picture.
-
When you're happy with your cropping efforts, press Return to apply the mask .
-
Any time you need to recrop this picture, double-click it to display the mask again .
Pages displays the dotted mask outline; click the outline to reveal its selection handles. Resize, reposition, or rotate the mask, and then press Return to apply the mask to the picture again.
-
If you need to completely unmask this image, select it and choose Format
Unmask . Pages displays the picture in its full glory once again.
If you do very much of this sort of thing, add the Mask button to the toolbar to make applying the mask easier (see Section 1.2).
Tip: You can make a mask larger than the picture to add white space around it. Using this method, you can create asymmetrical white space around a picturesomething you can't achieve using the Extra Space control in the Wrap Inspector.
4.3.9. Arranging Objects
After you've garnished your document with objectsmodified, resized, positioned, and wrapped themyou may still not be finished with object manipulations. Pages offers a few more options to control how an object relates to the page and to other objects around it.
4.3.9.1. Layering objects
Any time objects overlap one another, or whenever a fixed object appears within a block of text, one object has to be in front of another. Pages manages multiple objects by placing each object, and the text, on its own invisible layer . In this way, objects are free to overlap one anothereven obscure underlying objects completelywithout harming the individual objects.
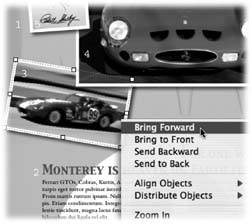
As you add objects to your document, Pages places them on the top layer; the new object covers up any portion of another object it overlaps. The text layer (which also contains any in-line objects) always starts out as the background layer. You can move objects forward or backward through the layers by choosing Arrange Bring Forward or Send Backward (Figure 4-21). Move a selected object all the way to the front or back of the pile by choosing Arrange Bring to Front or Send to Back. Pages provides Front, Back, Forward, and Backward buttons that you can add to the toolbar to speed up the layer adjusting process. Better yet, Control-click a selected object (or right-click if you have a two-button mouse) and, from the pop-up menu, choose the layering command.
|
Although the text layer begins as the rearmost document layer, you can move objects behind the text, in order to run text over a background image, for example. But once you place an object behind the text, it's difficult to select the object in order to resize or reposition itsince clicking it only selects the text in the layer above it. Circumvent this problem by clicking the page margin and dragging over the background image. Once the selection handles appear, you can manipulate it again.
Should you decide to make a global change to the fixed objects in your document, select one object or click the document's margin so the insertion point disappears, and then press ![]() -A (or choose Edit Select All). With all the objects selected you can, for example, delete them all, shift their position using the arrow keys, or simultaneously add a shadow to all of them. In fact, you can apply any object adjustmentusing the Object Inspector, the Metrics Inspector, the Wrap Inspector, or the Arrange menuto all the objects at once.
-A (or choose Edit Select All). With all the objects selected you can, for example, delete them all, shift their position using the arrow keys, or simultaneously add a shadow to all of them. In fact, you can apply any object adjustmentusing the Object Inspector, the Metrics Inspector, the Wrap Inspector, or the Arrange menuto all the objects at once.
|
4.3.9.2. Grouping objects
After going to the trouble of precisely positioning fixed objects relative to one another, you may find it useful to move, rotate, or copy them as if they were a single object. Pages gives you the power to group objects in this wayand later, if you need to adjust them individually, ungroup them.
Hold down the Shift key as you click the objects you want to group, selecting them all (all objects must be on the same page). Choose Arrange Group, and Pages replaces the individual selection rectangles with just one set enclosing the whole group. Grouped objects feature solid gray selection handles to differentiate them from other kinds of objects (Figure 4-22). Pages treats grouped objects like a single entity. With the exception of resizing, you can apply all the object manipulations and adjustments to a group that you can to a single object.
Select an object group and choose Arrange Ungroup to restore the objects individuality so you can, for example, resize or delete one of the group members .
4.3.9.3. Locking objects
You can lock a fixed object to the page to ensure you don't accidentally shift it out of position as you work on your layout. To lock an object, select it (or hold down the Shift key to select several objects). Choose Arrange Lock, and Pages nails it to the page, replacing its selection handles with X marks to indicate its immutable status (Figure 4-22). Although you can still select locked objects, you cant change them in any way until you unlock them.
Unlock an object by selecting it and choosing Arrange Unlock. Pages immediately returns the powers of adjustability, and its a normal object once again.
4.3.10. Master Objects
Pages reserves a special,
EAN: 2147483647
Pages: 134