Using Custom Property Sets
3 4
You can edit the properties for any individual shape, or you can take advantage of a great new feature in Visio 2002 called a custom property set. This feature provides a quick way to define and work with a group of custom properties, and then apply them wholesale to a group of shapes. To create a custom property set, you define a name for the set and then add the properties you want to include. Then you can apply your property set to selected shapes on the drawing page, the document stencil, or any open stencil. When you create custom properties in this way, it's easy to edit labels and formats for the entire set.
Custom property sets become especially useful when you import objects to use as shapes or draw shapes from scratch. The imported and from-scratch shapes won't have the same custom properties as other shapes in the drawing. For example, in a floor plan, shapes can be used to track facilities and equipment information through their custom properties. If you convert a CAD symbol library to Visio shapes, the converted shapes don't have custom properties. However, you can quickly add the entire set of facilities and equipment properties to the converted shapes.
You can apply only one custom property set to a shape or master shape. When you apply a custom property set to a shape that already has a set, Visio applies the new property set and removes the previous one. If you apply a custom property set to a shape that has custom properties, but not a custom property set, the original properties are retained and the new set of properties are added.
InsideOut
Technically, a custom property set definition is stored as an XML string in a user-defined cell (_CPM_SetDefns) in the document. This matters to you only if you're developing your own shapes or creating programs to automate shapes and drawings with custom properties.
Defining a Set of Custom Properties
To define a custom property set or edit its definition, you use the Edit Custom Property Set add-on, which lets you do the following:
- Create a new custom property set for a document.
- Rename an existing custom property set.
- Delete an entire custom property set or a property within a set.
- Add a new custom property to an existing set.
- Use existing custom properties in a shape to create a set.
The definition of a custom property set includes the names of the set as well as names (labels) for each custom property in the set and its data type, format, value, and prompt, as Figure 6-12 shows. A custom property set is saved with a document. If you open a stencil file and create a custom property set, the set is saved with the stencil, and you can then apply it to master shapes on the stencil. If you define a custom property set in a drawing, you can apply the set to shapes on the drawing page or master shapes on the drawing's document stencil.
You can also change the definition of an existing custom property set to rename or delete a set, or work with individual custom properties in a set. For example, you can edit property labels so that the labels you want appear in the Custom Properties window, or add and remove individual custom properties that are included in a set.
Tip
If you're creating a drawing based on a Process Engineering template (included only with Visio Professional), you can define custom property sets in the Component Model Properties dialog box.
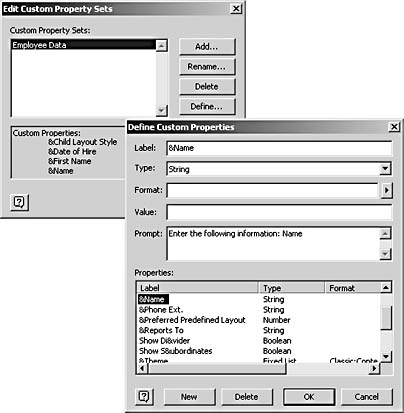
Figure 6-12. With the Edit Custom Property Set add-on, you can create a new custom property set and define its properties as well as add and remove individual custom properties.
Defining a New Set Based on Existing Custom Properties
An easy way to create a custom property set is to copy the custom properties defined for an existing shape, and then create a set from those properties. You can also copy the custom properties that are included in an existing set to create a new custom property set and revise its definition as you want. When you copy custom properties, you avoid starting from scratch and can take advantage of existing definitions. For example, if you're working with Visio shapes that include a custom property set, you can create a new set based on the existing one and then revise the property labels so that the names you want appear in the Custom Properties window. That way, you don't alter the original shapes or their definitions, but you can customize at will.
To create a new custom property set based on a shape with properties, follow these steps:
- Select a shape for which custom properties have already been defined—either a shape on the drawing page or a master shape you've opened for editing.
- Select Tools, Macros, Visio Extras, Edit Custom Property Sets.
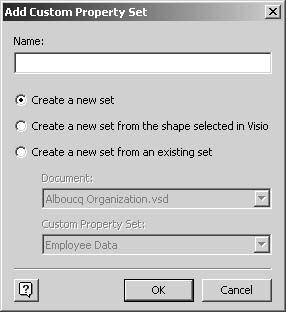
- Click Add.
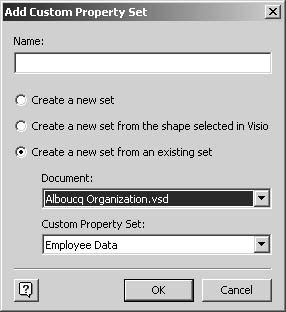
In the Add Custom Property Set dialog box, the option Create A New Set From The Shape Selected In Visio is selected.

- In the Name box, type a name for the custom property set as you want it to appear in the Apply Custom Property Set dialog box.
- Click OK.
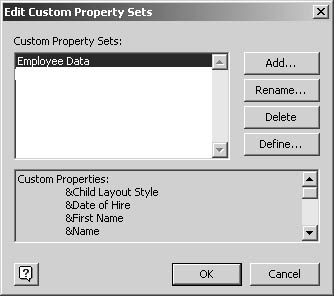
In the Edit Custom Property Sets box, the new set is listed and selected. Its properties, taken from the selected shape, are listed under Custom Properties at the bottom of the dialog box.
- Click OK.
A new custom property set is created and stored with the document. To apply the set to other shapes, see the sections that follow.
To create a new custom property set based on the definition of an existing set, follow these steps:
- Choose Tools, Macros, Visio Extras, Edit Custom Property Sets.
- In the Edit Custom Property Sets dialog box, click Add.
- In the Name box, type a name for the new set.
- Select Create A New Set From An Existing Set.
- In the Document box, select the document that contains the property set you want to copy. In the Custom Property Set box, select the custom property set that you want to copy, and then click OK.
Visio adds the new custom property set and its property definitions to the active document.
- Click Define to edit the custom properties you copied from the existing set, or click OK, and then apply the custom property set.
Defining a New Set and Its Properties
You can create a custom property set from scratch and define each custom property that you want to include in the set. If you're working with stencils and documents that do not contain custom properties, such as a new stencil that you've created, this is the best way to add custom properties. You create a set, define each property in the set, and then apply the set to your shapes as described later in this chapter.
To create a new custom property set and define its properties, follow these steps:
- Open the document in which you want to save the custom property set.
You can open either a drawing or stencil file. If you plan to apply the set to master shapes, open the stencil for editing (right-click its title bar, and then click Edit).
- Make sure nothing is selected, and then select Tools, Macros, Visio Extras, Edit Custom Property Sets.
- Click Add.
- In the Name box, type a name for the custom property set.
- Click OK.
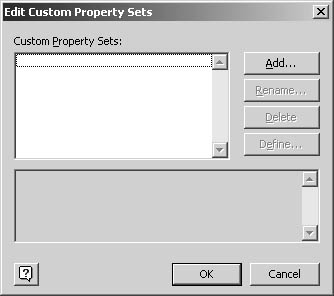
The new set is listed in the Edit Custom Property Sets dialog box. In the Custom Properties box, no properties are listed.
- Click Define.
The Define Custom Properties dialog box appears and lists Property1 as the default, initial custom property.
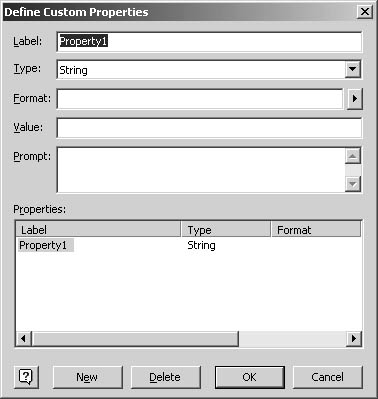
- Define the new property by typing or selecting the values you want for Label, Type, Format, Value, and Prompt.
For details about these options, see Table 6-2. If you're not certain which Type option to select, select String.
- When you've defined the property, do one of the following:
- Click the New button to define another custom property for the set.
- Click OK to close the Define Custom Properties dialog box.
- In the Edit Custom Property Sets dialog box, click OK.
A new custom property set is created and stored with the document. To apply the set to other shapes, see the sections that follow.
Editing Custom Property Sets
You can edit the definition of a custom property set. Specifically, you can change the name of the set itself and you can edit the custom properties in the set. When you use the Edit Custom Property Set add-on to revise an existing set, the changes are saved in the active document, which can be a drawing or stencil file. The main thing to remember when you edit a set is that you'll have to update any shapes that use that custom property set—Visio does not update the shapes to which a custom property set is applied.
To edit a custom property set, follow these steps:
- In a document that contains custom property sets, choose Tools, Macros, Visio Extras, Edit Custom Property Sets.
- In the Custom Property Sets box, select the set you want to edit.
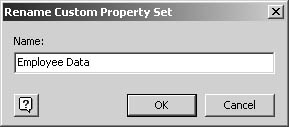
- If you want to rename the set, click Rename, type a new name in the Name box, and then click OK.
- If you want to edit, add, or remove custom properties in the set, click Define.
The Define Custom Properties dialog box appears and lists the definition for the first custom property, which is selected in the Properties list at the bottom of the dialog box.
Note
Any changes you make are immediately applied to the selected custom property. - In the Properties box, select a custom property, and then revise its definition by typing or selecting the values you want in the Label, Type, Format, Value, and Prompt boxes. For details about these options, see Table 6-2.
- When you've defined the property, do one of the following:
- Select a new property to edit in the Properties box.
- Click the New button to define a new custom property.
- Click OK to close the Define Custom Properties dialog box.
Visio adds the properties to the shape, which you can see in the Custom Properties window.
Applying a Custom Property Set to Shapes
With the Apply Custom Property Sets add-on, you can assign a custom property set to specified shapes in a drawing. It's probably more often the case that you'd apply custom property sets to master shapes, but sometimes you just need to update shapes on the drawing page. For example, if you use the drawing tools to create new shapes in a diagram, you can apply the custom property set used by other shapes to the new shapes. The Apply Custom Property Set add-on lists all the custom property sets defined for the active document—that is, your drawing file. You select the set you want, run the add-on, and choose the custom property set you want, and then Visio adds the set of properties to the selected shape.
Before you can use the Apply Custom Property Set add-on, you need to make sure that your document contains custom property sets. If the active document does not include a set, you'll see <None> listed in the add-on when you run it. Some Visio shapes include custom properties that were defined the old-fashioned way—without the set feature that became available only in this version of Visio. You can use the Edit Custom Property Sets add-on to define a new custom property set and then apply it using the procedure that follows.
Caution
Only one set of custom properties can be applied to a shape. If you add a custom property set to a shape, any existing custom property set is removed from the shape.
To add a custom property set to selected shapes, follow these steps:
- Select a shape or set of shapes in a drawing, and then select Tools, Macros, Visio Extras, Apply Custom Property Set.
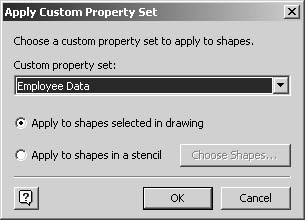
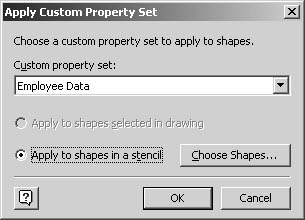
- In the Custom Property Set list, select the name of the set you want.
- Make sure that the option Apply To Shapes Selected In Drawing is selected.
If this option is dimmed, no shapes are selected on the page. Click Cancel, select a shape, and then repeat this procedure.
- Click OK to add the set of custom properties to the selected shapes.
Troubleshooting
After editing property names in a set, the changes do not appear in the Custom Properties window for selected shapes.
When you use the Edit Custom Property Set command, you can make changes to an existing set of properties, but Visio does not apply those changes to existing shapes, even if they are assigned to the set you edited. You must use the Apply Custom Property Set command to update the shapes with the edited set.
Applying Custom Property Sets to Master Shapes
If you've created your own shapes, or want to revise Visio master shapes to use a particular set of custom properties, you can apply a custom property set to all or selected master shapes on a stencil. You can run the Apply Custom Property Sets add-on to add sets of properties to the master shapes you select in an open stencil file. The stencil file can be any of the following:
- A Visio stencil that you've opened for editing (right-click the title bar, and then choose Edit). Save your changes as a new stencil file so that you retain the original stencil. You may need it if your changes to the shapes' properties have unexpected consequences.
- A stencil that you've created (choose File, Open, and then open your .VSS file)
- The document stencil for your drawing (choose File, Stencils, Document Stencil). All the shapes in your drawing will be updated with the changes made to the master shapes on the document stencil.
Caution
Only one set of custom properties can be applied to a master shape. If you add a custom property set to a master shape, any existing custom property set is removed from the shape.
To add a custom property set to selected master shapes, follow these steps.
- Do one of the following to open a stencil containing the master shapes you want:
- To apply the set to an existing stencil file, open the stencil, right-click its title-bar, and then select Edit.
- To apply the set to the drawing's document stencil, choose File, Stencil, Document Stencil.
- Make sure no shapes are selected, and then choose Tools, Macros, Visio Extras, Apply Custom Property Set.
In the Apply Custom Property Set dialog box, the option Apply To Shapes In A Stencil is selected, and the option Apply To Shapes Selected In Drawing is dimmed.
- Click the Choose Shapes button.
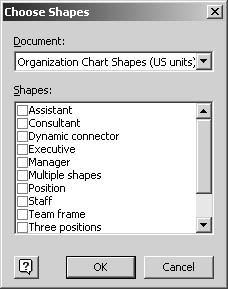
- Click the Document list's drop-down arrow, and then select the name of the stencil that contains the master shapes you want to work with.
Note
The document stencil has the same name as your drawing file. - In the Shapes list, select shapes to which you want the property set applied, and then click OK to close the dialog box.
- In the Apply Custom Property Set dialog box, click OK.
Visio applies the custom property set to the selected master shapes. Depending on the number of shapes you select, you might see a progress indicator as Visio applies the set to all the shapes. The next time you drag a master shape from the stencil, the shape on the page will include the set of custom properties.
Deleting Custom Properties
You can delete individual custom properties from shapes and master shapes. You can also delete custom property sets, although all you delete is the definition for the set. If you apply a custom property set to shapes, and then delete the set, the shapes retain their custom properties. However, the document no longer knows that the properties came from a set.
To delete a custom property set, follow these steps:
- In a document that contains custom property sets, choose Tools, Macros, Visio Extras, Edit Custom Property Sets.
- In the Custom Property Sets list, select the set you want to delete, and then click the Delete button.
- Click OK.
Visio removes the custom property set from the active document. Shapes that include custom properties from the deleted set are not changed—they retain their custom properties.
It's wise not to delete built-in custom properties that come with many of the Visio shapes. These properties may be required by the solution to accommodate the shape's "smart" behavior. For example, organization chart shapes include a number of invisible custom properties that don't appear in the Custom Properties window, but may appear in the Define Custom Properties dialog box, which means that you can delete them. However, the organization chart engine uses these properties to track document and layout options, so you do not want to delete them.
To delete an individual custom property from a shape or master shape, follow these steps:
- Select a shape on the drawing page, a master shape on the document stencil, or a master shape on a Visio stencil.
Tip
To open a master shape for editing so that you can select it, right-click a stencil's title bar, and then choose Edit. On the stencil, double-click a master shape to open it in a drawing window. If necessary, select the master shape. - If the Custom Properties window is not open, select View, Custom Properties Window.
- Right-click in the Custom Properties window, and then select Define Properties.
- In the Properties box, select the property you want to delete, and then click the Delete button.
Visio deletes the custom property from the selected shape. You don't get a warning first, but you can undo the operation after you've closed the dialog boxes.
- Click OK.
Note
To restore the deleted property, press Ctrl+Z or choose Edit, Undo. - If you edited a master shape, click the Close Window button in the master drawing window. Make sure to click the correct button. Don't click the Visio window's Close button.
Visio displays a message asking whether you want to update the master.
- Click Yes.
If you edited a document stencil, all the shapes in the drawing that are based on the master shape you edited will no longer include the deleted custom property.
- To save your changes to the stencil, do one of the following:
- If you edited a Visio stencil, right-click the title bar, choose Save As, and then specify a file name and location for the stencil.
- If you edited a document stencil, choose File, Save to save the changes with the drawing file.
EAN: 2147483647
Pages: 211