Draw
|
| < Day Day Up > |
|
Open Office Draw® is a very useful application. With this application you can create your own drawings. When you first launch Draw, you might notice that the toolbar on the left is identical to the one found in Impress. If you recall, that toolbar contained various graphical elements, so it should be no surprise that this application has the same toolbar.
As with any graphics-related application, you can open various graphics files and then edit or alter them as you see fit. When you go to File on the drop-down menu and select Open, you will see something like what is shown in Figure 11.1.

Figure 11.1: The Open menu.
Notice that there is a plethora of graphics types that Draw can open. You can open GIFs, JPEG, BMP, WMF, ICO, and even Kodak Photo CD files. This means that you have a number of graphics types you can work with. For our purposes we will open any image file on your PC and begin altering it using the Draw program. The images in this book might use a different image than you have on your machine. That is not important as long as you have some image you can work with.
For demonstration purposes this book is using a rather simple image, a black and gray yin and yang symbol, shown in Figure 11.2. This figure is rather simple, but it will enable us to explore the things you can do with the image once you have it opened in Draw.
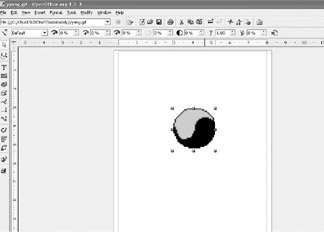
Figure 11.2: The sample picture.
Keep in mind that the images you create in Draw will often be used later in a Writer document or an Impress slide show presentation. This means that, while you cannot do complex image manipulation, you can create logos and the sort of graphics often used in brochures and fliers.
As was previously mentioned, the toolbar on the left is identical to the one you were introduced to with Impress, so there is no need to examine it again. However, the toolbar at the top is not identical to the toolbars you have previously seen. You get a new set of options when you have an image selected.
Let’s examine some of its functionality with our sample image. The first item of interest on the upper toolbar is the first drop-down box. If you click on it you see that it has four options: default, grayscale, black and white, and watermark. Each of these changes your image. For example, the black and white option, when applied to our yin and yang symbol, is shown in Figure 11.3.

Figure 11.3: The black and white option.
The next three buttons are not of much use with a black and white image or with the grayscale images used in most books. These three buttons enable you to alter the amount of red, green, and blue in an image. Most computer graphics colors are created by mixing reds, greens, and blues. Therefore, altering the levels of these colors in your image will enable you to alter the image’s overall color. These buttons are shown in Figure 11.4.
![]()
Figure 11.4: The red, green, and blue buttons.
The next two buttons, shown in Figure 11.5, enable you to alter the brightness and contrast of a picture. Careful alteration of both brightness and contrast can help clear up an otherwise difficult picture.
![]()
Figure 11.5: Brightness and contrast buttons.
The next two buttons, shown in Figure 11.6, enable you to alter the gamma and the transparency of an image. The transparency setting is the one that we will be taking a closer look at.
![]()
Figure 11.6: Gamma and transparency settings.
There are times when you might want an image to have varying degrees of opaqueness. You may want the image to be at least partially transparent. That is where the transparency setting comes in. A setting of zero indicates that your image is completely opaque with no transparency at all. A setting of 100 indicates that your image is completely transparent and in fact not visible. Figure 11.7 shows a few different transparency settings for our yin and yang symbol.

Figure 11.7: Transparency settings.
As we learned earlier, many of the tools and settings in this application are identical to the ones found in Impress, which is why we don’t need an entire chapter for this application. Let’s examine a few drop-down menu items that Draw does not share with Impress. In Figure 11.8 you can see the drop-down menu for flipping an image. This is found by going to the Modify drop-down menu and selecting Flip. You can completely flip an image, either horizontally or vertically.

Figure 11.8: Flipping an image.
There are some other interesting options under the Modify menu. For example, you will find the Arrange menu item. If you have more than one object on your drawing, you can use the Arrange options to alter the positioning of the objects. For example, in Figure 11.9 there is a cube in front of our image. If you go to Modify on the drop-down menu, select Arrange, and choose Bring to Front, the image you have selected will be brought to the front. If you click once on our yin and yang emblem, you can then bring it back to the front, as it is in Figure 11.10.

Figure 11.9: An image blocking our image.

Figure 11.10: Bringing our image back to the front.
The next option under Modify is Alignment. This menu item is self-explanatory. It enables you to align the image you have selected. You can give it a horizontal alignment of left, right, or center. You also can give it a vertical alignment of top, bottom, or center.
This is not everything you can do with the Draw application, of course. Combining what we have covered here with what you learned about Impress, you should be able to use Draw to create basic graphics for purposes such as brochures, fliers, and more.
|
| < Day Day Up > |
|
EAN: 2147483647
Pages: 247