| For those who are using an application server, server-side XSLT provides a number of advantages over client-side XSLT. When you use server-side XSLT, the application server performs the transformation rather than a browser. This means that you can display the page in any browser, not just browsers that support XSLT. An additional advantage to server-side XSLT is that the XML data doesn't need to reside on your server. You can use XML data from anywhere on the Web, and this data will be automatically updated without any need for you to download the XML file and upload it to your server. You can use XSLT pages for server-side transformations, but it's more common to use an XSLT fragment, which is a piece of XSLT code that displays XML data within a dynamic page. In the exercises in this section, you'll learn how to display a Really Simple Syndication (RSS 2.0) feed on a dynamic page. RSS is an XML application used for syndicating Web content and creating news feeds. (RSS stands for Rich Site Summary, RDF Site Summary, or Really Simple Syndication, depending on which version of RSS you are using.) You'll first create an XSLT fragment and add an RSS 2.0 file as the XML data source. Then you'll use Dreamweaver's XSLT Transformation server behavior to insert the XSLT fragment in the dynamic page. We use PHP for the dynamic page, but you could also use ASP, ASP.NET, or ColdFusion. The XSLT Transformation behavior is not available for JSP. To create an XSLT fragment: 1. | To create a new XSLT fragment page, choose File > New > Basic page > XSLT (Fragment).
The Locate XML Source dialog appears.
| 2. | Select the "Attach a remote file on the Internet" radio button. In the box below the radio button, enter the URL for an RSS feed (Figure 14.29).
Figure 14.29. Enter a URL to attach a remote XML file in the Locate XML Source dialog. 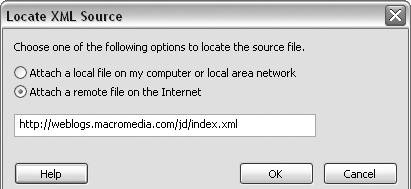
We chose John Dowdell's Macromedia blog, so the URL is http://weblogs.macromedia.com/jd/index.xml.
| 3. | Click OK to close the dialog and add the RSS feed as an XML data source.
| 4. | In the Application panel group, click the Bindings tab to access the Bindings panel.
The schema for the RSS feed appears on the Bindings panel (Figure 14.30). This schema shows the structure of the RSS file, including all the elements and attributes. Next, you'll insert a table to display data from three of the elements in the RSS file.
Figure 14.30. The structure of the RSS file is shown on the Bindings panel after the file is added as an XML data source. 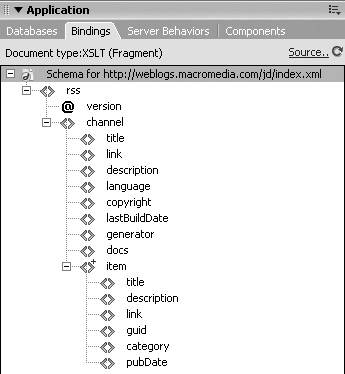
| 5. | Choose Insert > Table to open the Table dialog. In the Rows field, type 2, and in the Columns field, type 3. In the Table Width field, type 85, and select percent from the drop-down list on the right. In the Border Thickness field, type 1, and in the Cell Padding field, type 2 (Figure 14.31). Click OK to close the dialog and insert the table on the page.
Figure 14.31. Specify the table properties in the Table dialog (2 Rows, 3 Columns, 85% width, 1 pixel Border thickness, and 2 pixel Cell padding). 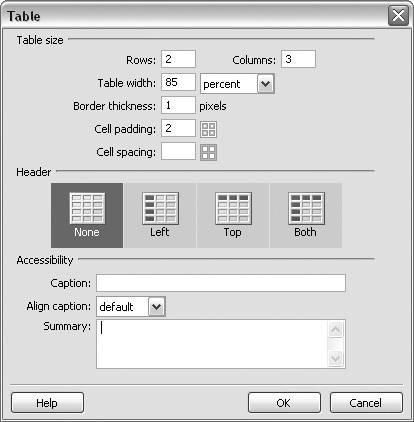
| 6. | In the first row of the table, type these headings in the cells: Title, Description, and Link.
| 7. | On the Bindings panel, find the item element, and then select the title element below it and drag it to the first cell in the second row of the table (Figure 14.32).
Figure 14.32. Select the title element that's a child of the item element (the repeating element). 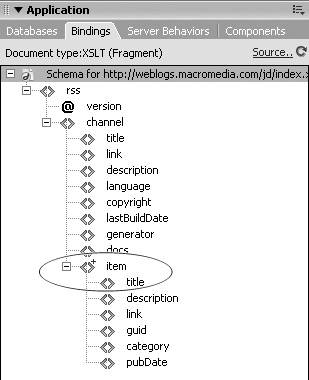
There are two title, description, and link elements in this RSS file, but they have different parent elements. The first title, description, and link elements are children of the channel element, and the second group are children of the item element. You want to use the elements that are children of the repeating element in this RSS file (item).
An XML data placeholder appears in the cell.
| 8. | Drag the description element to the second cell, and the link element to the third cell.
You've now added an XML data placeholder to each cell in the second row of the table. These cells will display the title, description, and link to each item in John Dowdell's Macromedia blog.
| 9. | In Design view, select the second row of the table.
| 10. | From the Insert menu, select XSLT Objects > Repeat Region.
The XPath Expression Builder dialog appears.
| 11. | Select the item element from the list (Figure 14.33). Click OK.
Figure 14.33. Select the item element to create a repeat region using the XPath Expression Builder. 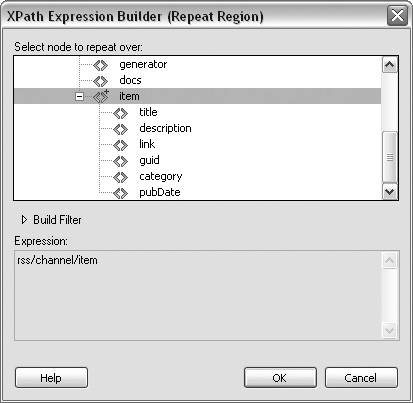
You can identify the repeating element by the plus (+) sign to the right of the angle brackets. The item element is the repeating element in the RSS file.
| 12. | Save the page as jd.xsl.
| 13. | Preview the page in a browser (File > Preview in Browser).
|
You've created an XSLT fragment and added an RSS file as an XML data source. You've added three elements from the RSS file as XML data placeholders and also added an XSLT Repeat Region object so that you could display multiple items.  Tip Tip
We added three of the RSS elements to our table. If you're displaying an XML news feed on a page with other content, you may want to save space and display only one repeating element on your page, such as the news feed title element.
To add a link to an XML placeholder: 1. | Open jd.xsl, the XSLT file you created in the previous exercise.
| 2. | In Design view, select the placeholder for the link element (Figure 14.34).
Figure 14.34. Select the XML data placeholder for the link element in Design view. 
| 3. | In the Property inspector, click the folder icon next to the Link drop-down list (Figure 14.35).
Figure 14.35. Click the folder icon in the Property inspector to open the Select File dialog. 
The Select File dialog appears.
| 4. | In the Select File Name From section, select the Data Sources radio button (Figure 14.36). Select the second link element (the child element of the item element). Click OK to close the dialog and insert a dynamic link.
Figure 14.36. Select the Data Sources radio button in the Select File dialog to display the elements in the RSS file. 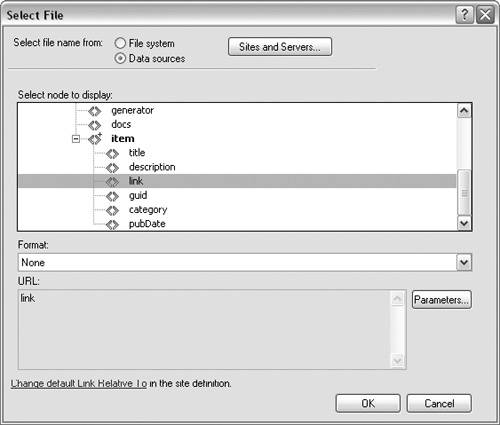
| 5. | Save the page. Preview the page in a browser (File > Preview in Browser).
You've added a link to an XML data placeholder. When the page displays in a browser, the URL for the news feed article is a link to the article.
|
Before you insert the jd.xsl XSLT fragment in a PHP page in the final exercise in this section, you need to configure your PHP application server to process XSLT. In the next exercise, you'll configure PHP 5 for XSLT in Windows. If you're using ASP, ASP.NET, or ColdFusion, no additional configuration should be necessary for XSLT processing. If you're using PHP in Mac OS X or using an earlier version of PHP, see the article "Configuring and Testing PHP Servers for XSL Support," by Marius Zaharia, at www.macromedia.com/devnet/dreamweaver/articles/config_php_xslt.html. Tips If you want to display only the titles from the news feed on your page, but want to include a link to the articles, select the title placeholder in Step 2 instead of the link placeholder. The Property inspector for the XML data placeholder (Figure 14.35) includes a "How do I style XSLT Fragments?" link that connects to Dreamweaver Help. Unlike XSLT style sheets that are attached to an XML file, an XSLT fragment is inserted into another page, so styles must be applied in a specific way. For more details, see "Applying Styles to XSLT Fragments" in Dreamweaver Help (F1). Dreamweaver supports five XSLT objects: Dynamic Text, Repeat Region, Conditional Region, Multiple Conditional Region, and XSL Comment. You can insert these objects in your XSLT code to add filters, conditions, and comments. For example, you can use an XSLT Repeat Region object with a filter to specify the number of items to display per page. For more information, see Dreamweaver Help (F1).
To configure PHP 5 for processing XSLT in Windows: 1. | Open the php.ini file in Notepad.
The php.ini file is the configuration file for the PHP application server. For more information on installing and configuring PHP, see Chapter 1 and the online help manual for PHP 5 at www.zend.net/manual/index.php.
| 2. | Locate ;extension=php_xsl.dll in the file (Figure 14.37).
Figure 14.37. Use the php.ini file to configure PHP 5 for processing XSLT. 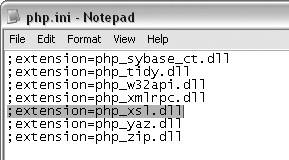
| 3. | Delete the semicolon (;) at the beginning of the line of code to remove the comment and activate the line.
| 4. | Save the file.
|
To add an XSLT fragment to a dynamic page: 1. | Open a new PHP page (File > Dynamic page > PHP). Save the page as jd.php.
| 2. | In the Application panel group, click the Server Behaviors tab to access the Server Behaviors panel.
| 3. | Click the plus (+) button and select XSL Transformation from the Server Behaviors menu (Figure 14.38).
Figure 14.38. Select XSL Transformation from the Server Behaviors menu. 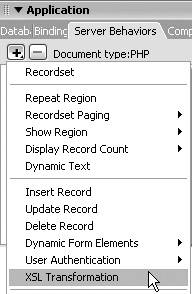
The XSL Transformation dialog appears (Figure 14.39).
Figure 14.39. The XSL Transformation dialog. 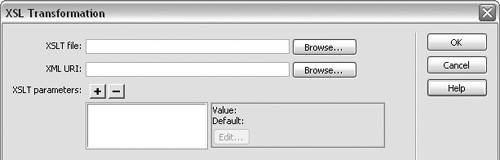
| 4. | Click the Browse button next to the XSLT File field to browse to the location of the XSLT fragment file (jd.xsl).
Dreamweaver automatically inserts the location of the XML file attached to the XSLT file in the XML URI field. In this case, it's the location of the RSS file for John Dowdell's blog (http://weblogs.macromedia.com/jd/index.xml).
| 5. | Click OK to close the dialog and insert the XSLT fragment.
| 6. | Save the page. Preview the page in a browser (File > Preview in Browser) to see the current listings in the blog (Figure 14.40).
Figure 14.40. A preview of jd.php in Internet Explorer shows multiple articles with titles, descriptions, and links displayed in a dynamic table. 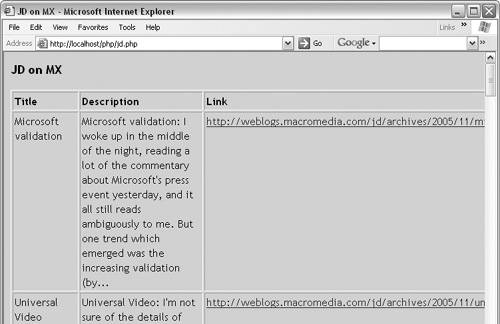
|
Tip
|