| You can set global preferences for your code in Dreamweaver Preferences. These settings will apply to all documents you create in Dreamweaver unless you manually change the code settings in an individual document. The Dreamweaver Preferences dialog includes four code preference categories: Code Coloring, Code Format, Code Hints, and Code Rewriting. Code Coloring Dreamweaver sets automatic default choices for code coloring in every document type it handles. You need to use the Code Coloring pane only if you want to change these defaults. For example, if you don't want to view tags in color, you can set all tags to display in black text. To change code color: 1. | From the Edit menu (Windows) or the Dreamweaver application menu (Mac), choose Preferences (Ctrl-U or Command-U) to open the Preferences dialog.
| 2. | From the Category list on the left, choose Code Coloring. The Code Coloring pane appears.
| 3. | From the Document Type list, select a document type (Figure 3.6).
Figure 3.6. Choose Code Coloring to display the Code Coloring pane. 
The remaining steps in this task will change the code color for all documents of the type you select in this step.
| 4. | Click the Edit Coloring Scheme button to open the Edit Coloring Scheme for HTML dialog.
| 5. | From the Styles For list, choose a tag type (Figure 3.7). From the Text Color dropdown list on the right, choose a text color for the tag. From the Background Color drop-down list, choose a background color.
Figure 3.7. The Edit Coloring Scheme for HTML dialog. 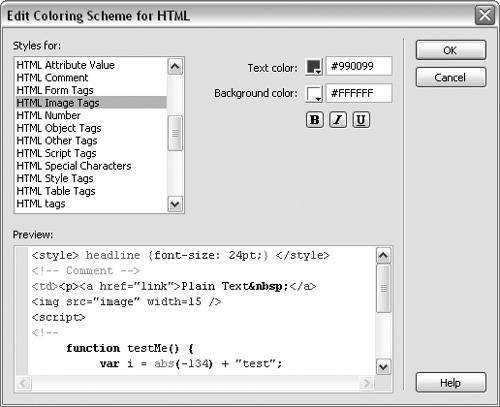
| 6. | Preview your choice in the Preview box at the bottom of the dialog.
| 7. | Repeat Steps 5 and 6 for each tag for which you want to change the color scheme. When you've completed all your changes, click OK to save your changes and close the dialog.
| 8. | Return to the Code Coloring pane in the Preferences dialog, and click the box next to Default Background to open the Color Picker (Figure 3.8). Choose an overall background color for the Code view of the document type you selected in Step 3.
Figure 3.8. Use the Color Picker to choose the Code view background color for the document type that is selected. 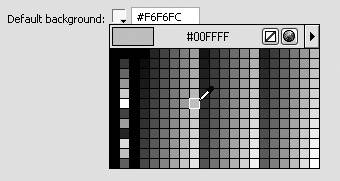
| 9. | In the Code Coloring pane, click OK to save your changes. Close the Preferences dialog.
|
Code formatting You can set preferences for code formatting on the Code Format pane of the Preferences dialog. These choices affect new documents and new sections of existing documents but do not apply to previously created documents. If you want to change the formatting of individual tags rather than an entire document, use the Tag Library Editor, where you can select preferences for line breaks, indenting, and case for any tag. For more details, see the task "To edit a tag in a tag library," later in this chapter. To select code formatting preferences: 1. | From the Edit menu (Windows) or the Dreamweaver application menu (Mac), choose Preferences (Ctrl-U or Command-U) to open the Preferences dialog.
| 2. | From the Category list on the left, choose Code Format. The Code Format pane appears (Figure 3.9).
Figure 3.9. Choose Code Format to display the Code Format pane. 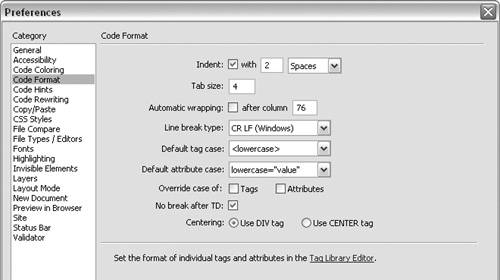
 Tip Tip
- Override Case of Tags or Attributes. Select Tags or Attributes if you want the default tag or attribute case to be applied to existing and new documents. (The changes will be made to existing documents when they're opened in Dreamweaver.)
- No Break After TD. You can change the line breaks for the TD tag here if you don't want td tags to appear on separate lines in your code.
- Centering. Change the centering options from the default div tag (div align="center") to a center tag. (Both of these approaches are deprecated as of HTML 4.01 in favor of using Cascading Style Sheets (CSS) for centering text.)
| 3. | Click OK to save your changes and close the Preferences dialog.
| 4. | Change any of the following default code formatting options:
- Indent or Tab Size. Change the indent of code that Dreamweaver generates (not the code you type yourself) by first selecting the Indent option, and then indicating whether the indent will be spaces or tabs and specifying the size. You can also change the size (number of spaces) of tabs.
- Automatic Wrapping. Add a line break to code after a certain line length by selecting this option and then entering the number of the column where you want the break added.
- Line Break Type. Choose the line break type that matches your remote server (Windows, Mac, or Unix).
- Default Tag and Attribute cases. Change the default case of tag and attribute names.
|
Code Hints Dreamweaver provides Code Hints by default to help you choose tags, attributes, and attribute values. After you type a few characters of a tag or attribute name or value in Code view, a list appears with suggested options for your entry. You can use Code Hints to complete a code entry by double-clicking an option, or just use it to review the available options. You can also disable Code Hints if you find they're not helpful. To access Code Hints: 1. | From the Edit menu (Windows) or the Dreamweaver application menu (Mac), choose Preferences (Ctrl-U or Command-U) to open the Preferences dialog.
| 2. | From the Category list on the left, choose Code Hints. The Code Hints pane appears (Figure 3.10).
Figure 3.10. Choose Code Hints to access the Code Hints pane. 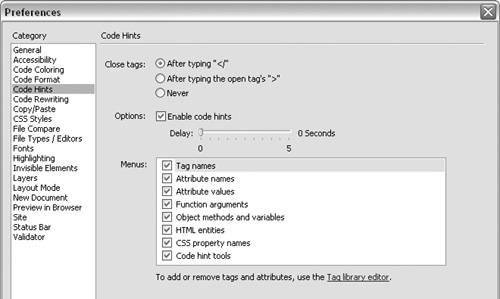
| 3. | Change any of the following default selections:
- Close Tags. Dreamweaver suggests a closing tag name by default after you type </. If you want the suggestions to appear immediately after the completion of the open tag, select the After Typing the Open Tag's ">" option. If you don't want Dreamweaver to suggest closing tag names, choose the Never option.
- Options. You can disable Code Hints entirely or change the time delay before Code Hints appear (the default is 0 seconds).
- Menus. Here you can choose which Code Hints you want to display. All the Code Hint menus are enabled by default. In addition to tag names and attribute names and values, Code Hints are available for function parameters, object methods, HTML entities, and CSS property names.
Code Hint Tools, which is the last option in the Menus section, includes Color Picker (accessing the Color Picker when coding attributes with color selections), URL Browser (browsing to file locations for automatic insertion of local URLs), and Font List (displaying font menus when font tags are used).
| 4. | Click OK to save your changes and close the Preferences dialog.
|
Tip
Code rewriting Dreamweaver rewrites invalid HTML markup by default when you create a new document, copy and paste form elements, or enter URL or attribute values in the Property inspector. Dreamweaver does not rewrite code when you are working directly with code in Code view. The code rewriting options apply only to new documents, not to existing documents that you open in Dreamweaver. To apply code rewriting: 1. | From the Edit menu (Windows) or the Dreamweaver application menu (Mac), select Preferences (Ctrl-U or Command-U) to open the Preferences dialog.
| 2. | From the Category list on the left, choose Code Rewriting. The Code Rewriting pane appears (Figure 3.11).
Figure 3.11. Choose Code Rewriting from the list to display the Code Rewriting pane. 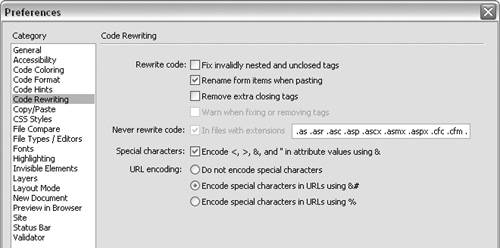
| 3. | Change any of the following default code rewriting options:
- Rewrite Code. You can change options for rewriting code, such as fixing invalidly nested tags or removing closing tags that don't have corresponding opening tags.
- Never Rewrite Code. If you want to disable code rewriting for certain types of documents, select this option and then enter the extensions for the types of documents you want to restrict.
- Special Characters. "Encode <, >, &, and "in attribute values using &," which is selected by default, specifies that attribute values use HTML character entities in place of characters that might generate errors. For example, < is used instead of the left angle bracket (<).
- URL Encoding. The "Encode special characters in URLs using &#" option, selected by default, specifies that URL values use HTML character entities in place of characters that will generate errors. The "Encode special characters in URLs using %" option specifies that URL values use an encoding method that uses the percent symbol (%). The percent-encoding method is more compatible with older browsers but may not work with some languages. The "Do not encode special characters" option tells Dreamweaver not to make any modifications to character encoding in URLs.
| 4. | Click OK to save your changes and close the Preferences dialog.
|
Tip If you'd like Dreamweaver to take a total hands-off position in rewriting any code, clear the check boxes for the Rewrite Code and Special Characters options, and select "Do not encode special characters" in the URL Encoding options.
|