| Logic's Score editor allows you to use Instrument Sets to control which instruments will be displayed (and printed) in a score. An Instrument Set can include as many (or as few) of the existing track instruments as you want, and instruments can be arranged independently of their order in the Arrange window. In an Instrument Set you can also assign instrument names and determine if the group shares bar lines, brackets, or braces. Multiple user-defined Instrument Sets can be created to display everything from a full score to individual parts. In this exercise you will use Instrument Sets to lay out the full score as well as generate quick parts for individual instruments. Creating an Instrument Set 1. | Bring up Screenset 6.
The screenset contains a Transport as well as a full-screen Score Editor that is displayed in page view.
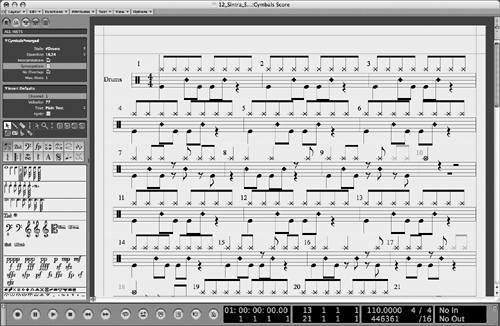 NOTE Page view can be displayed in any Score Editor window by selecting View > Page View from the Score Editor's local menu, or clicking the Page View button located in the top left corner of the window. Prior to the creation of any Instrument Sets, Logic displays selected instruments using a default Instrument Set named ALL INSTS, which appears in the Instrument Set box at the far left of the Score Editor.
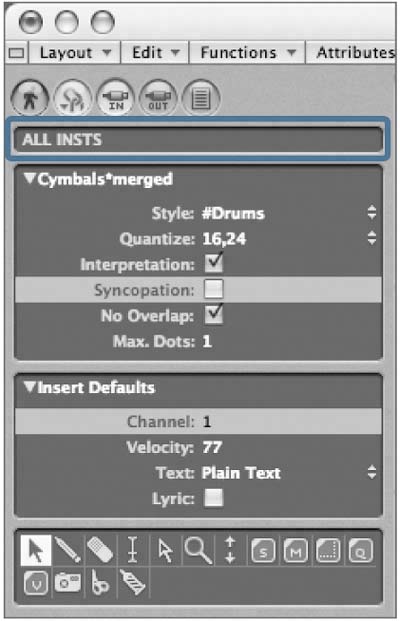
However, you aren't seeing all the instruments at the moment, because you recently selected the Drums Region. In order to display all the instruments, you need to move up a display level (reflecting the Arrange window).
| 2. | Click the Up One Display Level button, located in the top left corner of the window.

All instruments are displayed in the Score Editor.
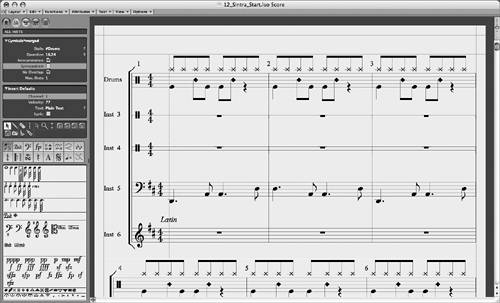 While the default ALL INSTS Instrument Set works for the basic display of the instruments, you can refine the score display by creating your own Instrument Set. While the default ALL INSTS Instrument Set works for the basic display of the instruments, you can refine the score display by creating your own Instrument Set.
| 3. | In the Score Editor's local menu, choose Layout > Instrument Sets.
The Instrument Set window opens.
 | 4. | In the Instrument Set window's local menu, choose New > New Complete Set.
A new Instrument Set, made up of all the instruments used in the Arrange window, is created.
 | 5. | Double-click the Instrument Set name in the Name box, and type Ensemble. Press Return.
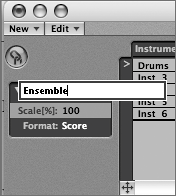
In the Instrument Set window, you can set the instrument names that appear in the score. As you can see in the Full Name column, the default names are taken from the instrument assigned to the track. You can, however, enter anything you like. Let's edit the Instrument Set by naming all the parts according to the instrument type (percussion, bongos, guitar, and so on).
| 6. | In the Full Name column, click the field displaying Inst 3 and type Percussion, then press Return.
 | 7. | Using the same technique, rename Inst 4 Bongos, Inst 5 Bass, and Inst 6 Guitar.
 An Instrument Set also allows you to scale the size of the displayed staves, enabling you to fit more systems on a page. This is especially useful when creating full conductor scores. An Instrument Set also allows you to scale the size of the displayed staves, enabling you to fit more systems on a page. This is especially useful when creating full conductor scores.
| 8. | Double-click the number next to the Scale parameter (below the Instrument Set name) and enter 65, then press Return.
| 9. | Close the Instrument Set window.
To apply the Instrument Set you created, you need to assign it in the Instrument Set box.
| 10. | Click-hold the Instrument Set box and choose Ensemble.
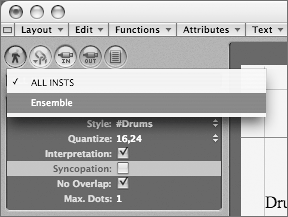
The score displays to a smaller scale and shows the instrument names you assigned in the Instrument Set.
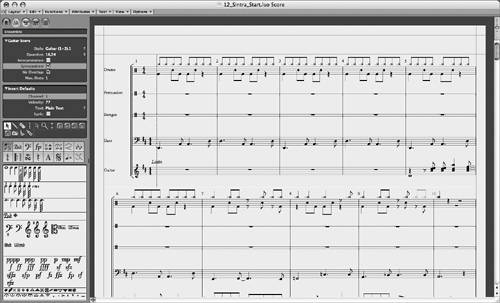 The full score can now be printed. The full score can now be printed.
|
Creating Parts for Printing It is desirable to create individual Instrument Sets for each instrumental part in the score. This allows the most control over naming and other display attributes, and it enables you to print parts by selecting from the Instrument Sets menu. You can quickly create an Instrument Set for a part using the Create Instrument Set from Selection function. 1. | Click one of the staff lines in the guitar staff to select that staff.
The staff is selected and displayed in blue.
| 2. | In the Score Editor's local menu, choose Layout > Create Instrument Set from Selection.
A new Instrument Set, named *Inst 6, is created and displayed in the Score Editor.
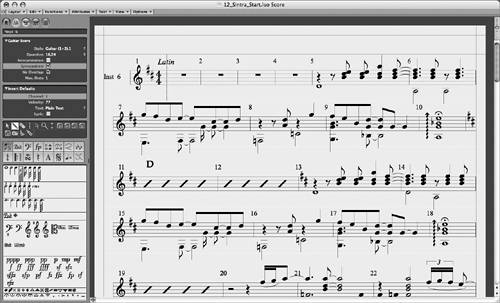 To complete the part, it is a simple matter to change the default instrument name to Guitar in the Instrument Set window. The current Instrument Set can be opened by double-clicking its name in the Instrument Set box. To complete the part, it is a simple matter to change the default instrument name to Guitar in the Instrument Set window. The current Instrument Set can be opened by double-clicking its name in the Instrument Set box.
| 3. | Double-click *Inst 6 in the Instrument Set box.
The Instrument Set window opens, displaying the settings for the newly created part.
 | 4. | Double-click the Instrument Set's name in the Name box, and enter Guitar. Press Return.
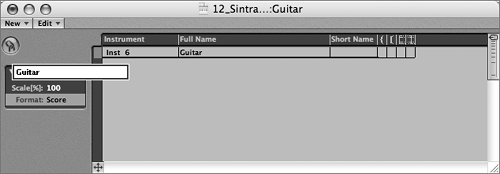 | 5. | Rename the instrument as you did before, by clicking in the Full Name field.
 Instrumental parts can have individual preferences for layout. To designate an Instrument Set as a part, you need to change the Format parameter, which is located below the Scale parameter. Instrumental parts can have individual preferences for layout. To designate an Instrument Set as a part, you need to change the Format parameter, which is located below the Scale parameter.
| 6. | Click the setting next to the Format parameter (it currently displays Score).
The Format setting changes to Part.
 | 7. | Close the Instrument Set window.
Now that you've designated the Guitar Instrument Set as a part, you can change its layout preferences without affecting the Ensemble Instrument Set you created earlier. The layout preferences for both scores and parts are located within the Song Settings.
| 8. | In the Score Editor's local menu, choose Layout > Global Format.
The Song Settings window opens, displaying the Score Editor's General pane.
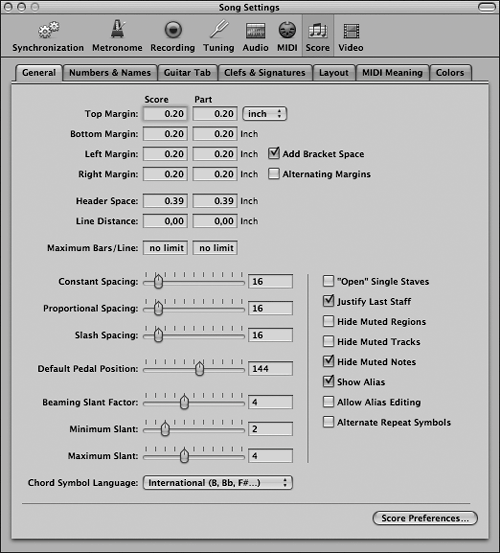 As you can see in this window, there are separate layout settings for scores and parts, designated by the two columns titled (appropriately enough) Score and Part. As you can see in this window, there are separate layout settings for scores and parts, designated by the two columns titled (appropriately enough) Score and Part.
The guitar part that you have been formatting needs a bit more space between the staves, because the notation is getting crowded. You can create more space between the staves by adjusting the Line Distance setting in the Part column.
| 9. | In the Part column, double-click the Line Distance field and enter .25. then press Return.
| 10. | Close the Song Settings window.
The staves for the guitar part are more spread out now, making them easier to read.
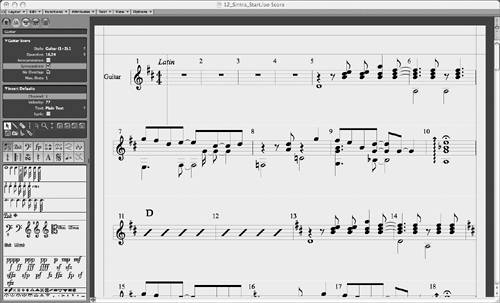
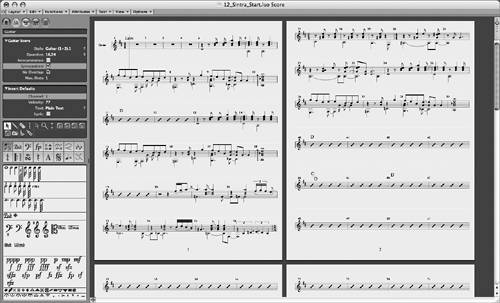
Let's finish by comparing the two Instrument Sets you have created. The differences can be seen most easily if you view the pages in their entirety. By zooming out in the Score Editor, you can see entire pages side by side.
| 11. | Press the Zoom Vertical Out key command (Ctrlup arrow) repeatedly until you can see two pages side by side.
 | 12. | Click-hold the Instrument Set box and choose Ensemble.
The Score Editor displays the full score.
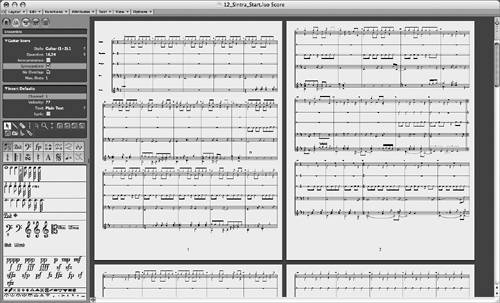 The two Instrument Sets display independent scale and line distance settings. The two Instrument Sets display independent scale and line distance settings.
| 13. | Try printing the scores of both the Guitar and Ensemble Instrument Sets by choosing them in the Instrument Set box and choosing File > Print.
|
NOTE If you don't have a printer connected, you can activate the Save as PDF button to save the score as a PDF file.
|


 While the default ALL INSTS Instrument Set works for the basic display of the instruments, you can refine the score display by creating your own Instrument Set.


 An Instrument Set also allows you to scale the size of the displayed staves, enabling you to fit more systems on a page. This is especially useful when creating full conductor scores.
 The full score can now be printed.
 To complete the part, it is a simple matter to change the default instrument name to

 Instrumental parts can have individual preferences for layout. To designate an Instrument Set as a part, you need to change the Format parameter, which is located below the Scale parameter.
 As you can see in this window, there are separate layout settings for scores and parts, designated by the two columns titled (appropriately enough) Score and Part.

 The two Instrument Sets display independent scale and line distance settings.