Section 2.3. The Software of Mac OS X
2.3. The Software of Mac OS XThere are many different kinds of applications available for Mac OS X. As you'll learn in Chapter 3, there are Carbon apps, Cocoa apps, native Unix programs, Java apps, the list goes on. Mac OS X is a very versatile operating system and it can run a variety of different programs. Most of that software breaks down into one of the following categories:
For most users, the majority of applications installed on their Macs are GUI apps. Some people will have some older Classic applications that have either not been ported or will never be. Even fewer people will have Unix-based software of either the GUI or CLI variety. Each of these categories has its own unique operating environment with a slightly different set of rules and procedures. For example, Mac OS X GUI applications are the simplest to use. You locate the program in your /Applications folder, double-click its icon, and go to work using it. Software that requires the Classic environment works in a similar manner, with the caveat that the Classic Environment must be launched before the program runs successfully. For Unix-based GUI applications, you'll need to have Apple's X11 environment installed, which is an optional package during the Tiger install (and can be installed after the fact, as described earlier). In the case of Unix-based CLI applications, you'll have to open up the Terminal to make use of them (the Terminal is discussed in Chapter 4). 2.3.1. Software InstallersNot only are there several different types of software available for Mac OS X, there are several different ways to install those applications. Each of these is discussed in detail below. 2.3.1.1. Drag-and-drop installPerhaps the easiest method of installation, but the most frequently botched, is the drag-and-drop install . Mac OS X has given rise to the popularity of using disk images for distributing software. A Disk image is essentially a single file that contains a virtual disk full of files. Software distributed on a disk image is usually of the drag-and-drop variety, though some developers will distribute a .pkg file for the Mac OS X Installer to use or some sort of custom software installer. Figure 2-1 shows an application distributed on a disk image. Figure 2-1. An application distributed by disk image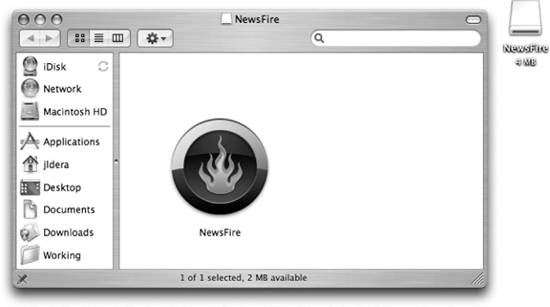
A lot of confusion arises from the use of disk images, as some users will download an application and never copy it off of the disk image. Instead, the application is run from the disk image. The user won't notice a problem until she restarts the machine and then has difficulty locating the app again. So, to successfully install software distributed on a disk image, you must drag it from the disk image and drop it into your Applications folder, as shown in Figure 2-2. This copies the application from the disk image to your Applications folder. You may then eject the disk image and run the app by double-clicking its icon, found in your Applications folder. Figure 2-2. Performing a drag-and-drop install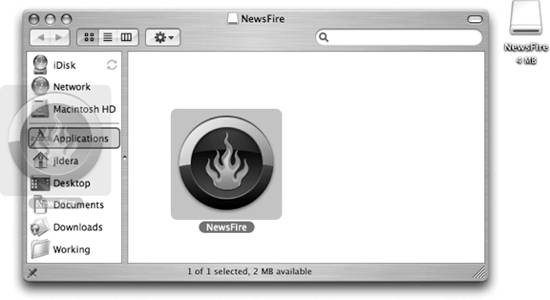 It's worth noting that drag-and-drop is also used by many applications that are distributed on CD or DVD. Disk images are just an intangible analog of distribution on media. 2.3.1.2. Mac OS X's InstallerAnother popular method of distributing software for Mac OS X is to use Mac OS X's own Installer. The Mac OS X Installer is located in /Applications/Utilities, though it's unlikely you'll ever need to launch it by hand. Instead, you'll find it is launched for you when you double-click a .pkg file. These package files are actually bundles (discussed in more detail in Chapter 3) that contain the software being distributed, as well as some files to help the Installer along. Figure 2-3 shows Apple's iWork suite being installed using the Mac OS X Installer. One of the nice things about the Mac OS X Installer is that it provides consistency for the user; each install is virtually identical, even though the software being installed differs. Another advantage of the Mac OS X Installer is that it leaves records behind. When an application is installed using the Installer, a Bill of Materials (.bom) file is placed in /Library/Receipts. These .bom files are used by the system for a variety of purposes. For example, the feature of Disk Utility that repairs permissions is based around reading what a file's permissions are supposed to be, according to the Installer's receipt. It's also worth noting that applications that use drag-and-drop install or are installed using a custom installer don't have this same benefit. Figure 2-3. Mac OS X's Installer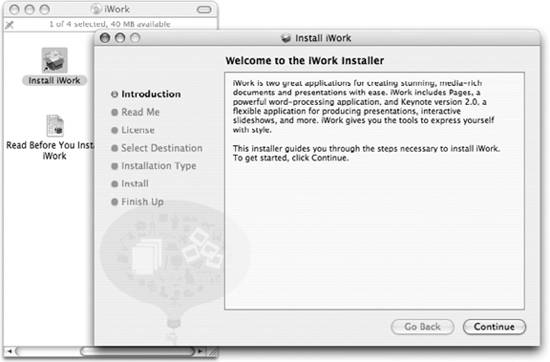 2.3.1.3. Custom installersSome applications written prior to Mac OS X are still distributed using custom installers . These are small applications whose sole purpose in life is to take files from point A and place them at point B on your Mac. Point A is usually some kind of install media (such as a DVD or even a disk image), and point B is most likely your Applications folder. Custom installers have little uniformity between vendors, though some software developers will use an installer developed by another company. For example, a popular iPhoto plug-in, FlickrExport (http://www.connectedflow.com), uses an installer developed by Wincent software (http://www.wincent.com). Figure 2-4 shows a custom installer for the venerable database application FileMaker. 2.3.2. Installing Unix SoftwareNow that the various methods of installing common Mac applications have been covered, let's take a look at Unix applications. Most Unix software is distributed as raw source code . This means that the files you download when you get a Unix app are not in a form that your computer can interpret. They must first be compiled into machine language before they can be executed. Figure 2-4. A custom software installer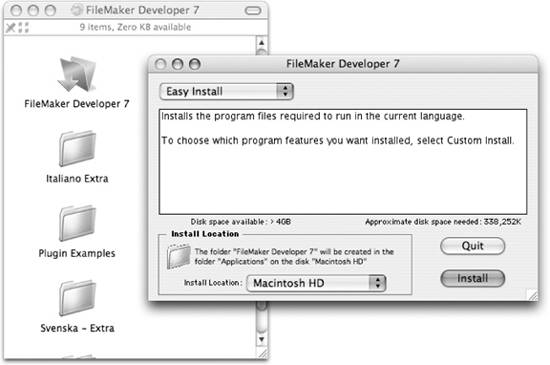 In reality, most software exists in this state at some point. It's just that in the case of most popular Unix apps, the software is released under an open source license. The most prevalent open source licenses actually require that the source code be included when distributed. For commercial applications like Microsoft Office, it would actually be to their disadvantage to include the source code. By preventing others from accessing their software's source code, commercial development houses can ensure they stay in business. Who would buy Word if you could just download the source and compile it yourself? If you're not a software developer or a Unix veteran, the concept of compiling your own software might seem a bit foreign. Luckily, other software developers have created tools to make the process of downloading, compiling, and installing open source software as easy as a few commands on the command line. These tools are known as package managers . On Mac OS X, there are two main package management projects. While other projects exist, the Fink and DarwinPorts projects are the most popular and most mature. These projects not only develop the tools to facilitate the installation of open source apps, but they also port and test these apps on the Mac OS X platform to ensure they work properly. The following sections below go into detail on each of these projects.
2.3.2.1. DarwinPortsThe DarwinPorts project is based on another popular package manager: FreeBSD 's ports. The major difference is that FreeBSD's system is based around using the make utility for the bulk of its tasks. In contrast, DarwinPorts uses the Tcl language for its handiwork. DarwinPorts is a source-based package manager. This means that it downloads raw source files, configures them for compilation on your system, and then compiles and installs them. Source-based package managers tend to be a bit slower when installing software (compiling can take a while), but the resulting software is often more thoroughly optimized for your individual system. To install DarwinPorts, download the Mac OS X .pkg installer from the DarwinPorts web site (http://darwinports.opendarwin.org). Once you've downloaded the package file, double-click it to have the Mac OS X Installer install the base DarwinPorts distribution. Something you might find strange about installing DarwinPorts is that it doesn't leave anything in your Applications folder. This is because DarwinPorts uses a special directory in the filesystem to keep its files and software. The DarwinPorts distribution is kept in /opt/local, with several different subdirectories of that folder being reserved for various purposes. In effect, this is a separate filesystem domain (discussed in Chapter 3) from the rest of Mac OS X, which keeps the OS and DarwinPorts from stepping on each other's toes. However, it can make life a little more confusing for you, as you'll need to either specify the absolute path to run a DarwinPorts package, or add the /opt/local/bin and /opt/local/sbin paths to your shell's default path. You can learn more about file paths and your shell in Chapter 4. After you have DarwinPorts installed, you should execute the following command to synchronize its package information: $ sudo /opt/local/bin/port -d selfupdate You should also use the previous command periodically, to help keep your DarwinPorts infrastructure current. Once this command has completed, you can enter this command to get a list of available software packages in the DarwinPorts distribution: $ /opt/local/bin/port list | more When something catches your eye, you can install it using the following command: $ sudo /opt/local/bin/port installpackagename In this example, packagename is the name of the desired port you want to install on your Mac. DarwinPorts first checks to see if any packages upon which your desired package depends are also installed. This means it looks for requisite libraries, checks that they are the proper versions, and if not, queues them to be installed first. Once all of the dependencies have been met, the port command downloads the source code for the port and begins to compile and install it. As each of these steps is processed, DarwinPorts gives you an update, as shown in Example 2-1. Example 2-1. Installing a port using DarwinPorts$ sudo /opt/local/bin/port install bladeenc ---> Fetching bladeenc ---> Attempting to fetch bladeenc-0.94.2-src-stable.tar.gz from http://bladeenc.mp3.no/source/ ---> Verifying checksum(s) for bladeenc ---> Extracting bladeenc ---> Applying patches to bladeenc ---> Configuring bladeenc ---> Building bladeenc with target all ---> Staging bladeenc into destroot ---> Packaging tgz archive for bladeenc 0.94.2_0 ---> Installing bladeenc 0.94.2_0 ---> Activating bladeenc 0.94.2_0 ---> Cleaning bladeenc Congratulations. You've just installed your first piece of ported open source software. DarwinPorts (and Fink , for that matter) takes all the complication out of the compiling process and does all of the work for you. If you're a do-it-yourself kind of person, you can read the section "Compiling Unix software" later in this chapter to see what kind of dirty work you're spared by using a package manager. Removing a package from your system is as easy as installing it. To remove a Unix app that you no longer use, enter this command: $ sudo /opt/local/bin/port uninstallpackagename Heard about a great new feature in a new release of your favorite package? First, synchronize your DarwinPorts infrastructure as discussed above. Then, issue this command to update the port: $ sudo /opt/local/bin/port upgradepackagename If you'd like to upgrade all of your installed ports in one go, you can use the -a switch when calling port: $ sudo /opt/local/bin/port -a upgrade Before upgrading all of the ports at once, you should probably check out which ports are out of date by using the outdated keyword with port: $ sudo /opt/local/bin/port outdated 2.3.2.2. FinkThe Fink project also draws inspiration from an existing package management system. In this case, it is Debian GNU/Linux 's apt and dpkg tools. While DarwinPorts is solely a source-based package manager, Fink can use either source-based or binary-based packages. Binary-based packages are compiled before they are put into the package system, so when your Mac goes to install the package, it doesn't have to compile from source code. This results in a much faster install process, though the resulting package may not be customized for your particular Mac. In practice, that's not as big a deal as it sounds. Still, the Fink project will use a source-based system in most cases, requiring an extra switch to have it use the binary distribution. To get started using Fink, download its installer from the Fink web site (http://fink.sourceforge.net). Once you've downloaded the disk image, opened it, and run the installer, you'll find you have a new folder at the top of your Macintosh HD. The /sw folder is where Fink keeps its installed packages and configuration data. Fink uses a very similar syntax to DarwinPorts, but here's a breakdown on some of the commands used to perform common package management tasks. Once you have Fink installed, you'll want to see what packages are available. To view them, enter the command: $ /sw/bin/fink list | more To install a package, the command is: $ sudo /sw/bin/fink installpackagename If you'd like to save some time and use the precompiled, binary version of a package, add the -b option, as in: $ sudo /sw/bin/fink -b installpackagename When you want to remove a package, just call Fink with the remove keyword: $sudo /sw/bin/fink removepackagename To upgrade a package, you first need to synchronize Fink with its selfupdate option, as follows: $ sudo /sw/bin/fink selfupdate The first time you run this command, it asks you whether you want to use rysnc, CVS, or if you'd rather stick to point releases. If you're aiming for stability, you'll want to stick to the point releases. If you're more accustomed to being on the bleeding edge, go for the rsync. The Fink project prefers that CVS access be used only by their developers, but leaves the option there for those who have problems using the other two methods. Once you've finished synchronizing Fink, enter the command: $ sudo /sw/bin/fink updatepackagename To update the desired package, or to update all of your installed packages: $ sudo /sw/bin/fink update-all 2.3.2.3. Compiling Unix softwareWhile Apple has included many great open source applications with Mac OS X and the package manager projects offer hundreds more, there are thousands of open source projects out there. It's impractical to expect any project to encompass all of them, let alone keep them all updated with the latest releases. For this reason, you might find yourself needing to install one of these apps by hand. Installing open source software can be broken down into the following stages:
As an example, here are the steps you'd take to configure nmap (http://www.insecure.org/nmap), a popular tool for identifying services on a network host. First, you'll need to download the nmap source code from the web site. Most source code is distributed in a tarball, which is just an archive created using the tar utility and then compressed using gzip or bzip2 .
To download the tarball, you can use Safari or, if you're feeling particularly Unix-ish, curl : $ curl -O http://download.insecure.org/nmap/dist/nmap-3.93.tar.bz2 Once the download has completed, you'll need to expand the resulting archive with the tar command. Depending on whether the archive was compressed using gzip or bzip2, you'll need to use a slightly different syntax. Check the tar manpage for more information: $ tar xvjf nmap-3.93.tar.bz2 After the tarball has been expanded, change to the resulting nmap-3.93 directory and take a look at the README and INSTALL files. Take note of any specific instructions for compiling the software on Mac OS X as well as any other caveats the developers wish to make you aware of. Assuming there aren't any hitches on the way, the next step is to configure the source code for compiling by using the software's configure script. The configure script is a strange beast; each application has its own unique script. Depending on the software you're installing and its features, the script might just check for a few simple system libraries or a variety of tools and other dependencies. A good place to start when using configure is with its help option. This option displays the configure script's help information, which details the various options and libraries that the script looks for. If the script requires any libraries that are not on your system, you'll need to compile and install them first.
Once you've determined which configure options you'll need to use, run the script with those options to get started: $ ./configure --prefix=/usr/local If the configure script fails, take a look at the last line printed to the screen. Chances are it was unable to find a requisite library or command. Compile and install the dependency and then try running the configure script again. When the configure script has finished preparing the source code for your system, use the make command to compile the code into binaries: $ make This is usually the lengthiest part of the install. Depending on the speed of your machine and amount of installed memory, compiling an application can take anywhere from a few minutes to several hours. Assuming the software compiles without any errors, the final step is to install the resulting binaries in the proper location: $ sudo make install If compiling fails, try running the configure script again and take note of any errors. Then, attempt to contact the developer, a support forum, or a mailing list related to the software about the problem. Include as much detail as possible, including any errors the configure script and make might have given you, details about your system, etc. Not all open source apps will compile cleanly on Mac OS X, but most developers are helpful in making it so they will. |

EAN: 2147483647
Pages: 166