Section 19.3. Running Reports
19.3. Running ReportsDreamweaver gives you a number of ways to check the soundness and integrity of your pages before you publish them. You can see where certain browsers are likely to choke. You can clean up the code to standards-police standards. You can find and fix broken links, and you can locate stranded files and either use them or lose them. This section shows you how. 19.3.1. Running a Browser CheckYou know from experience that different web browsers interpret the same web code differently. Many times, these differences are benign, if somewhat aggravating. Other times, they can cause problems. A browser check calls attention to these peculiarities specifically as they relate to your site. It scans your pages and flags the bits and pieces of code that a particular browser doesn't like.
19.3.2. Choosing target browsersThe target browsers are the browsers against which you're checking the code of your site. You don't need to have these browsers installed on your computer. Dreamweaver has a built-in browser-check database.
To select target browsers, open any page of your site, and click the Target Browser button at the top of the document window. Choose Settings from the menu that appears in Figure 19-9, and Dreamweaver opens the Target Browsers dialog box shown in Figure 19-10. Select the make and model of the browsers that you want to use as your targets, and click OK. Figure 19-9. Choosing Settings from the Target Browser menu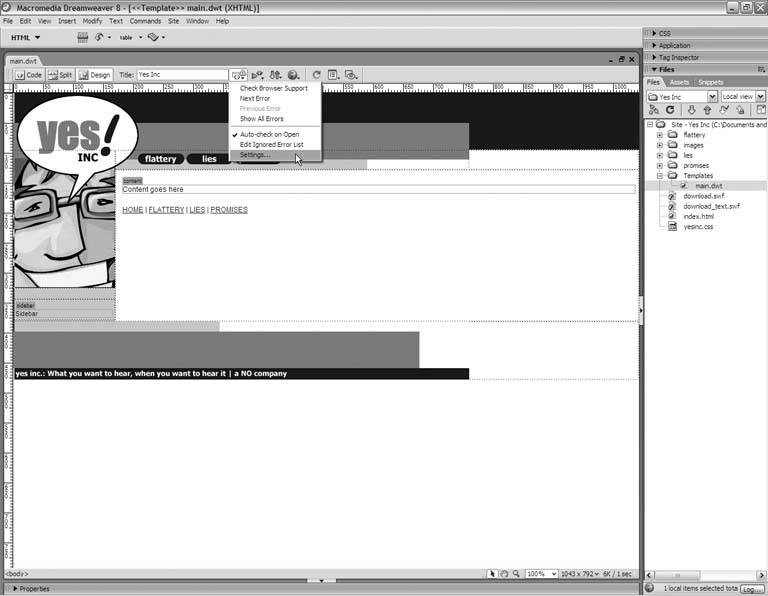 Figure 19-10. Choosing target browsers and minimum versions
19.3.3. Running the checkBy default, Dreamweaver runs a browser check whenever you open a document window. To see the results of the check, click the Browser Check button and choose Show All Errors from the menu. Dreamweaver opens the Results panel along the bottom of the workspace. You can increase the size of the panel by dragging the bottom border of the document window toward the top of the workspace, as Figure 19-11 shows. Figure 19-11. Increasing the size of the Results panel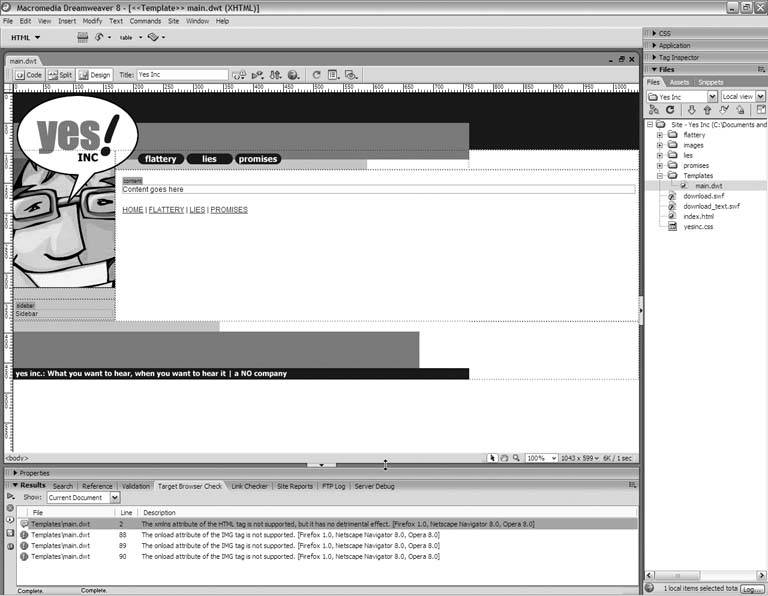
Look specifically for the red caution icons in the list and note which browsers Dreamweaver predicts will experience the problems. On this web page, Dreamweaver identifies Opera, Netscape, and Firefox in each case. To see what specifically is causing these problems, double-click an entry in the Results panel. Dreamweaver switches to Split view and highlights the problematic code, as Figure 19-12 shows. The warning message says that Firefox, Netscape, and Opera don't support the onLoad attribute of the <img> tag. Now look at the code: onLoad="" Nothing is happening during the onLoad event, so it's safe to delete this bit of code completely. The same holds true for the other two warnings in the Results panel. So after removing the offending bits of empty code, go to the top of the document window, click the Browser Check button, and choose Check Browser Support from the menu. You find to your relief that the page passes inspection in the target browsers. Figure 19-12. Dreamweaver highlights the problematic code in the top panel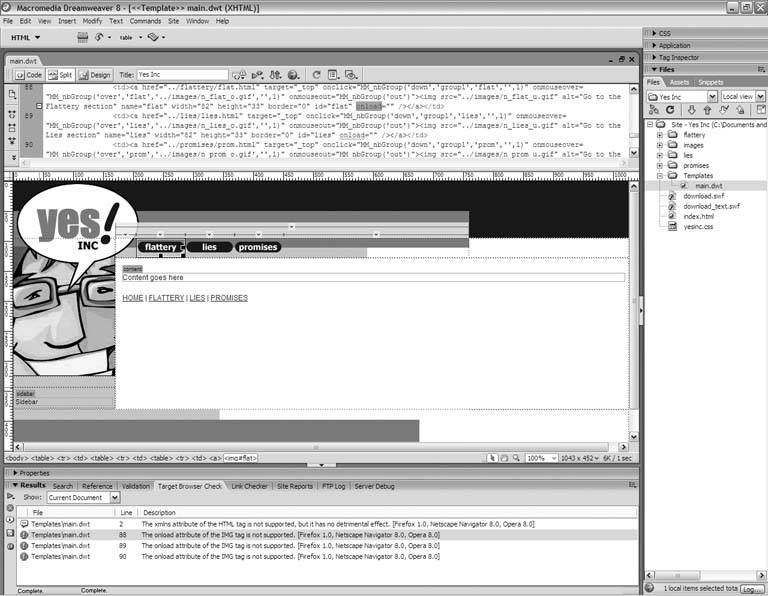 Now, what happens if you get a warning message like this: The tag name: "embed" Not found in currently active versions. [XHTML 1.0 transitional] You find to your horror that this tag marks up a Flash movie or some other form of multimedia on your page. Do you scrap the Flash movie? Not necessarily. Double-check to make sure that the page works correctly in the target browser, and if it does, you don't have to worry. So much for the current page. On to the next! Or, better yet, on to all of the next. To run the browser check on the entire site at once, click the green arrow button at the top left of the Results panel and choose Check Target Browsers For Entire Current Local Site from the menu that appears, as Figure 19-13 shows. Figure 19-13. Running a browser check on the entire site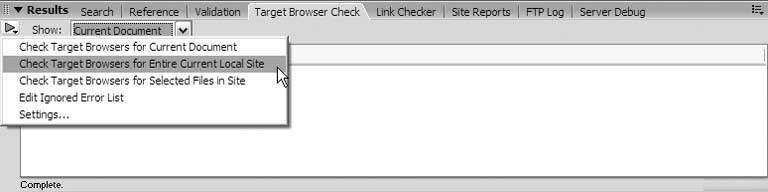 19.3.4. Validating MarkupAside from checking your code against target browsers, you can validate your pages (i.e., check their code against the official standards).
A word to the wise: a standards-compliant web page doesn't necessarily look the same in all browsers. A standards-compliant web page might not even work correctly in certain browsers, especially in the case of Cascading Style Sheets. Plenty of official style definitions have yet to receive support in any browsing device. Likewise, a web page that fails standards checks miserably might look spectacular, maintain a decent level of accessibility, and work respectably well in all the biggie browsers. If you have to choose between passing the browser check and passing validation, this humble tome recommends the browser check every time.
This is not to say that standards compliance doesn't have its place. To a certain degree, the Web needs standards. Code that adheres to them is less dependent upon the idiosyncrasies of particular browsers and is therefore less subject to change when Microsoft puts out a new version of Internet Explorer. Officially sanctioned code also tends to work better in a wider cross-section of devices (some of which haven't been invented yet). Yet we live in the present, not the future, and the vast majority of all web browsing on planet Earth at this time comes by way of Microsoft Internet Explorer version 6 for Windows. Your site would appeal to a greater percentage of the overall online audience if you forgot about standards compliance entirely and simply designed your site for this browser, but not even this humble tome suggests that you go that far. By all means, validate. Just don't give up on web design and go back to beauty school if your markup isn't officially sanctioned by the coding cabal. To validate the markup of your site, switch to the Validate tab of the Results panel, click the green arrow icon, and choose Validate Entire Current Local Site from the menu. 19.3.5. Finding and Fixing Broken LinksBroken links are links that can't find their destination pages. Either the pages don't exist or they aren't at the location that the link is pointing. Dreamweaver locates broken internal links for you but doesn't find broken external links. You should periodically check your external links to make sure they're all still pointing to the right pages and sites.
To check for broken links in the current site, go to the main menu, and choose Site Figure 19-14. The Link Checker tab shows broken internal links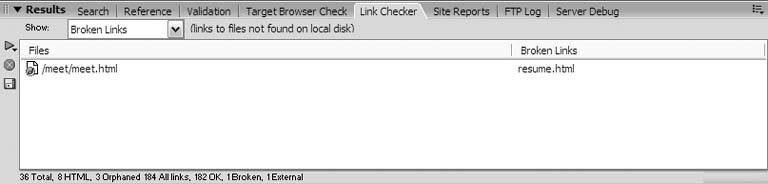
If the same broken link comes up again and again, you can change all occurrences of the link at once. From the main menu, choose Site Figure 19-15. Changing a recurring broken link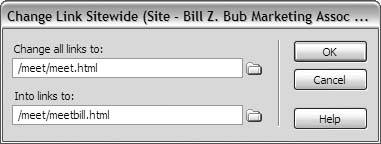 19.3.6. Finding Orphaned FilesOrphaned files are files in your local root folder that don't appear on any page of your site. You can safely move these files out of your local root folder, but don't delete them unless you're absolutely sure you won't need them in the future. Remember, your data are valuable and storage is cheap.
To check for orphaned files, go to the Link Checker tab of the Results panel and set the Show menu to Orphaned Files, as Figure 19-16 shows. Figure 19-16. Checking for orphaned files in the Link Checker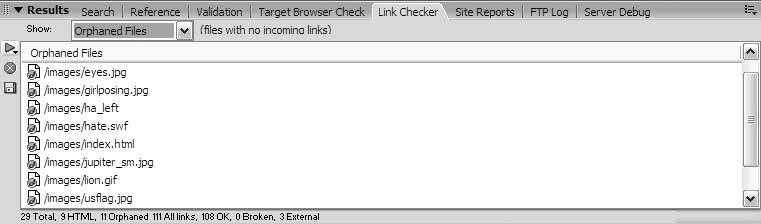
|
 Check Links Sitewide. Any broken internal links appear in the Results panel under the Link Checker tab, as Figure 19-14 shows. Doubleclick an entry in the list to open the page with the broken link, and make the necessary corrections.
EAN: 2147483647
Pages: 154