Data Access Pages
It is beyond the scope of this book to examine all the ins and outs of web design. Instead, we are going to focus on the tools available in Access—specifically, we are going to look at Data Access Pages.
A Data Access Page looks and feels like an Access form or report. Like forms and reports, it is tied into tables or queries. However, it uses HTML code so that data can be accessed through a web browser and viewed on the Web. The data can even be edited in the web browser.
As an example of how to use this, let’s say you design an Access database for ABC Corporation. Let’s say there is a data entry form that needs to be used by the New York and Los Angeles offices. Further, let’s assume there are reports that need to be seen by the Paris office.
Using Data Access Pages in conjunction with Internet technologies will allow you to handle this scenario easily. Each of the offices can access the forms and reports as easily as they would if the database was located right there.
Here is a word of warning, however: Data Access Pages were introduced in Access 2000. The format used changed in Access 2002 and again in Access 2003. Thus, if you design the Data Access Page in Access 2003, and the workstations in Los Angeles, Paris, and New York are using Access 2000, the Data Access Page may not work properly. Also, if you design the page in one version of Access, you cannot open it in Design View in another version of Access.
This problem can be remedied by installing Office Web Components for Office 2003 on the workstations that will be accessing the Data Access Pages.
The examples shown here were created using Access 2003. If you are using a different version, you may see some variations in functionality.
Up to this point, forms and reports have been part of an Access database. However, Data Access Pages are stand-alone files. Access will show them as Pages objects, but they are external files. The reason for this is that you can point the browser to a Data Access Page like you would any other URL. A good knowledge of web technologies, coupled with a program like FrontPage 2003, is essential to successfully deploying these pages.
Generating a Data Access Page
To create a Data Access Page, you begin by going to Pages in the Objects list, as shown in Figure 18-1. As you can see, like forms and reports, Data Access Pagescan be generated in either Design View or by using the wizard. Let’s create our first page by using the wizard and connecting it to tblCustomer.
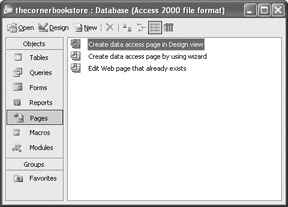
Figure 18-1: The Pages window
The first screen should be familiar to anyone who has built a form or report using the wizard. As shown in Figure 18-2, it allows you to select the table or query that the page will be attached to, and the fields you want to use.
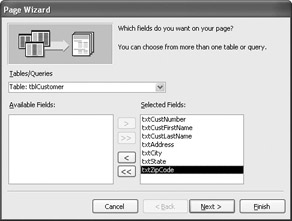
Figure 18-2: First step in the Page Wizard
As you can see, our web page is based on all the fields in tblCustomer. Once that is done, select Next. You should see a screen similar to Figure 18-3.
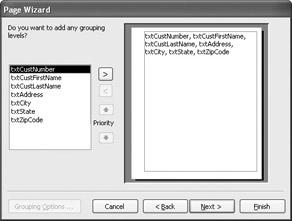
Figure 18-3: Step 2 of the Page Wizard
This allows you to decide if you want to group the data together in any particular way. That concept is discussed in Chapter 13 about reports. For this example, we are not going to use a grouping. Instead, just click on Next, which produces the screen shown in Figure 18-4.
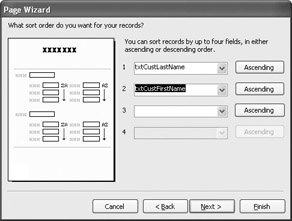
Figure 18-4: Step 3 of the Page Wizard
In this screen you decide how you want the data sorted. If the page is already associated with a query, that may be decided already. However, since our example is based on a table, we are going to sort it on the txtCustFirstName and txtCustLastName fields. The proper SQL code string will be written in the background.
After clicking Next, you are brought to the screen shown in Figure 18-5. This last screen allows you to name the Data Access Page. We will be discussing naming more in a bit. However, for the time being, you should use the identifying prefix of dap. In this example, the Open the Page option is also selected.
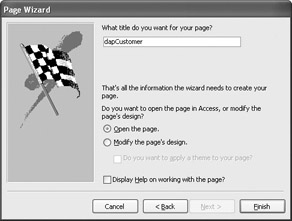
Figure 18-5: Final step of the Page Wizard
Once all is completed, click on Finish and you should see a page similar to the one shown in Figure 18-6.
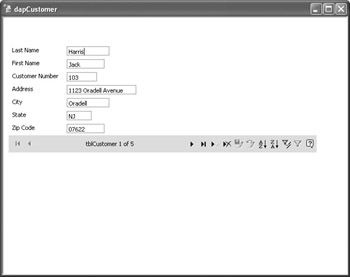
Figure 18-6: A Data Access Page
There are two interesting things going on here. First of all, you see the fields much like you would on any other form. But what is unique is that Access created a web-based navigation bar that, like a regular form, allows you to move through the records, change the sort, filter records, and so on. In other words, it is like any normal form you work with—the only difference being that it is web based.
Remember, this form is built using HTML. Let’s take a brief look behind the scenes by selecting View | HTML Source. You will see something like Figure 18-7.
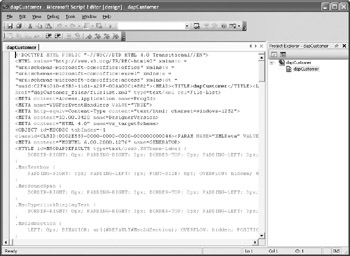
Figure 18-7: The Microsoft Script Editor
This is called the Microsoft Script Editor; it allows you to view and edit the underlying HTML and related code. The necessary coding to properly connect the form to the table is also written, as well as JavaScript code to handle issues such as browser validation and navigation.
I strongly suggest that unless you are very familiar with HTML, JavaScript, and database connection strings, you do not change any code here.
Saving the Data Access Page
As I stated from the outset, a Data Access Page is an external file that needs to be named and saved outside of the database environment. The file has an extension of .htm, which indicates that it is an HTML file. Where you save it is another matter.
This is where a program such as FrontPage will come into play. Using it, in conjunction with a web server such as IIS (which comes as part of the Windows 2000 or XP Professional software), directory structures would be set up to hold the files of the website. The proper directory structure, and placement of the Data Access Page, would need to be determined in advance. As you are about to see, this can be critical.
If you use IIS, in most cases, the file will need to be saved to a folder under c:\inetpub\wwwroot in order for it to be used in the web server environment.
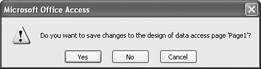
The name we gave the example Data Access Page, dapCustomer, needs to be taken to another step. As soon as you go to close the page, you will see the prompt shown here:
After selecting Yes, you are taken to the standard Windows Save As screen using dapCustomer as the suggested name, as shown in Figure 18-8. This is where you need to decide where it is going to be placed. Again, this is a function of the website directory structure your particular project is employing.
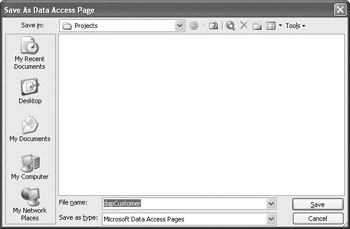
Figure 18-8: Save As Data Access Page
Once you select Save, you are brought to a rather cryptic message:
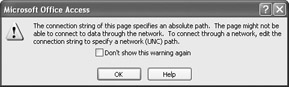
In order for a website to access a database, there must be code written that tells the website where to find the database structure (just like we have had to put that information into our VBA code). This is called a connection string. Unfortunately, due to the way networks and web servers work, the connection string that Access writes might not work and may need to be edited.
Once you select OK, Access will go ahead and do the best job it can to ensure that the web page functions properly (from my experience, most of the time it runs fine). Access recognizes the Data Access Page as an object, even though it is an external file. Now the Pages window should look like Figure 18-9.
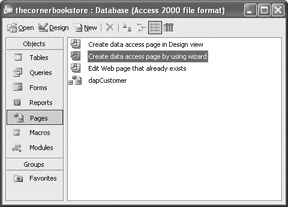
Figure 18-9: The Pages window with the new object
As an interesting exercise, you can test your new page in the web browser by opening the browser, selecting File | Open, and maneuvering to the directory that contains your Data Access Page. Since it has the file extension of .htm, and is written in HTML, the browser should have no difficulties opening it with the connection string, written by Access, that provides the connection to the table tblCustomer.
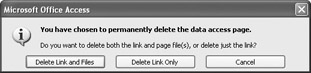
If you want to delete a Data Access Page, Access will prompt whether you want to delete the whole file or just the link to the database:
Creating a Data Access Page in Design View
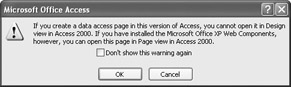
Creating a Data Access Page has some similarities to creating a form. However, there are some differences. If you use the Pages window in Access, you can double-click on the Create Data Access Page in Design View option. You will receive the warning shown here, regarding the version conflicts discussed earlier:
Once you select OK, you are presented with the window shown in Figure 18-10. Notice that the design area is divided into sections. Along the top, you can click to enter a title for your page. There is a two-row grid in the middle of the page, which we will use shortly. On the right of the window, there is a list of tables and queries.
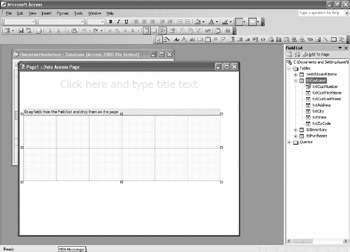
Figure 18-10: The Data Access Page Design window
If you click on the plus (+) symbol just to the left of the table or query name, you will see the field list associated with it. As an example, suppose I open the tblCustomer field list. I can then take a field, txtCustNumber for example, and drag it where I want to place it on the grid. As soon as I do that, Access automatically creates the navigation controls you saw earlier. Your grid should look something like Figure 18-11.
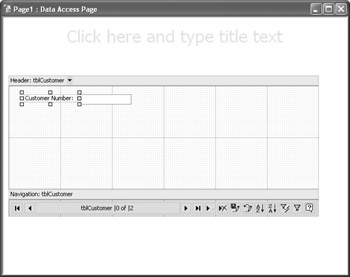
Figure 18-11: The Data Access Page Design window with a field added
You can add the fields you want and test the page by selecting View | Page View. Notice in the field list that you have all the tables and queries of your database listed. What would happen if you tried to drag a field from tblPurchases onto the design grid? Access will open up a Relationship Wizard window, as shown in Figure 18-12.
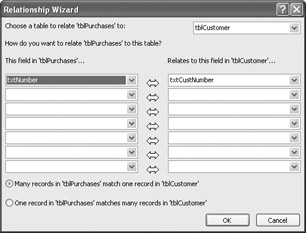
Figure 18-12: Relationship Wizard window
The options in this window are pretty easy to follow. Figure 18-12 has the information filled in. I related tblPurchases to tblCustomer by relating txtNumber to txtCustNumber. The bottom of the window shows that many relationships are on the tblPurchases side.
Once you have the Data Access Page set up the way you want it, you can select File | Save As to save it. (Remember, it will be saved as an external file.) You will see a dialog box like this:
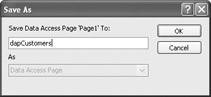
In this example, I used the name dapCustomers. Once you have given it a name, you will then see the standard Windows Save As dialog box, where you decide where the HTML file will be located. As before, once that decision is made, it will prompt you and write the proper connection string for you.
One final point needs to be made here. If you examine the properties of the controls inside a Data Access Page, you will notice that attributes such as color, size, and so forth, use HTML attributes instead of the settings you are used to in Access. For instance, color uses a hexadecimal code, and size uses pixels. Figure 18-13 shows what a Property sheet looks like for the Page element.
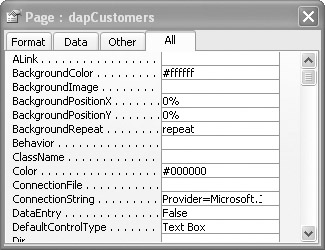
Figure 18-13: Properties for a Data Access Page
Data Access Pages and VBA
You are going to find some serious compatibility issues between versions of Access if you try to work with Data Access Pages and VBA. Access 2000 offered a method called CreateDataAccessPage to create a new page. However, any attempts to run this page will result in an Error 13 in Access 2003.
The CreateDataAccessPage method accepts two parameters. The first is the path where the page is going to be stored. The second is a Boolean value of True or False. True means that you are going to create a new Data Access Page, and False means that you are just creating a connection to an existing page.
From there on, some rather advanced programming techniques are required to populate the page with the controls necessary.
In most situations, it is recommended that you do not use VBA to create the Data Access Page. There are very few situations in which it should be necessary to do that.
EAN: 2147483647
Pages: 214