Section 10.1. Building a Form
10.1. Building a FormSince you'll need a place for the user to enter a search query, let's begin by building a form to handle the user's input. Every form must have these basic components:
Let's build a simple form with a text input field called search and a submit button, as shown in Example 10-1. Example 10-1. A simple form example
Place the code in Example 10-1 into a file called simple.php in a web-accessible directory on your web server, such as the document root. Strictly speaking, forms are defined purely by HTML, but we're using some PHP code on line 6 to reference the super global PHP_SELF. This provides a shortcut to the name of the current PHP file that handles the submission of the form data. The form in Example 10-1 allows you to capture the search sting from the user for a search. Notice how we wrapped a label tag around the input where the text was; this makes the form easier to use. Since clicking on the Search: text automatically sends the cursor to the search field. On line 7, we set the form submission method to GET. This is done to insure that users can bookmark their searches and not have to come back to the page and reenter their data. Line 9 does the bulk of the work by defining the text field. Accessing the simple.php file from your browser should generate a form similar to Figure 10-1. It's not terribly useful, as any value you submit just brings the same form back again, but we'll take care of that soon. Figure 10-1. How the sample form appears in your browser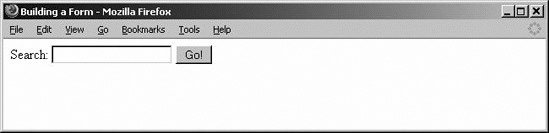 10.1.1. Accessing Submitted Form ValuesLet's go ahead and modify the code in Example 10-1 to display back the search string when the form is submitted. To do this, check the value of a GET submitted field with the syntax $_GET[field]. Likewise, $_POST[field] is used to access a field when using the POST field submission. Since search is the name of the field that we specified when building the form, we'll use $_GET["search"] in Example 10-2. Example 10-2. Modifying our simple search to process the results
Example 10-2 generates this HTML: <html> <head> <title>Building a Form</title> </head> <body> <form action="/oreilly/ch10/simple.php" method="GET" /> <label> Search: <input type="text" name="search" > </label> <input type="submit" value="Go!" /> </form> </body> </html> If you submitted a value of PHP in the search text box, you'd get output similar to Figure 10-2. Figure 10-2. The same script is now able to echo back the search string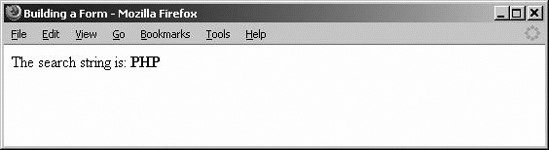 When the form is submitted, the if statement notices that the $search variable has a value assigned. Instead of the script returning the HTML form, the search string is returned. So, you have the same PHP file generating the form and processing its submitted values. With forms, you can specify default values and use different form inputs. There are various ways you can submit the form. These will be explained in the following subsections. 10.1.2. Default ValuesWhen doing searches on a database, you might need to actually have some default values in your forms. This is useful, for example, for searching within a price range. The user doesn't always want to insert values, and it makes it that much simpler when searching. Typically, the default value for a form element is set with the value attribute; there is an exception for checkboxes that use the checked keyword. Take Example 10-3. Example 10-3. Form default values
In Figure 10-3, the default values reflect 0 and 1000 for the minimum and maximum prices that you want to search. Depending on the area, if the user searches for an apartment to rent, this is a good starting point. We already specified a default value for the submit button as Go! in Example 10-1. Figure 10-3. The default values appear in their fields 10.1.3. Types of InputThere are many different types of input, so which one should you use? Radio buttons, checkboxes, text, input, text areas buttons . . . oh my! We'll describe each of our input options. 10.1.3.1. Text boxesMost of the time when dealing with input from a user, you might want a string of text. A text type element is used to capture these strings from the user. The name attribute is required to process the input after a form submission as it specifies how to reference the value. When it appears in the browser, the size parameter determines the length of the text box. The maxlength parameter determines the maximum number of characters the user can place in the field. The syntax is: <input type="text" name="name" size="display size" maxlength="max characters allows" /> For example, the following: <form> <input type="text" name="search" size="10" maxlength="30" /> </form> creates a text box like Figure 10-3. 10.1.3.2. Text areasIf you need a large chunk of text from a user or are going to be using a WYSIWYG editor, you need to use a text area. A text area is defined by using the textarea element. The name, cols, and rows attributes are required. The name attribute works like it did in a text box. The cols attribute specifies how many columns to create for your text area. The rows attribute specifies how many rows to create. The syntax is: <textarea name="name" cols="# of cols" rows="# of rows"></textarea> For example: <form> <label>Suggestion: <textarea name="suggestions" cols="40" rows="5"></textarea> </label> <input type="submit" value="Go! /> </form> might display like Figure 10-4. Figure 10-4. A simple form with a text area element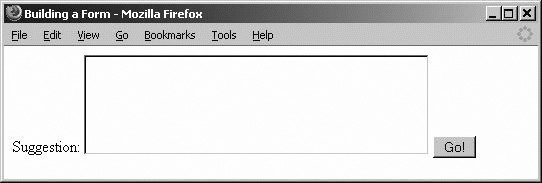 10.1.3.3. CheckboxesA checkbox is useful when you want to give users several different options, especially when they're allowed to select each choice individually. Use checkboxes only when you have a few options to give to a user; otherwise, there is a different type of input that you would want to use. This is called a select, which we'll talk about in a bit. For a checkbox, set the input type to checkbox. The name and value attributes are also required. If the value is set to checked, the checkbox is checked by default. The syntax is: <input type="checkbox" name="name" value="checkbox value" /> For example: <form> <fieldset> <label>Italian <input type="checkbox" name="food[]" value="Italian" /></label> <label>Mexican <input type="checkbox" name="food[]" value="Mexican" /></label> <label>Chinese <input type="checkbox" name="food[]" value="Chinese" checked="checked" /></label> </fieldset> <input type="submit" value="Go! /> </form> This displays the box shown in Figure 10-5. Figure 10-5. A sample form with checkboxes 10.1.3.4. Radio buttonsRadio buttons behave just like the presets on a radio. They are like checkboxes, except you can only select one radio button at a time. To create a radio button, set the type to radio. The name and value attributes are required. All of the radio buttons in a group must use the same name to allow for only one value. The syntax is: <input type="radio" name="name" value="radio button value" /> For example: <form> <fieldset> <label>Italian <input type="radio" name="food" value="Italian" /></label> <label>Mexican <input type="radio" name="food" value="Mexican" /></label> <label>Chinese <input type="radio" name="food" value="Chinese" checked="checked" /></label> </fieldset> <input type="submit" value="Go! /> </form> This looks like Figure 10-6. Figure 10-6. The same choices are available as before, but the radio buttons are round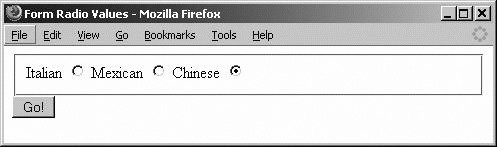 Figure 10-6 allows only one type of food to be selected. 10.1.3.5. HiddenHidden form elements allow you to send information from the form to the script that processes the data without that information being visible to the user. This may be information such as whether the forms' submit button was pressed, or perhaps a username. The syntax is: <input type="hidden" name="name" value="hidden value" /> For example: <form> <input type="hidden" name="submitted" value="true" /> </form> HIDDEN is a TYPE attribute value to the INPUT element for forms. It indicates a form field that does not appear visibly in the document and that the user does not interact with. It can be used to transmit stale information about the client or server. Hidden fields can be viewed via the Page Source. Therefore, it's unadvisable to put passwords in a hidden field. 10.1.3.6. SelectsSelects present a list of options to the user. You can specify whether a user can select only one or many items from the list. The <select> element defines a select list. Each item on the list is specified with the option element. The syntax is: <select name="name"> <option>Label of Option</option> </select> Additionally, there are several attributes that can be set within <select>:
There are two commonly used attributes for <option>:
A common use for a select list is providing options from which a user may choose, such as that created in Example 10-4. Example 10-4. Multiple book types
Figure 10-7 shows the list built from the code in Example 10-4. Figure 10-7. Multiple items selected from the list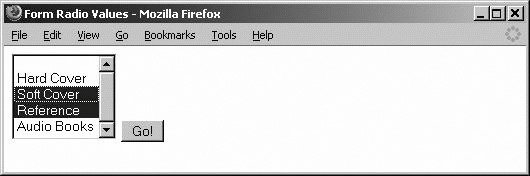 The first option in the list is actually a blank entry. This is useful for detecting if a user hasn't made any changes to a list. 10.1.4. Working with Multiple ValuesHaving checkboxes and radio buttons creates a new problem. You can't use a single value when processing the results of a group of checkboxes with the same name or elements from a select list. Example 10-5 shows an example. Example 10-5. A form with checkboxes using the same name to store multiple values
Example 10-5 produces something like Figure 10-8. Figure 10-8. The Chinese checkbox is checked by default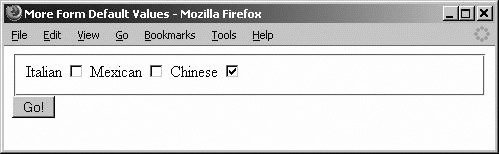 You gave the user the choice of three different ethnic foods: Italian, Mexican, and Chinese. In this example, the user can check multiple checkboxes. Therefore, you need to access more than a single value from the name of the checkbox when you process the form submission in PHP. We'll place a pair of brackets ([]) after the field's name attribute to send the results in an array. In the following code, the name attribute is set to food[] instead of food. Without the array, if a user checks multiple foods, his selections would be overwritten by the last food checked in the list. Placing closed brackets after the input name signifies an array. Since you want to have one choice checked already, give it an attribute of checked, and then set it to checked. This sets the checkbox to be set by default in a user's browser. <html> <head> <title>Using Default Checkbox Values</title> </head> <body> <?php $food=$_GET[food]; $self=$_SERVER['PHP_SELF']; if (!empty($food)) { echo "The foods selected are:<br />"; foreach($_GET[food] as $foodstuf) { echo "<strong>$foodstuf</strong><br />"; } } else { echo ("<form action=\"$self\" "); echo ('method="get"> <fieldset> <label>Italian <input type="checkbox" name="food[]" value="Italian" /></label> <label>Mexican <input type="checkbox" name="food[]" value="Mexican" /></label> <label>Chinese <input type="checkbox" name="food[]" value="Chinese" checked="checked" /></label> </fieldset> <input type="submit" value="Go!" > '); } ?> </body> </html> If you select two checkboxes, you'll see the screen in Figure 10-9. Figure 10-9. Selecting Italian and Chinese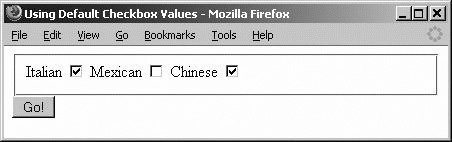 The screen in Figure 10-9 produces the screen in Figure 10-10, when submitted. Figure 10-10. Each check field is displayed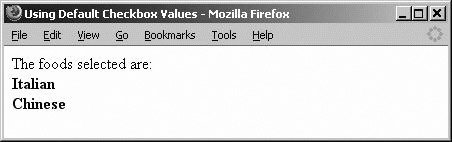 You can set up radio buttons in the same way, but name should be set to food instead of food[], since radio buttons tell users they have only one choice. Lastly, notice in the preceding code that the checkboxes are wrapped around a fieldset tag. This is used to logically define a set of data. 10.1.5. Validating DataWhenever you are taking data from a user, you should always validate it. If you do not validate the user's input, it can cause many problemsmost importantly, substantial security risks. Validating input is not complicated. We'll go over the most common PHP functions that are used to sanitize data from users. 10.1.5.1. Validating checkboxes, radio buttons, and selectsValidating data that comes from checkboxes, radio buttons, or selects is easier than validating free format fields such as text boxes, because the value should only be one of the predefined values. To ensure this, store all of the options in an array and make sure the user input is part of the array when you process the data. We'll look at the code for checking input from a single selection (in other words, only one checkbox, radio button, or other selection), as shown in Example 10-6. Example 10-6. Checking input from a radio button or a single select
10.1.5.2. Validating text boxes and text areasTo validate text boxes and text areas, you first need to gather what information is valid and what isn't. Also, you don't want to allow the user to enter nothing. You can spend as little time as checking to see whether a string is empty, or you can build more complex expressions to check for the presence of certain characters, such as the @ in an email address. You can use the code in Example 10-7 to make sure the input is acceptable. Example 10-7. Checking input from a checkbox or a multiple select
Since we haven't given you much tangible, sink-your-teeth-into-it PHP code, we're going to give you a great example of how PHP can easily create a conversion tool. Using conversion tools, you could convert from Fahrenheit to Celsius, or U.S. Units of Measurement to Metric. Pretty cool, huh? 10.1.6. Building a Feet-to-Meters Converter in PHPWe're going to show you the power of PHP by creating a feet-to-meters converter application, shown in Example 10-8, which would be handy if your web site is used internationally. Example 10-8. PHP feet-to-meters converter
This self-processing form collects a measurement in feet, multiplies that measurement by a standard conversion factor, and then prints out the results. Since you still have the original value for feet in the $feet variable from the form submission, you use it as an initial value when displaying the Feet user input field in the form. Figure 10-11 shows the results of entering 12 and clicking Convert. Figure 10-11. Simply convert feet to meters using a mathematical formula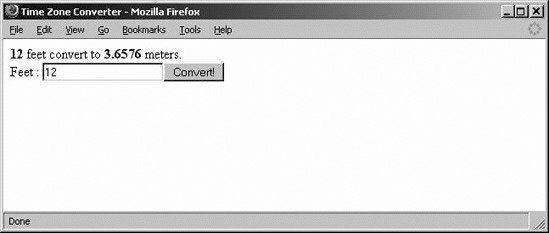 10.1.7. Building a Time Zone Conversion Utility in PHPNow that you've learned how to do a variety of tasks, let's put it all together to get an idea of what can be done in PHP. Example 10-9 uses forms, arrays, conditionals, looping, and date strings. These all work together to bring you a handy tool for converting between some common time zones. Example 10-9. Converting between time zones based on user input
Here's what happened in Example 10-9 on a line-by-line basis:
Figure 10-12 show an example of converting the time from Chicago to Paris. Figure 10-12. Converting Chicago time to Paris time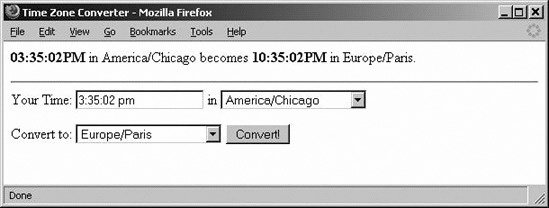 10.1.8. Querying the Database with Form DataOnce you've validated your data, you're ready to start using information from the forms in your database queries. Example 10-10 creates a function called query_db from the code in Chapter 7 for displaying authors with a change to line 11 that allows matching the title with a LIKE search clause. LIKE and NOT LIKE are usually used with strings and possibly with wildcards, such as the underscore (_) and the percentage sign (%).
In Example 10-10, the function takes a single parameter and searches for the specific book title you're looking to find. Example 10-10. Combining form processing and database querying
Line 50 completes the processing of the form data. The search string is sent to the query_db function. This example shows a fairly simple search done by searching a words table, and then outputting the results on the pages that are being used, as shown in Figure 10-13. Figure 10-13. We see our familiar text box for searching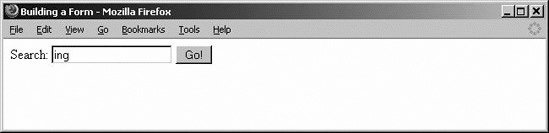 Searching for "ing" matches one title, shown in Figure 10-14. Figure 10-14. The book titles that contain "ing" are displayed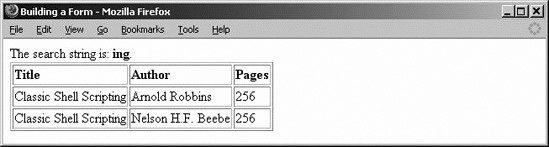 Shortening up the search string to in outputs an additional title, as shown in Figure 10-15. Figure 10-15. Shortening the search string gives more results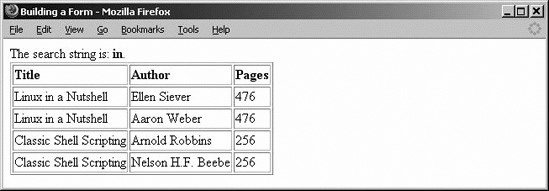 While this code works pretty well, it's starting to get more complicated and intricate than some people are comfortable with. The solution is to break out the HTML from the PHP. |

EAN: 2147483647
Pages: 135