Setting Up a VPN
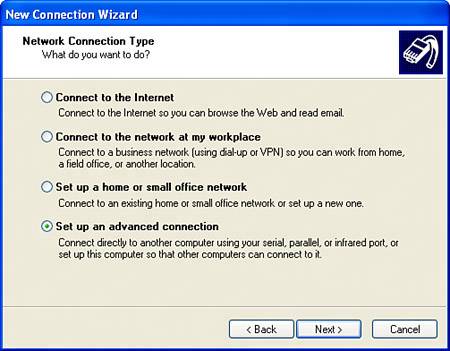
| If you are connecting to a home network using a public Wi-Fi hotspot, using a virtual private network (VPN), which acts as a kind of tunnel through the Internet, is a great way to enhance security. Earlier in this chapter, I explained that using a VPN to isolate the Wi-Fi access point from the rest of the network and to restrict access to authorized users, is a great way to beef up network security. You can buy dedicated remote access servers that provide VPN functionality. For example, the Watchguard SoHo Firebox that I mentioned earlier is a good dedicated box for the SoHo class network that provides firewall and VPN capabilities. You can also buy sophisticated software to enable a VPN. But why pay for it if it is available free? Windows XP Professional already includes a VPN remote access server. To set up your VPN using Windows XP Professional, open the Network Connections window by clicking on Network Connections in the Control panel. Next, click Create a New Connection in the Tasks pane on the upper left of the Network Connections window. The New Connection Wizard will open with a Welcome screen. Click Next to get started. In the Network Connection Type pane of the Wizard, choose Set Up an Advanced Connection as shown in Figure 18.4. Figure 18.4. Choose Set Up an Advanced Connection to create a VPN in Windows XP.
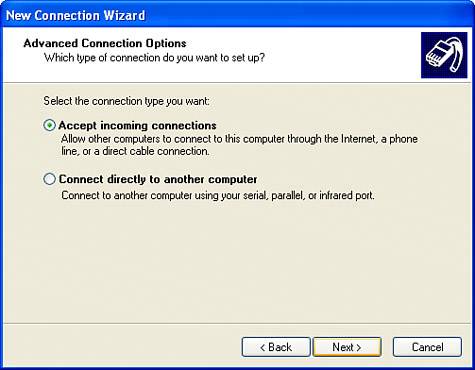
Click Next. In the Advanced Connection Options pane, choose Accept Incoming Connections as shown in Figure 18.5. Figure 18.5. A VPN server should be set to accept incoming connections, or what is the point?
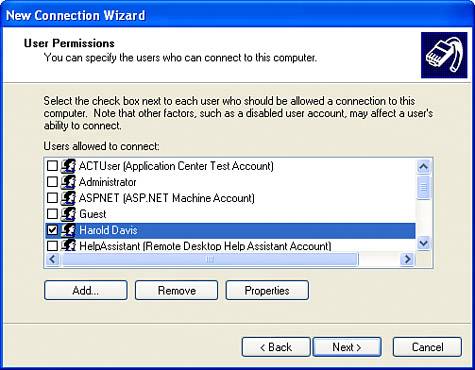
Click Next. The Devices for Incoming Connections pane will probably show your parallel port (LPT1) and nothing else. Don't do anything in this pane. Just click Next to continue setting up your VPN server. In the Incoming VPN Connection pane, choose Allow Virtual Private Connections. Click Next. In the User Permissions pane, shown in Figure 18.6, you can specify the users who have permission to use the VPN. Figure 18.6. In the User Permissions pane, specify the users who can use the VPN.
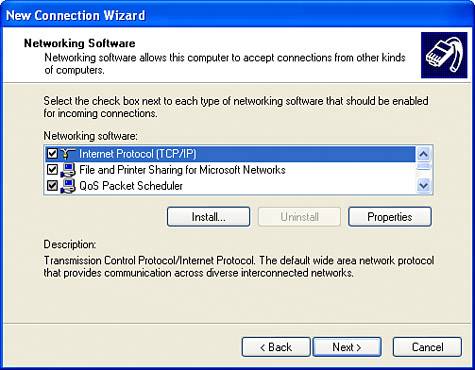
There are a number of good features in specifying the users who can use the VPN in this way. First of all, access to the VPN is authenticated using the authentication controls baked in to the operating system. Second, users who access the VPN have only the privileges on the network that they've been granted. So guests, for example, might only have the right to read certain files (and no right to delete files). Click Next. The Networking Software pane, shown in Figure 18.7, will open. Figure 18.7. Select the networking software that should be enabled for incoming connections.
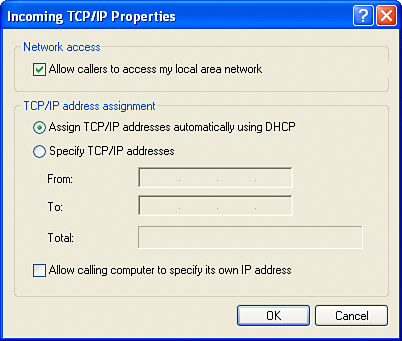
In the Networking Software pane, with the Internet Protocol (TCP/IP) item selected, click Properties. In the Incoming TCP/IP Properties window, shown in Figure 18.8, determine whether IP addresses for VPN clients, or callers, should be assigned by DHCP or provide a scheme for IP assignment. Figure 18.8. In the Incoming TCP/IP Properties window, choose to have IP addresses assigned using DHCP or designate an IP addressing scheme.
TIP Now that the VPN server has been added as an incoming connection, you can edit it by selecting it in the Network Connections window and choosing Properties from its context menu. You don't have to run the New Connection Wizard again. Click OK to close the Incoming TCP/IP Properties window. Click Next to move to the final Wizard pane. Click Finish to create the VPN server, which will now be shown as an incoming connection in the Network Connections window, as you can see in Figure 18.9. Figure 18.9. The VPN server is shown as an incoming connection in the Network Connections window.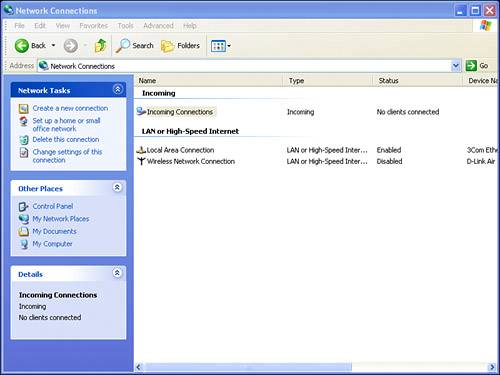 |
EAN: N/A
Pages: 204