Collect Your Settings
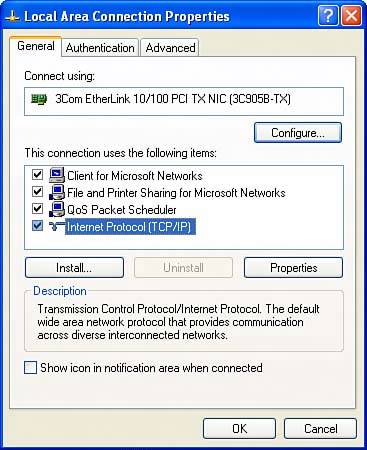
| You need to know the settings you should use to tell the access point how to connect to the Internet. The easiest way to find these settings out is to read them off your computer or to learn them from your ISP. Collecting setting information is a little different in Windows XP as opposed to Windows Me, so I'll show you each. (This works the same way in Windows 2000 as in Windows XP, and Windows 98 is no different from Windows Me in this respect.) Note This book mostly assumes that you are running one of the versions of Windows XP because that is what will be installed on a laptop that uses Intel Centrino mobile technology. The other operating systems are discussed in this chapter because your older, wired computers connected to the Internet might be running themso you might need to use them to collect information. Please be very clear that the point of opening up these dialogs is to see how they are set so you can configure your access point/router to connect to the Internet. It might help to think of your network as having an inward and an outward face. Right now, we are gathering the settings for your network's outward facethe part connecting to the Internet, sometimes called the WAN (or wide area network). The inward face of your network consists of your connected computers, or LAN (local area network). When the access point/router is in place, and it's time to verify settings of the computers within your LAN, all the computers that share access through it should be set to automatically obtain IP and DNS server addresses. (These are obtained from the access point/router.) Windows XPFrom the Windows Start menu, open the Control Panel. In the Control Panel, double-click Network Connections to open the Network Connections, as shown in Figure 13.1. Figure 13.1. The Windows XP Network Connections window lets you select a network connection.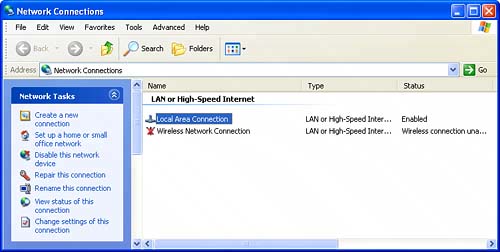 Highlight your computer's connection to the broadband modem. Most likely, this will be something such as Local Area Connection. Right-click the connection and select Properties from the context menu. The Properties window for the connection will open, as shown in Figure 13.2. Figure 13.2. The Properties window for the Local Area Connection shows a number of items.
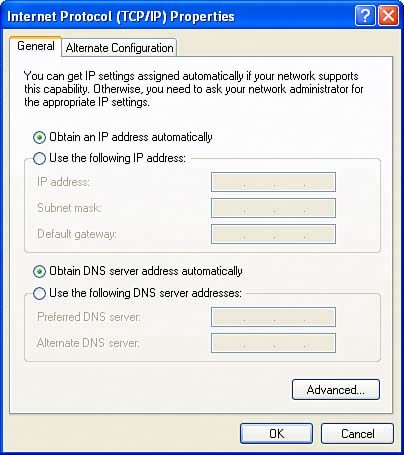
In the items list, choose Internet Protocol (TCP/IP) and click the Properties button. The Internet Protocol (TCP/IP) Properties window, shown in Figure 13.3, will open. Figure 13.3. You can determine your settings for connecting to the Internet using the Internet Protocol (TCP/IP) Properties window for the device that connects to your broadband modem.
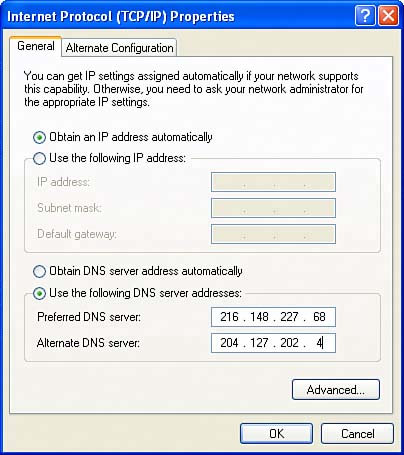
The Internet Protocol (TCP/IP) Properties window is where you should note the settings required for your Internet connection. Quite likely, the settings in this window will be set to automatically obtain IP and DNS server addresses as in Figure 13.3, and you should make note if this is the case. However, it is also common to have to supply specific server addresses to connect to the Internet. Even when the IP address (which represents your particular node on the Internet) is automatically generated, you will often need to specify an address for your DNS serverwhich translates domain names into the numeric IP address necessary to connect to specific websites. TIP If you have a static IP, you should also make note of the Subnet mask and Default gateway being used, which you will also see in the Internet Protocol (TCP/IP) Properties window shown in Figures 13.3 and 13.4. You will need these settings as well. Figure 13.4. It's common to have to specify an address for DNS service.
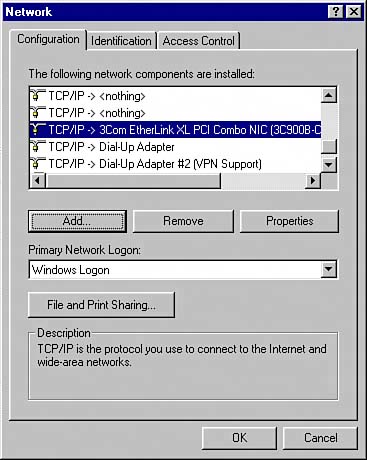
Figure 13.4 shows a computer connected to the Internet using an automatically generated IP address, but with a specified DNS server address. Whatever the settings, you should write them down, taking great care to be accurate about the numbers that compose the address of a static IP or of a DNS server. You will need this information to configure your wireless access point/router. Windows MeDetermining your network settings in older Windows versions works pretty much in the same way as under Windows XP, but the interface is a little different. Open the Network window, shown in Figure 13.5, either by selecting the Network application in the Control Panel (click Start, Settings, Control Panel), or by right-clicking on the My Network Places icon on your desktop and selecting Properties from the context menu. Figure 13.5. The Network window is used to select a combination of protocols and devices.
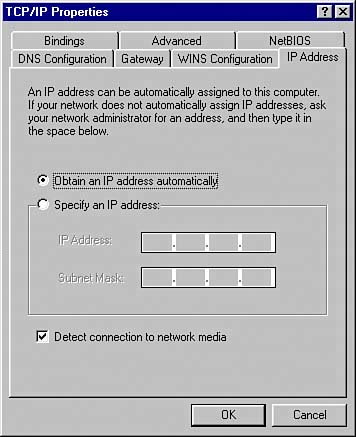
In the Network window (make sure that the Configuration tab is selected), scroll down the list of installed network components until you find an entry in the list that combines the TCP/IP protocol and the device (such as a network card) that you use to connect to the Internet. A typical entry of this sort, shown selected in Figure 13.5, combines TCP/IP with a 3Com Etherlink Network Interface Card (NIC). With the combined protocol and device selected, click the Properties button. The TCP/IP Properties window will open, with the IP Address tab displayed, as you can see in Figure 13.6. Figure 13.6. The IP Address tab of the TCP/IP Properties window shows you the IP settings you should use.
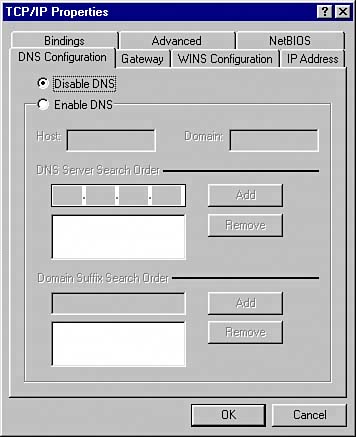
Make a note of the IP settings, and if they are anything other than Obtain an IP Address Automatically, write down the numbers you see. Next, click the DNS Configuration tab, which you can see in Figure 13.7. Figure 13.7. Make note of the DNS settings you can find on the DNS Configuration tab.
If these settings are anything other than Disable DNS, you should make note of the DNS settings because you will need them to configure the access point/router. If you are not obtaining IP and DNS settings automatically, you will also need to note the gateway being used, which you can find on the Gateway tab.
|
EAN: N/A
Pages: 204