| Now that we have a pretty cool way to bring these words on the stage, it's time to start thinking about fading them off. Also, we need a transition to the next scene. Rather than just fade out the letters , I worked to design a unique type of transition. By inserting instances of both the macromedia and shockzone Library symbols into new layers , I can animate them in what I call a split fade. The words appear to split horizontally and fade out as they move away from the original text. -
Add two new layers directly above the macromedia layer. Name them macromedia-up and macromedia-down or something similar. -
Locate the frame where you want the fade off transition to begin. For me, the transition needed to be over fairly quicklyless than a secondand I wanted it to end the scene, so I placed the keyframe about 10 frames from the end. -
Add a keyframe to the macromedia layer and the two new layers in the frame at which the transition is to start. You'll get a filled keyframe in the macromedia layer and two blank keyframes in your new layers, as shown in figure 02:28.
Figure 02:28. 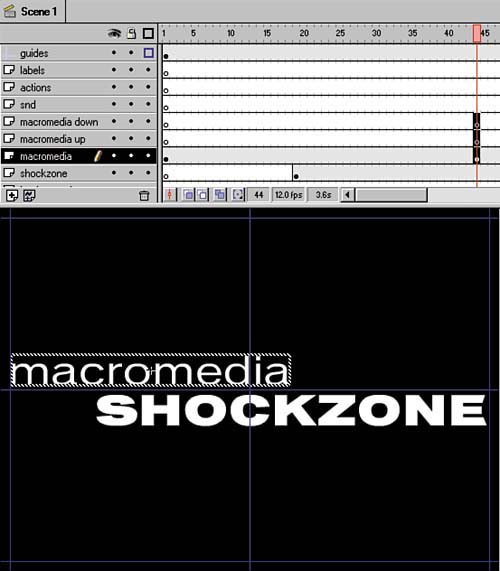
-
Select the new filled keyframe by clicking it. -
With the new keyframe selected, hold down your Ctrl (Cmd) key so that a small plus symbol (+) appears over the keyframe. Mousedown and drag the keyframe from the macromedia layer to the macromedia-up layer. Hold the Ctrl (Cmd) key down while dragging a keyframe to duplicate it. -
Select the keyframe in the macromedia-up layer, choose Modify > Instance or use the keyboard shortcut Ctrl-I / Cmd-I, and set the Alpha to 80%. -
Add another keyframe in the same layer on the second to last frame in the scene. -
With that keyframe selected, move the macromedia text symbol up with the arrow keys so that it almost completely clears the top of the letters as shown in figure 02:29.
Figure 02:29. 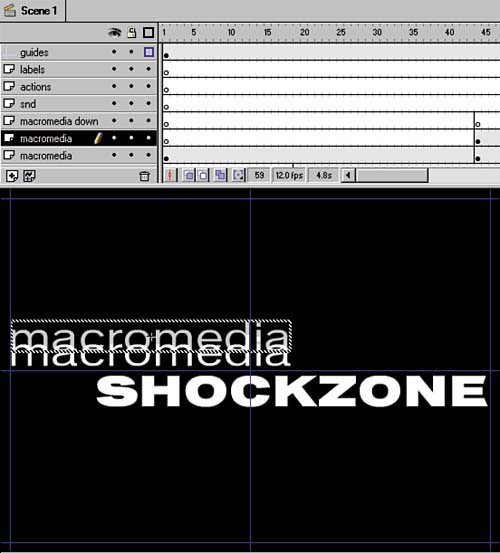
-
While the second keyframe is still selected, change the Alpha to 0% by choosing Modify > Instance or using the keyboard shortcut Ctrl-I / Cmd-I. -
Choose Insert > Create Motion Tween to create a motion tween between the second and third keyframes in the macromedia-up layer (see figure 02:30).
Figure 02:30. 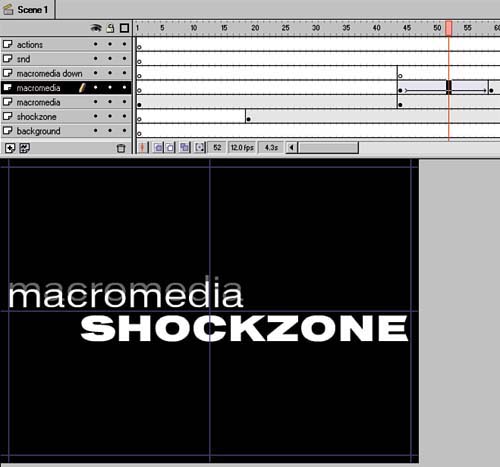
-
Add a blank keyframe in the last frame of the scene by choosing Insert > Blank Keyframe or using the keyboard shortcut F7. -
Repeat steps 611 for the macromedia-down layer, but move the faded symbol down instead of up. -
Add a keyframe in the macromedia layer on the second to last frame in the scene. -
While that keyframe is still selected, change the Alpha of the instance to 0 and the scale to 80%, so that while the macromedia-up and -down layers are splitting and fading, the macromedia layer is fading back. -
Create a motion tween between the first and second keyframes in the macromedia layer. Now, as you move the playhead across the final area of the Timeline, the word macromedia splits and fades out.  |