| With text, I tend to use simple, slow fades, which give me a bit of play in syncing with the audio cue. In Sky, particularly, I stayed away from zoom moves, both because the slower transitions were more in keeping with the work (a poem) and because zooms are very processor- intensive . In Sky, many of the text phrases are handled in a similar three-step process: -
First, I bring the text in just a bit ahead of the audio cue and fade it up from an Alpha transparency of 12 to 100. -
Next, the text moves slightly to one sidearound 10 pixelsso that it appears to be floating. -
Then, while the text is still moving, I reduce the Alpha transparency to 12. -
Why do I bring the text in and out at 12 rather than zero? Again, the two worlds of visual composition and file functionality coincide for me. Limiting the Alpha blends to a smaller range reduces processor usage and leaving the text on-screen, in a very subtle manner, adds texture to the scene and enhances the visual for me. To re-create the use of text phrases in Sky, follow these steps: -
Use the playhead to scrub the audio and find where the phrase is spoken as shown in figure 07:16. (If you don't hear anything as you move the playhead, make sure the sound sync is set to Stream within Frame properties.)
Figure 07:16. 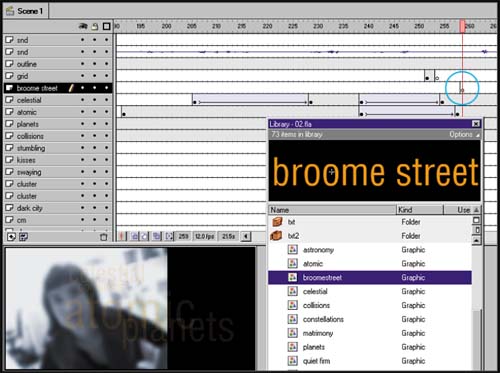
-
Insert a new layer to hold the text element. -
Create a new graphic symbol by choosing Insert > New Symbol or using the keyboard shortcut Ctrl-F8 / Cmd-F8 and label it the same as the text. In my example, I use the phrase Broome Street. -
Use the Text tool to make the text phrase within that graphic symbol. I tend to use a single font with no more than two colors for all the text in a movie. In Sky, the primary variable was text size with a range from 11 to 44 points, while the font I chose was Helvetica. -
In the primary scene, create a keyframe (using the keyboard shortcut F6) just slightly prior to when the audio phrase is spoken. -
Drag an instance of the phrase from the Library to the stage and position where you want it to appear. Time your synced text phrases to appear slightly before the spoken phrase is heard (see figure 07:17).
Figure 07:17. 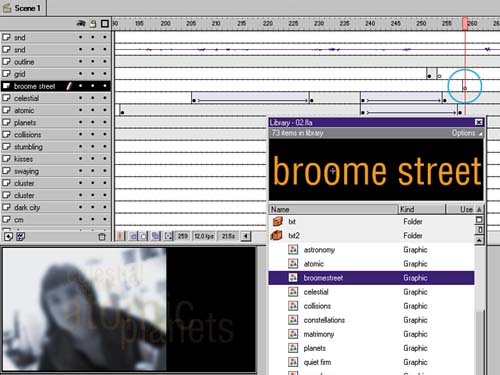
-
Create a second keyframe 20 frames after the initial text keyframe. -
Select the first keyframe, which in turn selects the instance of your text on the stage. Now choose Modify > Instance to open the Instance Properties dialog. -
On the Color Effect tab, reduce the Alpha to 12 and close the dialog. -
While the first keyframe is still selected, choose Insert > Create Motion Tween. The phrase Broome Street is introduced in a slow fade up, syncing perfectly with the voiceover. Now I will leave the phrase onstage until the phrase "Broome Street" has been spoken and then I'll fade it back out, moving the text to the right slightly as it fades out to give it the sensation of floating. |