Working with Dreamweaver MX
| Macromedia has recently introduced Dreamweaver MX, their new development platform for web applications. Dreamweaver MX has visual design and editing capabilities, but also sports one of the best code-editing environments on the market Macromedia's HomeSite. Dreamweaver MX is a slick combination of Dreamweaver, HomeSite, ColdFusion Studio, and JRun Studio. Dreamweaver MX helps you to build robust, database-driven web applications using ColdFusion Markup Language (CFML), Active Server Pages (ASP), JavaServer Pages (JSP), and PHP. For those of you who have always used ColdFusion Studio, Dreamweaver MX includes numerous tools to help you write code efficiently. Dreamweaver MX boasts features such as tag completion and code coloring. It also includes complete reference material on Hypertext Markup Language (HTML), CFML, JavaScript, and more. One of the nicest things about Dreamweaver MX is that it maintains your hand-written code without reformatting it as many what-you-see-is-what-you-get (WYSISYG) editors tend to do. Dreamweaver MX features that ColdFusion developers enjoy include the following:
Dreamweaver MX WorkspaceWhen using Dreamweaver MX in Windows, you are given a choice of two workspace layouts. The floating layout is similar to that of Dreamweaver 4. The one that I want to concentrate on is the integrated layout, which is better-suited to ColdFusion application development. After you've installed Dreamweaver MX on your Windows-based system, you are asked to choose a workspace layout in the Workspace Setup dialog box. The Dreamweaver MX workspace has a HomeSite/Coder-Style option that offers an integrated workspace with panel groups docked within one window. This workspace is similar to HomeSite and ColdFusion Studio, but offers access to all the latest tools to help developers create applications more quickly. Table 2.4 provides an overview of the various interface elements.
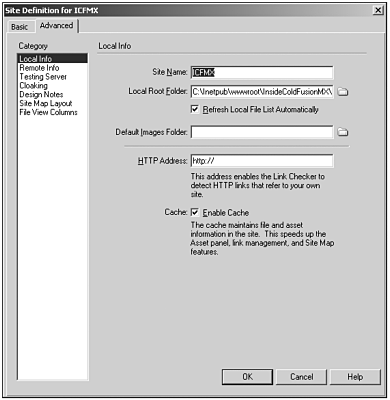
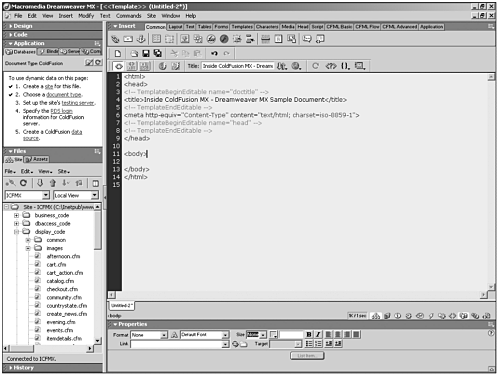
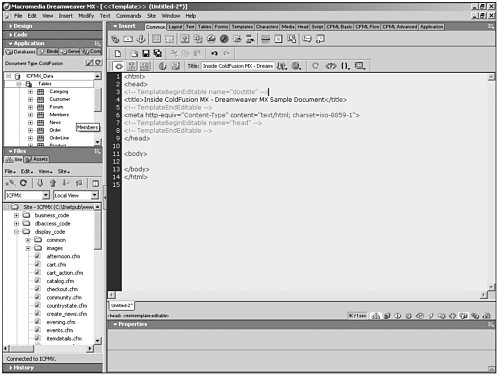
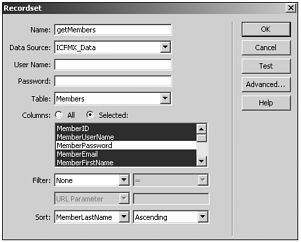
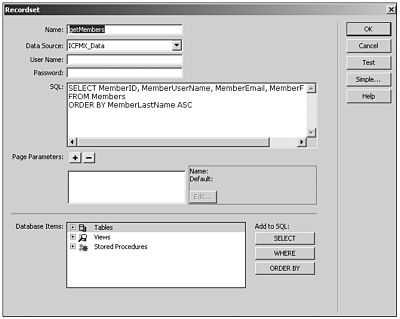
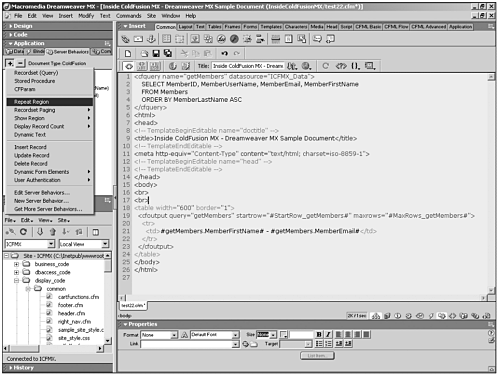
Creating Sites in Dreamweaver MXIf you've used ColdFusion Studio in the past, you might know that you can manage the files that make up your ColdFusion application or web site in a project. Dreamweaver MX manages all the files used in your application. The files are referred to as assets in a site. You can create a site in Dreamweaver MX and populate it with existing files, or you can create an empty site. Either way, before you start developing your application, you must create and specify a Dreamweaver MX site (see Figure 2.1). The site is merely a way to keep your files organized and to maintain their relationships to each other. Unlike ColdFusion Studio, Dreamweaver MX automatically tracks and maintains links and manages your files. Figure 2.1. Creating a Dreamweaver MX site with the Site Definition Wizard. To create a new site in Dreamweaver MX, select Site from the Main menu, and then select New Site. The Site Definition dialog box appears and enables you to fill out the remainder of the site configuration options by using a convenient wizard, as shown in Figure 2.1, or by selecting the Advanced tab and filling out your setting manually, as shown in Figure 2.2. Figure 2.2. Creating a Dreamweaver MX site manually using the Advanced tab. Connecting to Datasources in Dreamweaver MXTo connect to a ColdFusion datasource within Dreamweaver MX, you must have that datasource defined within the ColdFusion Administrator. You create a datasource within ColdFusion Administrator in the same way that you have in previous versions of ColdFusion. Dreamweaver MX provides you with tools to help you access ColdFusion Administrator. In Dreamweaver MX, you have a Databases panel within the Application panel group. In the Databases panel, click the Modify Data Sources icon in the top-right corner. This launches the ColdFusion Adminstrator in a new browser window and enables you to create your datasource. For more information on creating ColdFusion datasources, check out Chapter 4, "Fundamentals of ColdFusion Development." Figure 2.3 shows the Database panel in Dreamweaver MX. Figure 2.3. Creating a datasource connection in Dreamweaver MX. After you've created the datasource in ColdFusion Administrator, you need to connect to it from Dreamweaver. To connect to your datasource, create a new ColdFusion template or open one that already exists inside your site. Note One of the nice things about Dreamweaver MX is that the tabs on the Insert bar change according to the type of document on which you're working. If you create a new HTML document, you have access to only the tabs that apply to plain HTML. If you create a new ColdFusion document, you see the tabs for CFML Basic, CFML Flow, and CFML Advanced. After you've created your new datasource, you should see it appear in the Databases panel, although you might have to refresh the view of that panel. You then can expand your view of that particular datasource and its tables. You can even view its data as shown in Figure 2.4. If you cannot see any datasources, you can click each required step that appears within the Databases panel. These steps help you walk through the processes required to make sure that you can interact with your backend data. Figure 2.4. Viewing a datasource in Dreamweaver MX . Creating Queries in Dreamweaver MXThe typical way that we looked at creating queries in ColdFusion Studio has changed a lot with Dreamweaver MX. In ColdFusion Studio, we just right-clicked a database table within our datasource and selected New Query. Up would pop the SQL/Query Builder. We'd drag and drop columns into the structured query language (SQL) statement, define our criteria, and then save our query. Then by pasting that query code into our ColdFusion template, we would create a result set. Dreamweaver MX takes a bit of a different approach. In Dreamweaver MX, we look at all the possible sources of dynamic content. Simply put, a dynamic content source is a block of stored information that you access for evaluation or comparison processing and display within your web page or application. This includes information that is stored in the database as you might expect, but it also includes form structures with values (perhaps submitted by an HTML form), server objects, and values from JavaBeans. Any of these types of content sources can be added to Dreamweaver MX's Bindings panel. It is probably most common that we use a database as our content source. In Dreamweaver MX, a query is referred to as a recordset. A recordset is the collection of data that is returned from the database. It might contain all the rows and columns that make up the complete database, but it can be (and should be) refined to include only the data that you need. You can create a recordset by clicking the plus (+) button within the Bindings panel of the Application panel group. You can create your recordset without writing any SQL code in the default Simple view (see Figure 2.5), or you can write your own advanced SQL code in the Advanced view (see Figure 2.6). After you save the recordset, it is inserted into your ColdFusion template and saved to your Bindings panel for access later. Figure 2.5. Creating a Dreamweaver MX recordset in Simple view. Figure 2.6. Creating a Dreamweaver MX recordset in Advanced view. Displaying Dynamic ContentOf course, Dreamweaver MX also makes it easy for you to include dynamic content in your ColdFusion templates. You can add the dynamic content from your recordset to replace static text strings or to fill in the values for HTML or CFML attributes and more. After you've created your recordset, you can add elements of it to your application pages by simply selecting the column name from the recordset and dragging it into your code. You then drop it at the insertion point where you want the value to appear. Once you insert a dynamic content call into your page template, the reference to that content is added to the Server Behaviors panel, which is still in the Application panel group. They are now considered server behaviors. You can edit a server behavior by double-clicking the listing within the Server Behaviors panel. When you double-click them, the same dialog box that you used to build them appears. You then can make your changes within that dialog box. When you make your change to that server behavior, it automatically is reflected within the page that you're editing. If you choose to remove one of the server behaviors in your template, you can select the code within the template and press the Delete key, or you can select the server behavior in the Server Behaviors panel and click the minus (-) button. Dreamweaver MX lists server behaviors in the order in which they appear within the template. In the event that the same server behavior appears in a template more than once, you can distinguish between them by clicking the server behavior and checking which sections of code are highlighted. Dreamweaver MX has several predefined server behaviors that you can use. One of them is called the Repeat Region. This creates your typical CFOUTPUT query loop. In addition to creating this code, there are other options to enable you to create a next/previous record navigation just by filling out a few optional items. For those of you who have used custom tags to take care of this in the past, you know that it is a time saver? In Figure 2.7, you can see that Dreamweaver MX includes more built-in server behaviors. Figure 2.7. Server behaviors in Dreamweaver MX . You can also create and edit your own custom-built server behaviors and add them to the Server Behaviors panel. Debugging in Dreamweaver MXYou can debug your ColdFusion application code in Dreamweaver MX. If you're using Dreamweaver MX as your testing server, you can code, test, and debug the ColdFusion template without ever leaving Dreamweaver. Check out the code in Listing 2.1. You should notice that we have two CFOUTPUT closing tags. Listing 2.1 Debugging ColdFusion Code in Dreamweaver MX<cfset variables.myname="Neil Ross"> <html> <head> <title>Inside ColdFusion MX - Dreamweaver MX Debugging</title> </head> <body> <cfoutput>My name is #variables.fullname#</cfoutput></cfoutput> </body> </html> Of course, this won't work. In Figure 2.8, we can see how Dreamweaver MX handles the error. Figure 2.8. Debugging in Dreamweaver MX. To debug a page in Dreamweaver MX, follow these simple steps:
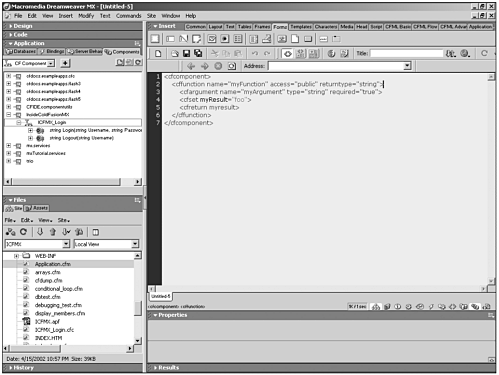
ColdFusion Components in Dreamweaver MXOne of the hottest new features of ColdFusion MX is that of ColdFusion components (CFCs). Though we do not go into a lot of detail here about CFCs (we do later in Chapter 6, "ColdFusion Components"), let us at least introduce you to them and how they can be created and accessed within Dreamweaver MX. CFCs enable you to wrap application or business process logic into self-contained units. CFCs take encapsulation further than do ColdFusion custom tags. They yield nicely encapsulated, resuable segments of code. In addition to providing another means for code reuse, CFCs also provide a great way to create web services. CFCs are written in CFML and can encapsulate entire segments of business logic within a web application. CFCs are the preferred unit for business logic now, and ColdFusion custom tags should be used for encapsulation of presentation elements. Dreamweaver MX enables you to create CFCs visually or by editing the CFC code directly. To create a CFC visually within Dreamweaver MX, follow these simple steps:
As noted, we cover the real details of CFCs in Chapter 6. Dreamweaver enables you to view CFCs and to check out any CFC defined within your site. Dreamweaver reads, interprets, and displays information about the CFC in an easy-to-navigate tree structure within the Components panel. You can also check out each CFC's functions and arguments. In addition, you can check out the properties of any CFC function that serves as a web service. Figure 2.9 shows the Components panel and available CFCs. Figure 2.9. Viewing CFCs in Dreamweaver MX. To view CFCs in Dreamweaver MX, follow these steps:
You can edit a CFC in Dreamweaver MX by opening the CFC package and selecting the CFC that you want to edit. Right-click that CFC and choose Edit Code from the menu that appears. If you chose the CFC itself, the CFC template opens. If you chose to edit a particular function, the CFC template opens with the code that comprises the selected function highlighted. Remember these tips about working with CFCs in Dreamweaver MX:
|


EAN: 2147483647
Pages: 579
- Assessing Business-IT Alignment Maturity
- Linking the IT Balanced Scorecard to the Business Objectives at a Major Canadian Financial Group
- Technical Issues Related to IT Governance Tactics: Product Metrics, Measurements and Process Control
- Managing IT Functions
- Governance Structures for IT in the Health Care Industry