Cinema Tools
| Cinema Tools is your metadata tracking database, which allows you to edit film transferred to video and return to film to conform the work print and negative. Cinema Tools works closely with Final Cut Pro to track more than your film metadata; it also tracks duplicate frames, opticals, and titles. Note Duplicate frames are any additional frames of negative that must be optically reproduced. Opticals include transitions and motion effects. You need to account for duplicate frames, opticals, and titles in the final film conform because they can increase the budget. Although you can create a new database and enter information manually in Cinema Tools, you will usually work with a telecine event log to kick-start your database. Your typical workflow with Cinema Tools and Final Cut Pro will include the following steps:
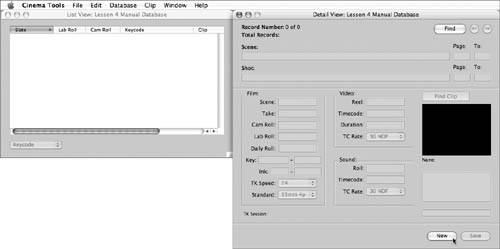
The DatabaseThe Cinema Tools database is at the center of your project. You'll use it to track all your elements. Your database must include the camera roll, daily roll or lab roll numbers, and the edge code. And it must have a clip connected to it or have video reel or video timecode numbers. Cinema Tools uses these values to produce a cut list. If a record is inadequate, Cinema Tools will flag it in the cut list as <missing >; you can produce a missing elements list through Cinema Tools. After you identify missing elements, you can update your database within Cinema Tools. Your Cinema Tools database can be detailed or streamlined. You can work in many different ways, by scene-and-take or camera roll. You can add, delete, and merge databases. In the next section of this lesson, you will work with a detailed database. You'll use a project of your own to practice importing a log from a telecine session and add new records. Import a Telecine LogCinema Tools supports the telecine log formats of ALE, FTL, FLX, and ATN. Although you can import a telecine log directly into Cinema Tools, importing the log through Final Cut Pro is easier because the offline clips from the telecine log will be imported into Final Cut Pro simultaneously.
You can also import your telecine log directly from Cinema Tools:
Tip Save all your databases together in a folder titled by project name (for example, SU&FR_Project_databases). Be methodical and organized; back up your databases together with your Final Cut Pro projects daily. Although you can export a standard batch list, export an XML batch list instead. An XML batch list is incredibly useful because it gives you access to all the film metadata that's viewable in Final Cut Pro. (See Lesson 5 for more information on XML, eXtensible Markup Language.)
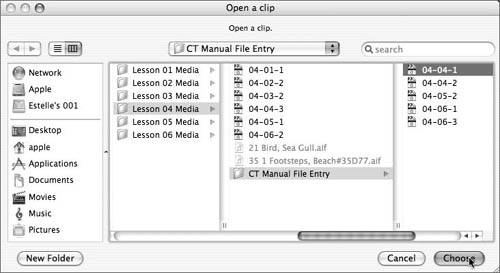
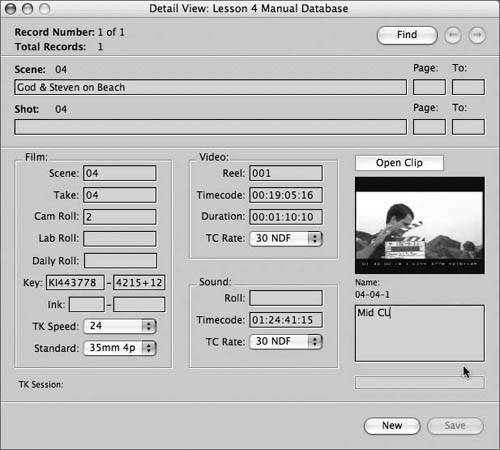
Tip You can view the film metadata directly in the Browser or through the clip Properties window. Manual Database InputIf you have no transfer logs, you can manually enter information into your Cinema Tools database. You will need a record for every clip that has either non-continuous timecode or key numbers. For scene-and-take, since each take may jump key numbers, you create a record for every take. For camera-roll transfers, since the key number runs continuously, you need one record for the entire clip. Although it can be tedious, entering information manually into a Cinema Tools database is easy, especially if you have the key numbers and video timecode burned into the frame. Note In these steps, you are viewing the clips directly in Cinema Tools. Typically, entering information into a Cinema Tools database would be done prior to capture, and you would use a deck to view your footage. However, it's useful to know that you can create a database no matter what approach you use.
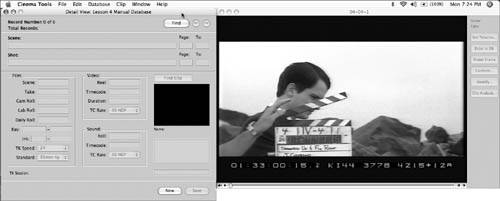
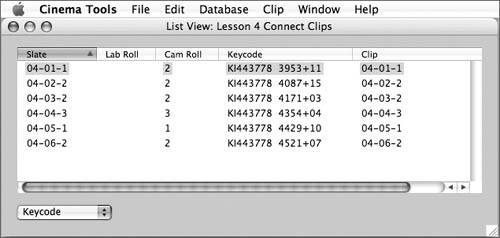
In this exercise, you manually entered minimum information. Of course, there are many details you left out that you would normally enter, such as the Camera, Daily, Lab, and Sound Roll numbers. The sound timecode information could also be entered from the clapboard timecode. Entering additional information enables greater tracking capabilities and increases your conform accuracy. Note If you are only working with film negative, you won't need to enter the Daily Roll or Ink numbers. Entering a Daily Roll and Ink number applies only to film projects that print a work print. Tip If you want to include the sound roll and timecode information in the preceding exercise, you can do so by adding it to each record. The sound roll number for these clips is 01. Add the sound timecode from the clapboard timecode reading at the head of each clip. Connect Clips on CommandYou can connect multiple clips to your database by using the Connect Clips command. This is especially useful because you can automate the process of connecting. You can use the Find command to find selected records to connect, or you can use it to show all records.
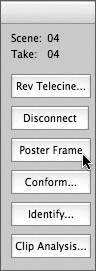
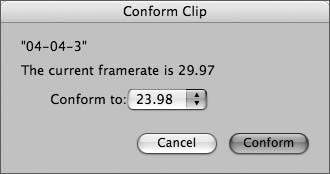
Tip You should not rename or move a clip once it is connected. If you do, the clip-to-database link is broken. As long as you have not renamed a clip, you can fix a broken link by using the Reconnect Clips command. The Reconnect Clips command works in the same way as the Connect Clips command: choose Database > Reconnect Clips, and navigate to the location of your clips. Prepping the ClipsPrior to editing, you need to decide exactly how you will treat your footage. You have two Cinema Tools features to consider: Conform and Reverse Telecine. ConformThe Conform feature provides a great way to correct video clip frame duration errors or change the frame rate of a clip. Every QuickTime file has a frame duration setting that tells each frame how long to display, such as 1/25th of a second for PAL. Occasionally, this frame duration during capture is set to inconsistent values. On playback, visually you will not notice the difference in the clip. However, if the clip has inconsistent frame durations, you will get errors in your cut list or errors during a reverse telecine. In these cases, you would simply reapply a clip's frame rate to reset the frame duration. Tip You can check and mark long frames in Final Cut Pro. From the Browser, simply select the clip or clips you wish to check and choose Tools > Long Frames > Mark. Any clips that have long frames will be marked, and you can correct them by using the Cinema Tools Conform feature. Once you have completed the conform, you can clear the marked long frames by choosing Tools > Long Frames > Clear. You can also use the Conform feature to change a clip's frame rate, choosing among 23.98, 24, 25, 29.97, and 30 fps. If your clip contains video and audio, the audio rate will be adjusted to maintain sync. You can apply the Conform feature to a clip with or without a database record.
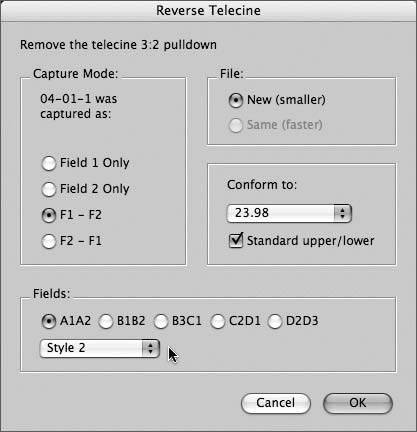
Tip You can batch conform all files in the same directory. Choose File > Batch Conform, navigate to the directory containing the clips you want to conform, select a single clip, and click Choose. The batch conform will be applied to all clips contained in the same directory. Tip Using Final Cut Pro 5, you can conform 25 fps to 24 fps directly from Final Cut Pro. From the Browser, simply select the clip you wish to conform from 25 fps to 24 fps and choose Tools > Conform 25 to 24. Reverse TelecineDuring your telecine, you converted your 24 fps film to 30 fps video. If you're planning to edit your project at 24 fps, you need to apply the Reverse Telecine feature. This feature, which reverses the 3:2 pull-down, applies to NTSC transfers only. It works by removing the extra fields that were applied during your telecine transfer. Tip Allow for processing time when performing a reverse telecine in Cinema Tools. For a large number of clips, set up a batch reverse telecine and let your computer run overnight.
Tip Before you apply your reverse telecine settings on the entire film, check your results on a single clip to make sure there are no errors. After your first clip has finished processing, step through it frame by frame. You should clearly see the A, B, C, D sequence. Each frame should be fully visible, legible, and sequential. If this is not the case, disconnect the clip from your database, and reconnect the record to the original clip. Try applying a different style from the Field Style pop-up menu or deselecting the Standard Upper/Lower check box. Once you have successfully performed a reverse telecine on a single clip, you can batch telecine the remaining clips. This is useful because you'll be able to apply your settings to an entire directory of clips. Choose File > Batch Reverse Telecine, navigate to the directory containing your clips, check your Reverse Telecine settings, and click OK. You will notice that Cinema Tools will place three new folders and one text file in the original directory: one folder containing your original clips, one folder containing your reversed clips, one folder containing any skipped clips, and a text file containing a log report. Once the batch reverse telecine is complete, you will need to reconnect your database records to the new reversed clips. Tip Using Final Cut Pro 5, you can perform a Cinema Tools reverse telecine directly from your Final Cut Pro project. Simply select the clip you wish to reverse telecine and choose Tools > Cinema Tools Reverse Telecine. |
 The Import XML dialog opens.
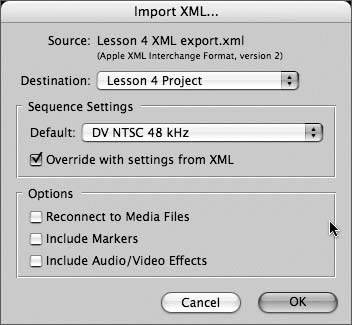

 Once you have finished entering information in the database, close the Clip window and repeat steps 5 through 13 to complete the remaining clips.
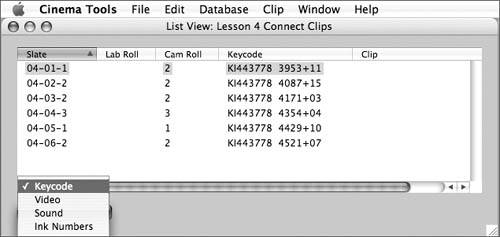

EAN: N/A
Pages: 205