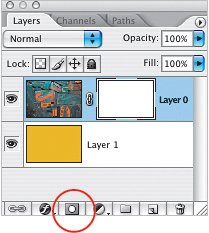
Creating a Layer Mask
| In this example, I double-clicked on the Background layer and renamed it (this is necessary since you cannot add a layer mask to the Background layer). Then I added a new layer, filled it with a color, and then clicked-and-dragged the new layer below my image layer. By clicking on the Add Layer Mask icon at the bottom of the Layers palette, a layer mask was added to the image layer. At first nothing changes since, by default, the layer mask is added in Reveal All mode, which means the entire layer is visible. By painting on the layer mask with black, I was able to hide portions of the image layer.
One of the main principles of using layer masks is the role of black and white: black hides, white reveals. (And as we'll see, shades of gray will have a partial effect, making pixels somewhat hidden or somewhat visible, depending on the shade of gray.) 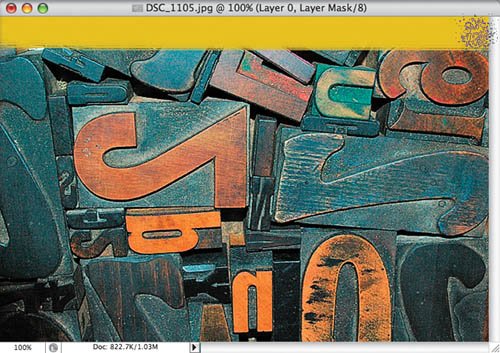 Another way to create a layer mask is to start with a selection. Here I used the Rectangular Marquee tool to select a large portion of the image. As soon as I click on the Add Layer Mask icon, the selected area remains visible while the areas that were not selected are hidden. Another way to think of this would be that the selected area was filled with white while the non-selected area was filled with black. 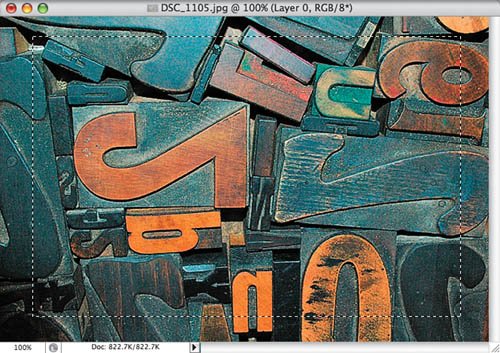 Note Useful shortcuts when working on a layer mask: Press X to swap between the black and white Foreground and Background color swatches. Shift-click on the layer mask thumbnail to hide it (and just click on it to show it again). Option-click (PC: Alt-click) on the layer mask thumbnail to view the layer mask itself. If you're painting on the layer mask: Press the Right Bracket key (]) to increase the brush size. Press the Left Bracket key ([) to decrease the brush size. Press number keys 19 to change the brush opacity from 1090%; press 0 for 100%. 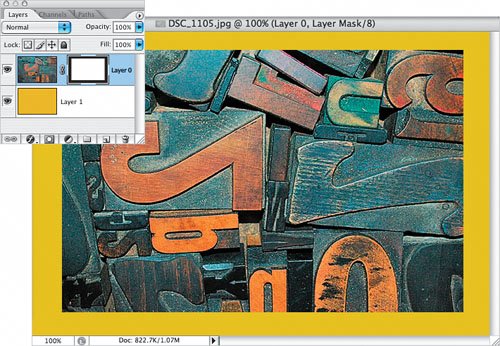  |