Drawing Clouds
We now have the basics of our background finished and will move on to add some clouds, again using a step-by-step approach:
-
Create a new layer (see Figure 17.20).
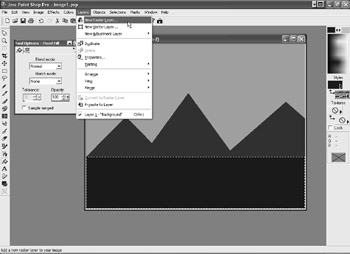
Figure 17.20: Create a new layer for our image. -
The layer default properties, seen in Figure 17.21, can be left as is, so click the OK button.
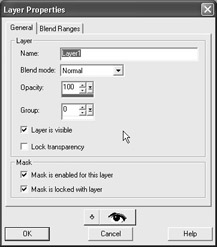
Figure 17.21: The default properties are OK.
Nothing appears to have changed, but we are now on the second layer. You can verify this by looking at the layer information in the image heading seen in Figure 17.22 or by attempting to edit the first layer contents at this time. As an example, you could try to erase some of the mountains.
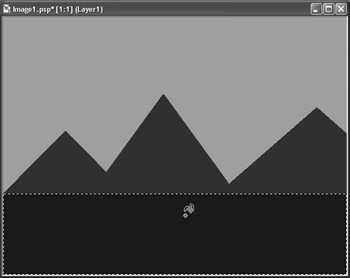
Figure 17.22: You can verify the existence of the new layer.
-
Choose the Preset Shapes tool. Select the ellipse.
-
Draw a series of three ellipses, referring to Figure 17.23.
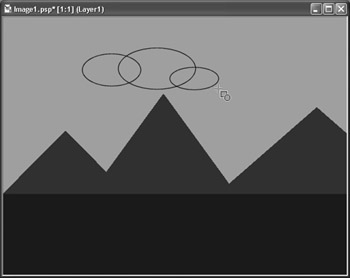
Figure 17.23: Draw a series of ellipses. -
Choose the Magic Wand tool and click inside the three ellipses to select the layer areas that are not inside the cloud (see Figure 17.24).
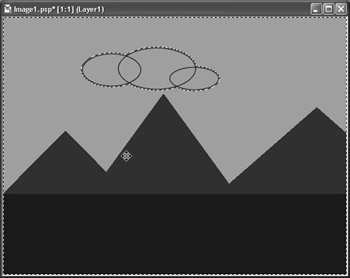
Figure 17.24: Select the ellipses with the Magic Wand.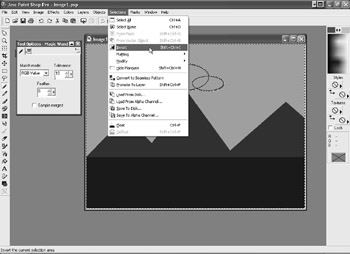
Figure 17.27: We need to expand the selection. -
Choose Selections, Invert (see Figure 17.25).

Figure 17.25: We need to invert our selection.We now have the entire cloud selected (see Figure 17.26).
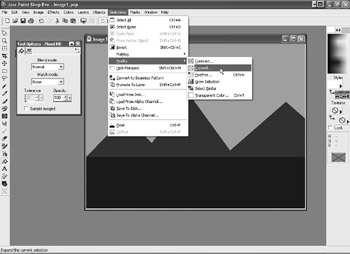
Figure 17.26: The outside of the entire cloud is now selected. -
Choose Expand to make sure we get any areas on the edge that might contain a small amount of black from drawing the outline of the ellipses (see Figure 17.27).
-
Expand the selection window and choose 5 pixels (see Figure 17.28).
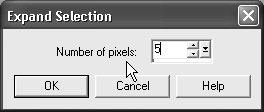
Figure 17.28: We’ll use 5 pixels for our width. -
Choose Flood Fill and fill with white color (see Figure 17.29). The cloud is now finished.
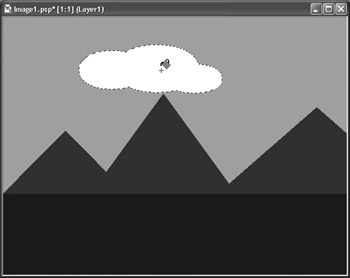
Figure 17.29: Fill with white.
Because it is on a layer by itself, we can now position the cloud anywhere on the image with the Mover tool (see Figure 17.30). Select the tool and click and drag the image to position the cloud in the upper right using Figure 17.31 as a guide. Our selection is still visible on the figure, so we can use the Fill tool to create another cloud in the position where the original one was located (see Figure 17.32). Fill the inside of the selection again to create the cloud (see Figure 17.33).
Figure 17.30: Position the cloud with the Mover tool.
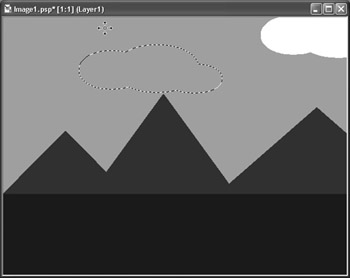
Figure 17.31: This would be an approximate location.
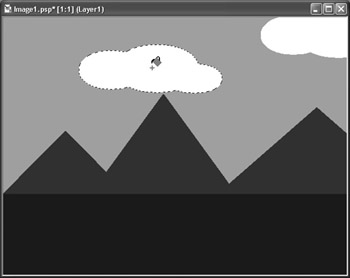
Figure 17.32: We’ll create another cloud.
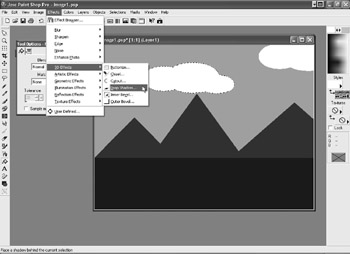
Figure 17.33: Fill the cloud again with white.
At this time, save the drawing as a Paint Shop Pro file (name it Chapter 17.PSP) so that you can reopen the file at a later date and edit the layers. Next, you can save a copy as a BMP file. A window will appear (see Figure 17.34) to remind you that you’ll lose all layer information. Remember to always keep your original in PSP format so that you can edit it and save copies of the items for the respective packages you’ll use them in. You’ll see in a minute why this can be so important.
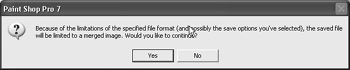
Figure 17.34: A reminder will appear whenever you save an image outside the default PSP file format.
EAN: 2147483647
Pages: 168