Chapter 8: Multimedia Fusion Editors
In the next few chapters, we are going to build our first game step by step. Once you have been led through the process of making a mock 3D game, you have the basis you need to go further into game development. Much of what you learn here will apply to more complex games and tools later on. You will find it easier to pick up new software and tools and learn them after having learned one application.
We’ll begin this chapter by getting to know Multimedia Fusion, or MMF, as it is commonly called. Once you are comfortable with MMF, you will be able to use it to produce games and interactive applications with ease. MMF is a very powerful 2D/3D game-creation package. It contains state-of-the-art animation tools, sound tools, multimedia functions, and fabulous game structuring routines that make it very easy to produce your own games with no programming.
Quick Guide to MMF
MMF is built around three main editing screens that allow you to control the main aspects of your game. The Storyboard Editor is the screen that allows you to decide the order of the levels in the game. The Level Editor allows you to decide which characters, backgrounds, and objects to put in your level and how to animate them. The Event Editor allows you to assign the actions and responses that will make your game come alive.
Let’s start MMF and take a look at some of those windows. When you first open MMF from the shortcuts that were created during the installation, a window will appear, reminding you that it is the demo version (see Figure 8.1). You can click Continue after reading through this information. The main interface of MMF now appears, and a Tip of the Day window is usually visible, an example of which can be seen in Figure 8.2. Reading through these tips can offer some insight into various aspects of MMF development.
Figure 8.1: Demo information is displayed on startup.
Figure 8.2: Tip of the Day window.
You can close the Tip of the Day to display the interface of MMF (see Figure 8.3). As you can see along the left side of the window, a smaller window is visible, which is called the Multimedia Fusion Library window. You can close this window by clicking the small X at its upper right. We will prefer to open this window if needed rather than allowing it to consume so much free space all the time. Figure 8.4 represents the much larger space that we now have to work with.
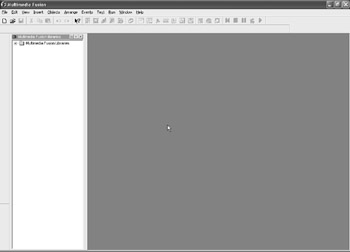
Figure 8.3: The main interface.

Figure 8.4: We have gained a considerable amount of space by closing the window.
Click New from the File menu (see Figure 8.5) to begin creating your first application. You will be presented with a window, which appears in Figure 8.6 and allows you to choose what you are creating. From this window, you can choose Application and then click OK.
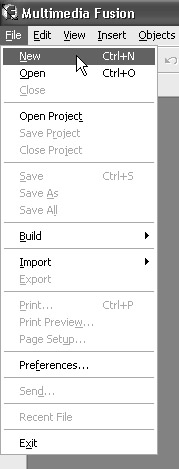
Figure 8.5: Creating a new application.
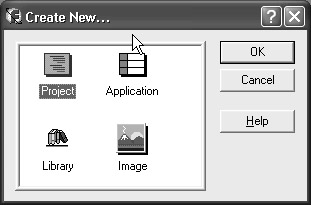
Figure 8.6: Choose Application from this window.
Our MMF interface has now changed dramatically. If you refer to Figure 8.7, you can see two new windows that are at our disposal. On the left is the Project Explorer, which provides an easy way to navigate through the application. On the right is the Storyboard Editor, which displays a visual overview of the application in the form of a thumbnail and also allows you to quickly access every frame a game uses. Let’s take a more in-depth look at these and all the editors we are going to use. The following descriptions should give you a better understanding of the editor screens, and you can refer to the help file included with MMF if you would like additional information.
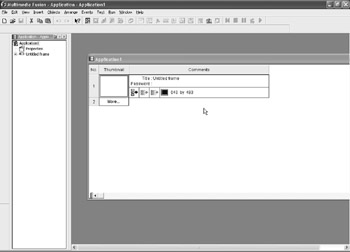
Figure 8.7: The interface has changed.
Storyboard Editor
Most games are composed of several different levels, and this screen allows you to add levels to your game, copy levels, and change the order of the levels by moving them around. This is also where you decide on the size of your playing area, add and edit professional-looking fades to each level, and assign passwords to enter each level (see Figure 8.8).
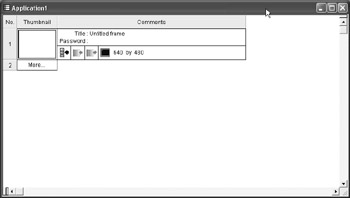
Figure 8.8: The Storyboard Editor.
Frame Editor
The Frame Editor (see Figure 8.9) is the initial “blank page” for each of your levels. It displays your play area and is where you put background objects and the main characters of your game. You generally access this screen from the Storyboard Editor screen.
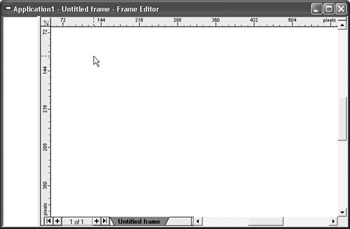
Figure 8.9: The Frame Editor.
This is also where you can create your own animated objects, text, and other object types. Basically, all the objects that you want to play with have to be placed on this screen first before you can start manipulating them. It is also here that you change the animation and movement of objects and change the basic setup of all your objects. You will frequently find that, before you can manipulate an object from the Event Editor, you must make sure it is set up correctly on this screen.
Event Editor
This is where your game will really come to life. The actions you assign here are called interactivity. Once you become experienced with MMF, you will find that this editor is where you will spend most of your time. It is here that you decide all the events in your game.
The Event Editor (see Figure 8.10) is set up like a spreadsheet, where you can assign relationships to each object in your game. This setup makes game-building easier because you can visually see what happens in your game. Examples of the gameplay you can build are aliens colliding with a spaceship; the main character collecting a power-up or getting hit by a missile; setting a time limit; or assigning a sound event. You can create an explosion, destroy an object, add to the score, subtract a life, or even add complicated events such as changing the direction of a character or randomly moving object.
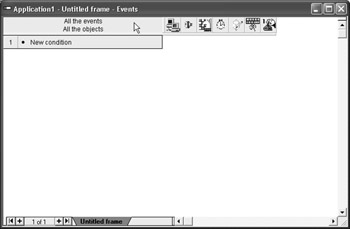
Figure 8.10: The Event Editor.
That was the quick tour of MMF. We saw that a game is built in MMF in three stages: First you lay out the flow of your game in the Storyboard Editor, then you lay out your level and its objects in the Frame Editor, and finally you use the Event Editor to assign relationships and behaviors to your objects.
EAN: 2147483647
Pages: 168