| As configured by the wizard, your dial-up connection is properly set up for most Internet service providers. The wizard doesn't do a good job of setting up the area code and call-waiting settings, so you may want to manually adjust these. It's unlikely that you would need to change any of the other settings, but just in case, and because I know you're curious, I will walk you through the various settings and properties that are part of a dial-up connection. (I'll explain dial-up connection properties in more detail in Chapter 18, "Windows Unplugged: Remote and Portable Networking.") You can view a connection's properties by selecting Start, Control Panel, Network and Internet Connections, Network Connections. This will display all dial-up connections you've configured (see Figure 8.7). Right-click the icon for your dial-up connection and select Properties. You'll see five tabs as shown in Figure 8.8, which I will run through in the order in which they appear. Only a few settings ever need to be changed for an ISP connection. Here is a list of the ones that do matter: The General tab contains modem properties and the ISP telephone number. If you travel with your computer, check Use Dialing Rules, be sure the area code is set correctly and is not entered in the Phone Number field, and click Dialing Rules if you want to enable Call Waiting control. If you have multiple modems, you can choose at the top of this page which of one or more of these modems will be used for this particular connection. Using the Configure button for the modem, you can set the maximum speed used to communicate from the computer to the modem. For external modems connected via a COM port, if you don't have a special-purpose high-speed serial port, you might want to reduce this speed from the default 115200 to 57600. Using the Alternates button for the telephone number, you can add multiple telephone numbers for your ISP, which will be automatically tried, in turn, if the first doesn't answer. On the Options tab, you can change the time between redial attempts if the connection fails. You can select a time to wait before hanging up the line when no activity occurs. By doing so, you can help cut costs if you pay an hourly rate to your ISP, by having your computer disconnect itself from the Internet if it detects that you've not been using your connection for a set amount of time. To maintain a permanent or nailed-up dial-up connection, check Redial If Line Is Dropped and set the disconnect time to Never. (Do this only with the consent of your ISP.)
The Security tab controls whether your password can be sent in unencrypted form. It's okay to send your ISP password unsecured. Don't check Automatically Use My Windows Login Name and Password if you use a commercial ISP. That's only for connections to corporate networks. The Networking tab determines which network components are accessible to the Internet connection. If you're dialing in to a standard ISP, you should leave File and Printer Sharing… unchecked. You'll learn more about that in Chapter 21. On the Advanced tab, you can share this dial-up connection automatically with other users on a LAN. (You'll learn more details on that in Chapter 19). You can also manage the Windows Firewall, which protects your computer from hackers while you're connected. For details on configuring the Windows Firewall, see Chapter 21, "Network Security." Click OK to save your changes.
Figure 8.7. Network Connections shows icons for each of your dial-up accounts and high-speed links. 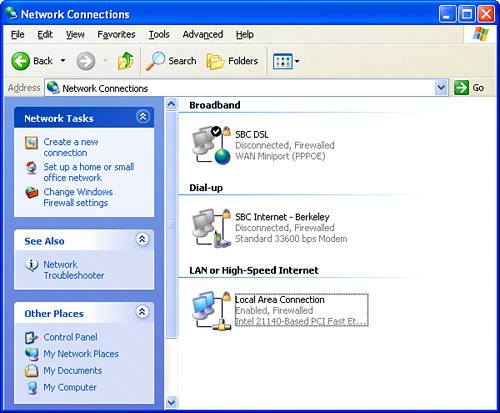
Figure 8.8. A dial-up connection's Properties page let you change dialing rules, set network parameters, and manage the Windows Firewall. 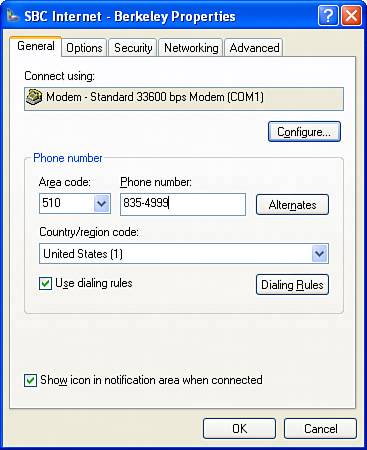
CAUTION While I strongly recommend that you read the Windows Firewall section in Chapter 21, if you don't, at least be sure to check the Network Connections window to ensure that the Windows Firewall is enabled on every connection icon that is used to connect directly to the Internet. 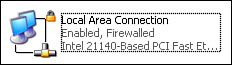 | Each Internet connection icon should say "Firewalled" as in the example shown here. If it doesn't, click Change Windows Firewall Settings in the Network Tasks list. Be sure that the "On (Recommended)" choice is selected. Select the Advanced tab, and be sure that each of the direct Internet connection is checked. |
For home and small office networks, all of your network connection icons can and should be firewalled.
|