Introducing the Dev-C Compiler
Introducing the Dev-C++ CompilerCompilers today are more than just programs that translate source code into object code. They are complete integrated development environments (IDEs). With compilers like Dev-C++, you can write, compile, link, and debug your programs all in one development environment. So before we get into how to write C++ programs, let's take a brief look at Dev-C++. At this point, I assume that you've installed Dev-C++ on your computer. If you haven't, please do it now. I'll wait. Okay, now that you've installed Dev-C++, start it up. When you do, the program's main window resembles Figure 2.1. Figure 2.1. The Dev-C++ program's main window.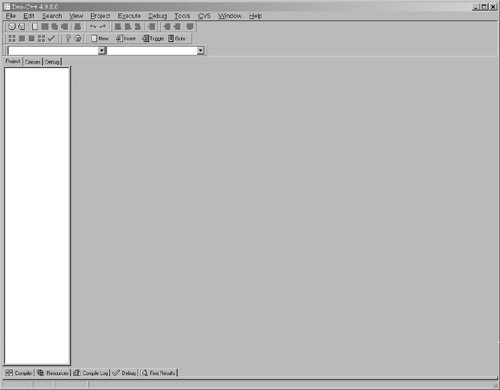 We'll see what each part of the Dev-C++ main window is used for in the next few sections. Warning I think it's worthwhile to take a moment to repeat a warning that I gave in chapter 1. All of the C++ source code you will encounter in this book is designed to work with Dev-C++. It may or may not compile with other compilers, such as Visual C++. Ideally, C++ source code should work with all compilers, but in reality, subtle differences exist between compilers produced by different companies. Therefore, I strongly recommend that you use Dev-C++ for all the programs in this book. After you become an experienced C++ programmer, you should have no problem compiling this book's programs with Visual C++ with only minimal changes.
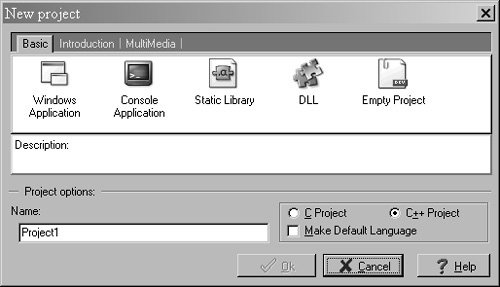
Creating a ProjectThe first step in using Dev-C++ to write a C++ program is to create a new project. Here's how it's done. Creating a Project File
Figure 2.3. The Dev-C++ main window after creating a new project.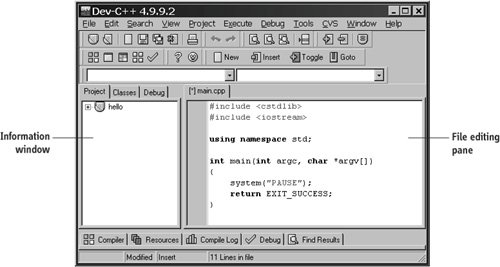 The tabbed box down the left side of the Dev-C++ window in Figure 2.3 contains information about the current project. If you click the + sign next to the folder icon by the word hello, Dev-C++ shows a list of all files in your project. Right now, the only file in the project is called main.cpp. The larger pane on the right side of the window has a tab with the filename in it. This is the file editing pane. In this pane, you'll see your first C++ programDev-C++ generated it for you. This program doesn't actually do anything. However, it contains all of the fundamental parts of a C++ program. We'll look at each one of them shortly. Writing ProgramsLet's go through the program in Figure 2.3 line by line. It's presented here in Listing 2.1 for your convenience. Listing 2.1. A very basic C++ program
The first two lines in the file main.cpp contain the following text: #include <cstdlib> #include <iostream> These statements are called include statements. They help you access code in the C++ Standard Libraries. Every C++ compiler comes with this standard set of libraries. The libraries contain object code that performs many common tasks that almost all C++ programs do. The main job of your linker is to link your program to the C++ Standard Libraries. You can also use it to link to other libraries. When you use other libraries, you will need to put special include statements in your program, similar to the ones shown in Figure 2.3. On line 4 of the file main.cpp, you'll find this statement: using namespace std; At this point, I'm not going to explain what this does. However, I will say that you need to put it at the beginning of most of your .cpp files. We'll revisit this statement, and others like it, in later chapters. Lines 610 of main.cpp contain a block of code called the main() function. The main() function is the heart of every C++ program. I'll explain it in detail soon. Right now, we'll take a look at how to add C++ statements to the main() function. Warning I added line numbers to Listing 2.1 to make it easy to discuss the code. These line numbers are not allowed in C++ programs. Do not type them into your program. It will not compile. They're just shown in the listing for convenience. Modifying the Main() Function
Listing 2.2. The new version of main()
Note I've compiled all of the code listings in this chapter into executable programs. You'll find them on the CD in the folder\Source\Chapter02\Bin. Note When the length of a line of code exceeds the character limit for this book, you'll see a little continuation arrow on the next line. Treat this as a single line of code: don't use a hard return. Compiling and Linking ProgramsAfter you make the changes in Listing 2.2, press the F9 key on your keyboard to compile, link, and run the program. If you typed it correctly, you'll see a window that looks like Figure 2.4 Figure 2.4. The output from your first program.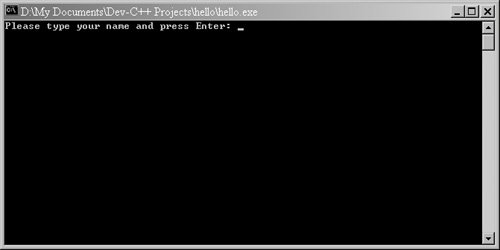 Congratulations! You've compiled, linked, and run your first C++ program. This is a console program. If you've been using computers a while, you know that it is essentially no different than old DOS programs. Figure 2.4 shows that this program is waiting for you to type your name and press Enter. After you do, it greets you with a friendly hello. It then asks you to press the C key followed by Enter. When you do, the program ends. Tip If you prefer, you can just compile and link your program without running it. Do this by pressing Ctrl+F9. You can accomplish the same thing by selecting Execute from the main menu and then choosing Compile. |
EAN: 2147483647
Pages: 148