Working with Clip Art
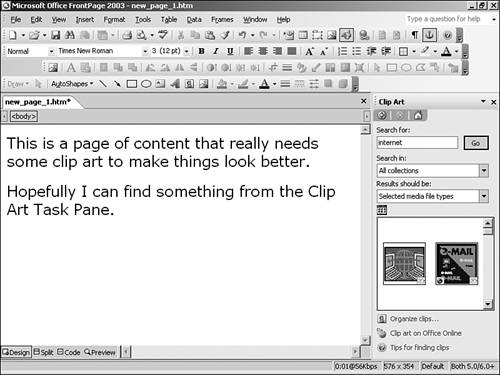
| The clip art offerings provided with FrontPage 2003 and the standard Office install are all managed in the Clip Art task pane. To access the task pane, select Clip Art from the Insert, Picture menu option. The Clip Art task pane is illustrated in Figure 6.2. Figure 6.2. The Clip Art task pane neatly docks to the right side of the screen, allowing you to search for media types without having to open another program.
Using the Clip Art Task PaneTo search for images, photographs, or multimedia, in the Clip Art task pane, you'll follow the same basic process:
After you click the Go button, FrontPage will show thumbnails in the results area of the items it has found based on the criteria you chose (see Figure 6.3). Figure 6.3. A search from the Clip Art task pane can provide multiple clip art types from different sources.
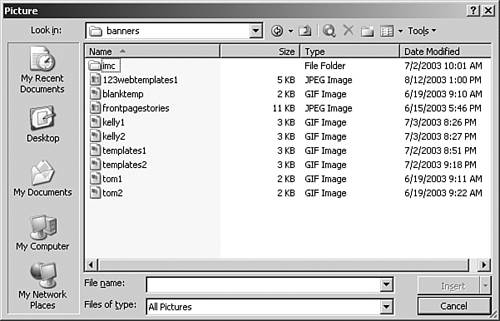
TIP If you don't find what you are looking for in your online search, redo your search with similar words and terms. The resource is tremendous and will, more often than not, provide you with what you are looking for. Right-clicking any of the clip art pieces in the Clip Art task pane opens a menu of options. Included in this list is the powerful option to Find Similar Style. The clip art provided by Microsoft (both online and off) is usually offered in stylistic groupings that might give you an image collection with a similar look and feel. Selecting the option will fill the Clip Art task pane with pieces of clip art similar to the style you collected. TIP If you are going to make considerable use of clip art in your Web design process, consider using the Clip Art task pane's Organize Clips option to make sense of your collection. Inserting Graphics FilesIf you don't find what you are looking for in the Microsoft clip art collection, you are free to insert a graphics file of your choice from the source of your choice. This is done by selecting Insert, Picture, From File. When this option is selected, the Picture dialog box will open, allowing you to pull your content from anywhere on your computer or network (see Figure 6.4). Figure 6.4. The Picture dialog box lets you insert any picture type from any location accessible from your computer.
NOTE Just because FrontPage lets you enter a graphic on a Web page doesn't mean that it can be read by all browser types.
Adjusting Image PropertiesDouble-clicking on any image in FrontPage will open the Picture Properties dialog box (see Figure 6.5). Figure 6.5. The Appearance tab of the Picture Properties dialog box lets you set the appearance of the image.
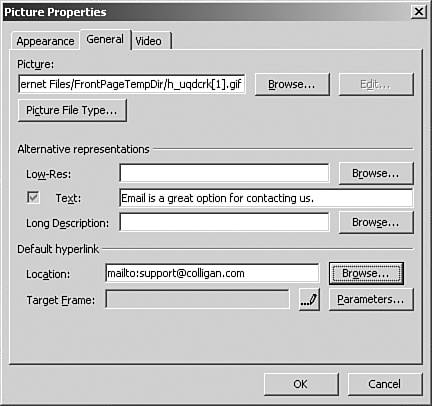
The Appearance tab of the dialog box lets you choose the layout and size of the image so that it works specifically in the format you want it to. Keeping the aspect ratio is vital if you don't want your image to appear distorted when reduced or enlarged on a Web page. TIP If you are placing one or more pictures next to each other, a nice effect is often achieved by setting a horizontal and vertical spacing of 5 or so pixels. The General tab lets you change the picture file type and set, if desired, a low-res, alternative text and long description representations (see Figure 6.6). If used on certain browsers, a low-res image will load first as a placeholder, allowing a more detailed graphic to load later. Alternative text is shown in browsers that are unable to parse graphics. The option to provide a long description for an image file works with certain browser types for the visually impaired and presents the longer description accordingly. Figure 6.6. The General tab of the Picture Properties dialog box sets specific elements related to file type, alternative representations, and hyperlinks.
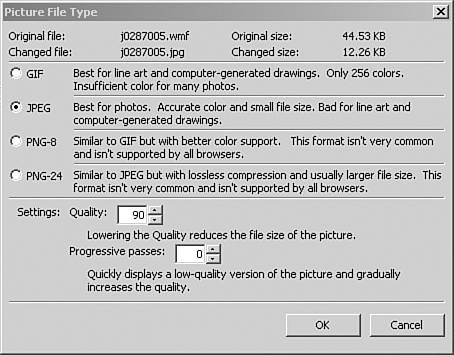
You can also change the file type of the graphic by selecting the Picture File Type button in the General Tab of the Picture Properties Dialog Box, shown previously in Figure 6.6. Doing so will open the Picture File Type dialog box, shown in Figure 6.7, that will let you switch between file types as well as quality settings. Figure 6.7. The Picture File Type dialog box will let you pick the file type that you'd like your picture to be saved as.
The Video tab is specifically related to video files, which are discussed later in this chapter. |

 For more on which graphics types work on the Web,
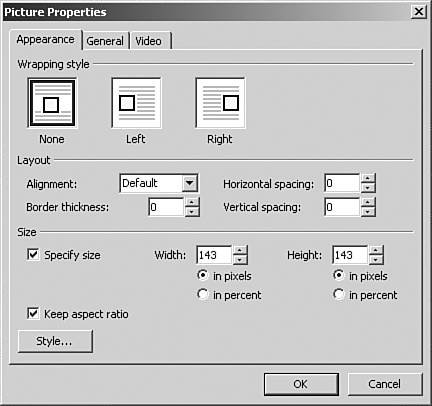
EAN: 2147483647
Pages: 443