Inserting Excel Data with the Database Results Wizard
| Most FrontPage users use ASP to display data from a Microsoft Access database or from a SQL Server database, but you can also use ASP to display data from an Excel spreadsheet.
Importing the Excel SpreadsheetThe first step in creating an ASP page to display Excel data is to import the Excel spreadsheet into your Web site so that you can connect to it with a database connection. To do that, follow these steps:
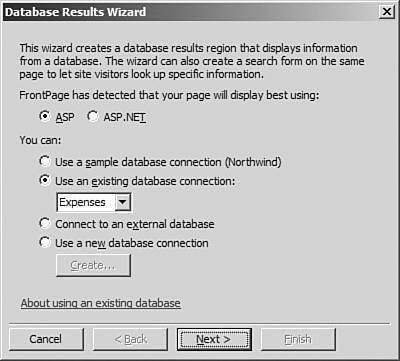
Creating the Database ConnectionOnce the Excel spreadsheet has been imported, you need to create a new database connection that points to the Excel file. The database connection allows you to connect to the Excel file with the Database Results Wizard.
The Site Settings dialog box now shows a new database connection. Notice that the Status column shows a question mark. You can go ahead and click OK at this point, or you can select the connection and click Verify just to make sure that FrontPage can access the file successfully. Once you've verified the connection, FrontPage will display a check mark in the Status column as shown in Figure 40.4. The check mark indicates that FrontPage sees the Excel file; however, it does not indicate that FrontPage can access data inside of it. After you've verified the connection, click OK to add the connection to your Web site. Figure 40.4. The database connection to the Excel file has been verified.
FrontPage has now added two items to your Web site. It has added an fpdb folder (which is empty) and a global.asa file. The fpdb folder is a restricted folder so that anything put into it cannot be accessed by people browsing to your Web site. Because you wouldn't want people to download your Excel spreadsheet file, you might want to move it into the fpdb folder by dragging and dropping it on the fpdb folder. FrontPage will automatically update the database connection for you. The global.asa file contains special ASP code that defines your database connection. It also contains other ASP code that FrontPage will use when you create your ASP page connecting to your Excel file.
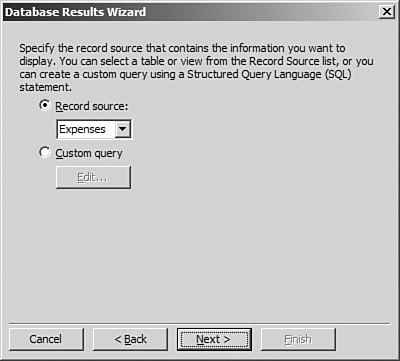
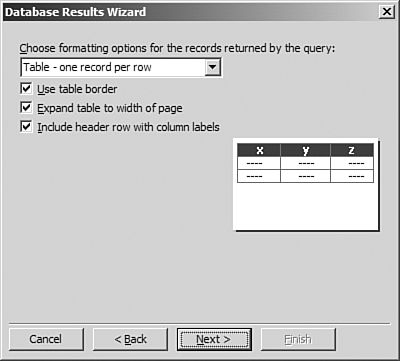
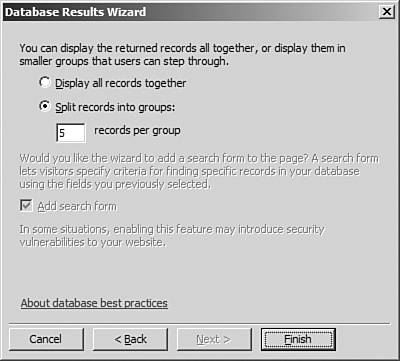
Inserting the Database ResultsNow it's time to create a new ASP page and connect to the data inside of the Excel spreadsheet.
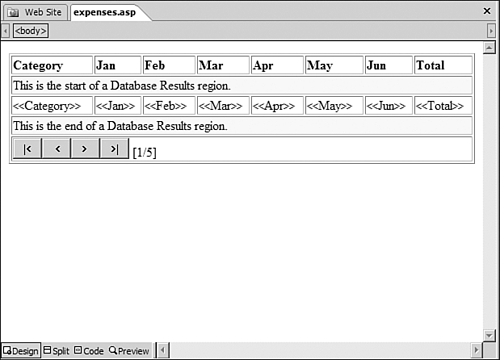
Your page should now look like the one in Figure 40.9. Save the page as expenses.asp. Figure 40.9. The completed page in FrontPage. Notice that FrontPage pulled out the columns from your Excel spreadsheet.
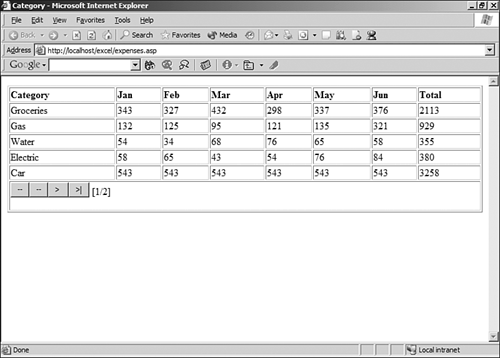
Now that you've saved the page, preview it in your browser. When you do, the Web server will connect to your Excel spreadsheet, pull the data from it, and display the data in the browser as shown in Figure 40.10. If you open the original Excel spreadsheet and change the data, the Web page will automatically show the updated data. Figure 40.10. This Web page was generated dynamically from the data in the Expenses.xls spreadsheet.
TIP If you're going to edit the Excel spreadsheet that your Web page is connected to, you should make a copy and edit the copy. After you've finished editing, copy the updated file into your Web site and overwrite the existing copy. |
 For more information on using the Database Results Wizard,
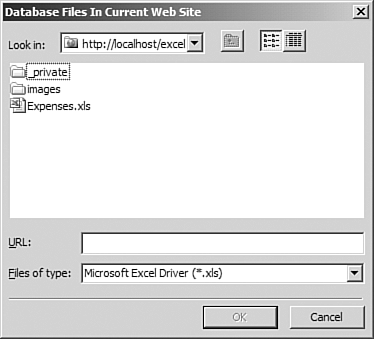

EAN: 2147483647
Pages: 443