InDesign CS2 for Macintosh and Windows(c) Visual QuickStart Guide
Authors: Cohen S.
Published year: 2006
Pages: 72-74/309
Buy this book on amazon.com >>

Using the Info Palette with Objects

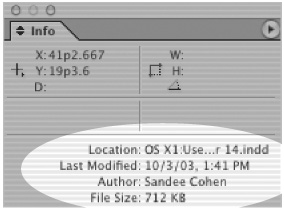
The Info palette also gives you important information about the document, text, and placed images.

To see the document information:

  • Deselect any objects on the page. The Info palette displays the following information :

    With no objects selected, the Info palette displays document information.

    • Location of the file on the computer.

    • Last Modification date and time.

    • Author as entered in the File Info ( File > File Info ) dialog box.

    • File size .

To see the text information:

  • Place your insertion point inside a text frame.

    or

    Highlight the text in the frame. The Info palette displays the following information :

    With text selected, the Info palette displays text information.

    • Character in the frame or selection.

    • Words in the frame or selection.

    • Lines in the frame or selection.

    • Paragraphs in the frame or selection.

    Tip

    If there is any overflow text in the frame, the amounts are displayed as a number with a plus sign.

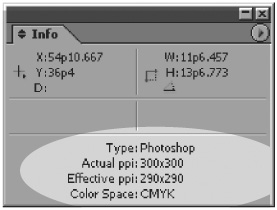
To see the placed object information:

  • Select a frame that contains a placed image, or the placed image itself. The Info palette displays the following information :

    With a placed image selected, the Info palette displays placed image information.

    • Type of placed image.

    • Actual ppi (points per inch ) resolution of the image.

    • Effective ppi resolution of the image if you have scaled the image in InDesign.

    • Color Space of the image.

    • ICC Profile (if applicable ) may also be shown.


Locking Objects

You can also lock objects so they cannot be moved or modified. This prevents people from inadvertently destroying your layout.

Tip

Locking objects is not the same as locking the layers of a document. ( See Chapter 11, "Layers," for more information on working with layers .)


To lock the position of an object:

1.

Select the objects you want to lock.

2.

Choose Object > Lock Position . A small padlock appears if you try to move or modify the object .

The Padlock cursor indicates that the Lock Position command has been applied .

Tip

Locked objects can be selected, copied , and pasted, and their colors and contents can be modified.

To unlock objects:

1.

Select the objects you want to unlock.

2.

Choose Object > Unlock Position .

How Safe Are Locked Objects?

I sincerely hope that you lock your front door more securely than the Lock Position command locks objects, although what's bad for your home can be good for your layouts.

The Lock Position command only locks the position of the object. The object can still be selected using either the selection tools or the Select All command.

If there is text within the selected object, the text can be selected and otherwise modified.

If there is a placed image within the selected object, the image can be replaced by choosing a new object with the Place command ( see page 194) .

If you need more security for your objects — for instance, to avoid inadvertently changing the color of an object — then you should lock the object's layer ( see page 292 ).


Selecting Frames

Use this chart as a guide to let you know what type of object you have selected and which parts of the object can be selected using the Selection tool or the Direct Selection tool.

Unassigned frames

Not selected.

Selected with the Selection tool. Notice the bounding box around the object.

Selected with the Direct Selection tool. Notice there is no bounding box.

One point selected with the Direct Selection tool.

Text frames

Not selected. Notice there is no indication that this is a text frame.

Selected with the Selection tool. Notice the bounding box and the text in and out ports.

Selected with the Direct Selection tool. Notice there is no bounding box but the text in and out ports are visible.

One point selected with the Direct Selection tool.

Graphic frames

Not selected. Notice the diagonal lines that indicate it is a graphic frame.

Selected with the Selection tool. Notice the bounding box.

Selected with the Direct Selection tool. Notice there is no bounding box.

One point selected with the Direct Selection tool

Graphic frames with a placed image

For more information on working with placed images, see Chapter 8, "Imported Graphics ."

Not selected.

Frame selected with the Selection tool. Notice the bounding box for the frame.

Frame selected with the Direct Selection tool. Notice there is no bounding box but the points are selected.

Content selected with the Direct Selection tool. Notice that the color of the bounding box for the placed image is the inverse of the color of the frame's bounding box.


InDesign CS2 for Macintosh and Windows(c) Visual QuickStart Guide
Authors: Cohen S.
Published year: 2006
Pages: 72-74/309
Buy this book on amazon.com >>

Similar books on Amazon