Importing Transparent Images


InDesign offers you a special advantage when you place native Photoshop (PSD) or Illustrator (AI) files. If there is any transparency in the placed image, InDesign displays the image with the same transparency as in the original file.

To use the transparency in a Photoshop file:

1.

In Photoshop, use any of the tools to silhouette or fade the edges of the image. The Photoshop transparency grid indicates which parts of the image are transparent.

2.

Save the file as a Photoshop (PSD) file.

3.

Choose File > Place to import the file into the InDesign document.

Tip

The Image Import Options dialog box automatically sets the Alpha Channel import option to Transparency. You do not have to set the transparency option for native Photoshop files.

4.

Click to place the file. The areas that were transparent in Photoshop will be transparent in InDesign .

A transparent Photoshop file lets you see through the glass to the text behind the image.

Tip

You can combine the use of a Photoshop path together with transparency to create a silhouette with a see-through transparency.

To use the transparency in an Illustrator file:

1.

In Illustrator, use any of the commands to apply transparency to the artwork.

2.

Save the file as an Illustrator (AI) file.

3.

Make sure that the PDF Compatibility option is checked in the Save dialog box.

4.

Import the file into the InDesign document. The areas that were transparent in Illustrator will be transparent in InDesign.

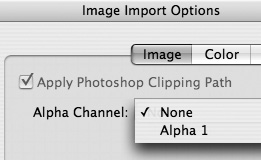
In addition to importing Photoshop files with transparent layers, InDesign can also apply an alpha channel saved with flattened files. This allows you to display transparency in file formats that do not support layers or a transparency grid.

To apply an alpha channel to an image:

1.

Add an alpha channel to the image in Photoshop. The alpha channel should be created as follows:

  • Black designates those areas that are not transparent.

  • White designates those areas that are completely transparent.

  • Shades of gray are used for those areas that are partially transparent.

2.

Save the file as a TIFF, GIF, JPEG, or BMP file.

3.

Choose File > Place to import the file into the InDesign document.

4.

Use the Show Import Options checkbox to open the Image Import Options dialog box.

5.

Choose the name of the alpha channel from the Alpha Channel menu and click OK to place the file .

Use the Alpha Channel menu in the Image Import Options to apply the channel to an image.

6.

If necessary, click to place the file on the page. The alpha channel is applied to the image to create opaque, transparent, and semi-transparent areas.


InDesign CS2 for Macintosh and Windows(c) Visual QuickStart Guide
InDesign CS4 for Macintosh and Windows: Visual QuickStart Guide
ISBN: 0321573579
EAN: 2147483647
Year: 2006
Pages: 309
Authors: Sandee Cohen

flylib.com © 2008-2017.
If you may any questions please contact us: flylib@qtcs.net