Moving Layers Between Photoshop and Illustrator
| Thanks to the great similarities between how layers are handled in Photoshop and Illustrator, it's possible to move a layered document from Photoshop to Illustrator, or from Illustrator to Photoshop, and retain much of the layer structure that you've carefully created. During inter-product importing and exporting, Photoshop and Illustrator retain layers and their components, as well as type, masks, and other elements, as much as possible. However, layers will be merged if retaining them would compromise the appearance of the resulting file. This makes it possible to move artwork back and forth between the two applications, using each application for the kind of work it does best. Layers from Photoshop to IllustratorThe best way to move a Photoshop image into Illustrator is to use the Illustrator Place or Open command.
Whether you place or open a Photoshop image, in the Photoshop Import Options dialog box (Figure 12-17), select Convert Photoshop Layers To Objects and Import Hidden Layers, and click OK. Figure 12-17. Placing a layered Photoshop image gives you the option to convert Photoshop layers to Illustrator objects.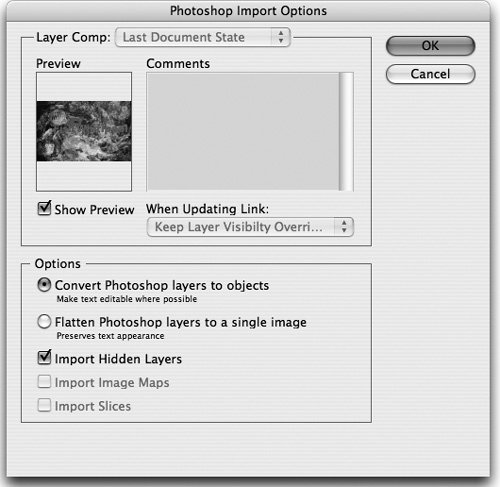 If you opened a Photoshop image, a registration rectangle appears on the bottom layer around the image bounding box. (You can release it by choosing Object > Crop Area > Release.) Keeping Type and Layers EditablePlacing a Photoshop file in Illustrator maintains the editability of type, and converts each Photoshop layer to a single embedded image (as shown in the Links palette) when the Convert Photoshop Layers To Objects option is checked. Any Photoshop layer groups will be imported as Illustrator sublayers. Layer opacity and blend mode settings will be retained when possible. Figure 12-18 shows a simple layered Photoshop file with type and image layers converted to Illustrator objects. Figure 12-18. Photoshop image (left) contains image layers and a type layer. When converted to Illustrator objects, the type remains editable (right).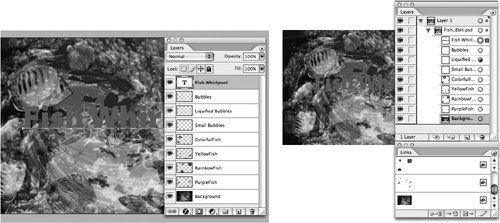 Merging Layers with Unsupported FeaturesIllustrator doesn't support all Photoshop layer features. When Illustrator imports files with the following layer features, it merges the layers automatically, without alerting you:
Once merged, these layers are no longer editable. Importing TypeIllustrator can import point type (single lines of type), text frame type, and type on a path. However, type that is warped with the Warp Text dialog box or the Warp transformation command must be rasterized during import. Likewise, type with any layer effects will be turned into pixels. Tip: Reapply Effects in Illustrator When you're bringing Photoshop type into Illustrator, remove any warp or layer effects in Photoshop. Then reapply the effects using commands in Illustrator. Converting MasksPhotoshop mask features layer, vector, and clipping masks are converted to equivalent Illustrator masks.
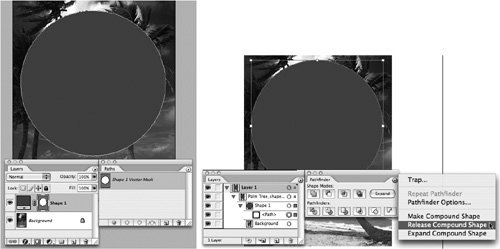
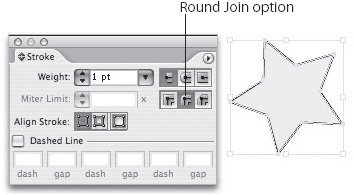
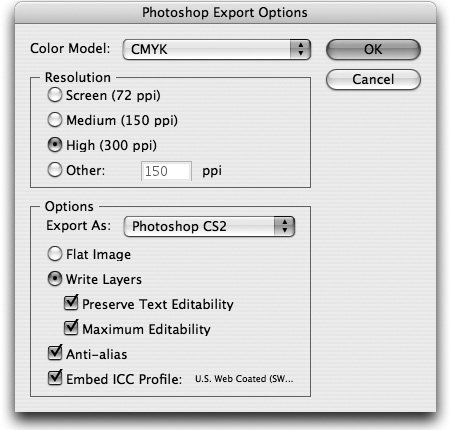
Layers from Illustrator to PhotoshopJust as you can move layered files from Photoshop to Illustrator, you can export layered Illustrator files to Photoshop to continue editing them. Before exporting to Photoshop, it's helpful to set up your Illustrator layers to make them as editable as possible in Photoshop. Do this by creating sublayers and compound shapes. Creating Sublayers and Compound ShapesThink ahead to which objects you want to maintain as vector in Photoshop. Move those objects to separate sublayers in Illustrator, and then convert them to compound shapes. We'll use as an example a simple Illustrator graphic that contains three kinds of type point, type on a path, and text frame. It also contains some stars that we'd like to move to Photoshop to apply Photoshop layer effects (Figure 12-21, left). Figure 12-21. Illustrator artwork with type and star shapes (left). To keep the stars as editable vector objects in Photoshop, move them to sublayers and convert them to compound shapes (right).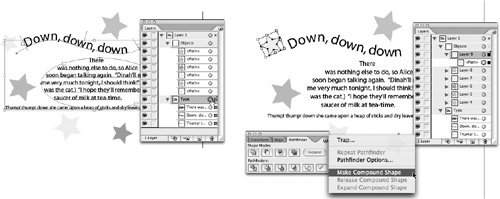 We moved each star to a separate sublayer. We then selected the path of each star on the Layers palette (Figure 12-21, right) and created a compound shape by choosing Make Compound Path from the Pathfinder palette menu. Preparing Compound ShapesBefore export, Illustrator shapes with strokes must be changed from the default Miter Join attribute to a Round Join in the Stroke palette (Figure 12-22). If the stroke join isn't properly converted, the object will be rasterized rather than converted to a shape layer. When correctly converted, the stroke is applied as a stroke effect applied to the shape layer. Figure 12-22. Choosing a Round Join before converting Illustrator shape with stroke. Before exporting compound shapes, also eliminate any brushes, dashed strokes, or graphic styles applied to them, to prevent the objects from being rasterized. Exporting as a Photoshop FileTo export an Illustrator file to Photoshop, choose File > Export and select Photoshop (PSD) as the format. In the Photoshop Export Options dialog box (Figure 12-23), choose from the following options to retain quality and editability:
When the Illustrator file is exported with the Preserve Text Editability option selected, opening the file in Photoshop shows all the type on editable type layers (Figure 12-24, left). Point type, area type, and type on a path are all converted successfully. The figure also shows what happens if sublayers and compound shapes weren't created all the stars are rasterized onto a single pixel layer. Creating sublayers and compound shapes puts each star object on its own shape layer, with a vector mask so that it can still be edited in Photoshop as needed (Figure 12-24, right). Opacity and blending modes are also retained. Figure 12-24. Illustrator type converted to Photoshop type layers (top). Putting vector objects on sublayers and making them compound shapes in Illustrator retains their editability in Photoshop (bottom).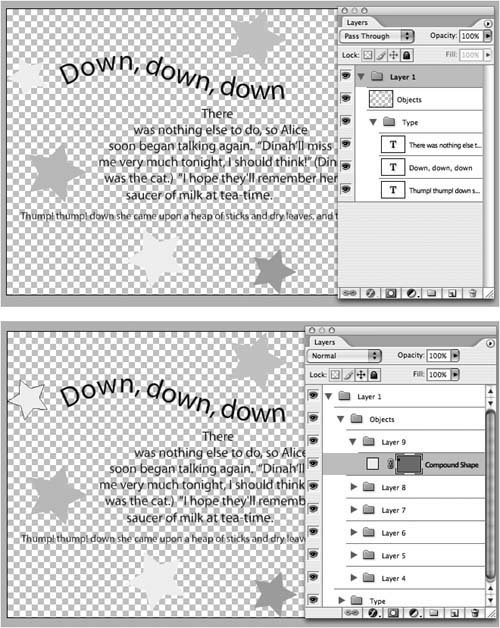 Illustrator masks convert to Photoshop masks: Both "traditional" clipping masks and layer-based masks are turned into Photoshop shape layers. |

EAN: 2147483647
Pages: 192