Object and Graphic Styles
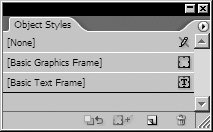
| Text styles offer convenience, speed, flexibility, and uniformity in the formatting of text. Likewise, object and graphic styles in InDesign and Illustrator as well as Photoshop's layer styles make it easier to work with complicated formatting of attributes applied to objects such as frames, paths, and lines. Instead of having to use myriad dialog boxes, palettes, and menus, you can apply intricate drop shadows, feathers, warps, text wraps, and other effects with just a single click. (Note that object styles (InDesign) can include text formatting, whereas graphic styles (Illustrator) apply only graphic formatting.) As with text styles, you need to plan ahead to use object and graphic styles effectively. However, it is time well spent. Consider a 1-point stroke applied to all the frames holding images in a long InDesign document, or to all the roads in a complicated Illustrator road map. Later you decide that you would prefer all those elements to have a half-point stroke. If you were working without styles, you would have to select each object and change its stroke width for every instance in the document. With object styles in InDesign, and graphic styles in Illustrator, however, you can simply redefine the stroke weight for the style to update all the strokes automatically. InDesign Object StylesIf you understand how text styles are defined and applied, you will find it simple to work with object styles. InDesign features three basic object styles, [None], [Basic Graphics Frame], and [Basic Text Frame], which appear by default in the Object Styles palette (Figure 8-8). You can also define your own object styles to apply to either graphics or text frames, or both. You can't delete the bracketed styles. Figure 8-8. Default styles in the Object Styles palette. The Basic Graphics Frame style governs the default appearance for all new unassigned objects, including objects drawn with the Rectangle, Ellipse, Polygon, Line, and Pen tools. The style does not govern objects drawn with the Rectangle Frame, Ellipse Frame, and Polygon Frame tools. The Basic Text Frame style governs the default appearance for all new text frames drawn with the Type tool. The None (unassigned) style has no fill, no stroke, and no other attributes applied to it. This style is automatically applied to placed images and text. You can't modify the None style. It exists solely to wipe out all formatting from an object and leave you with an empty, naked frame, ready for you to format as you like. Defining Object StylesTo create a new object style, choose New Object Style from the Object Styles palette. The New Object Styles dialog box appears (Figure 8-9). If you have defined paragraph styles in InDesign, you'll probably find this dialog box easy to understand. You enter the name of the style, choose whether it is based on another style, apply a keyboard shortcut, and reset the style to its default settings, just as you would do for paragraph styles, covered earlier in this chapter in "InDesign Paragraph Styles." Figure 8-9. New Object Styles dialog box in InDesign.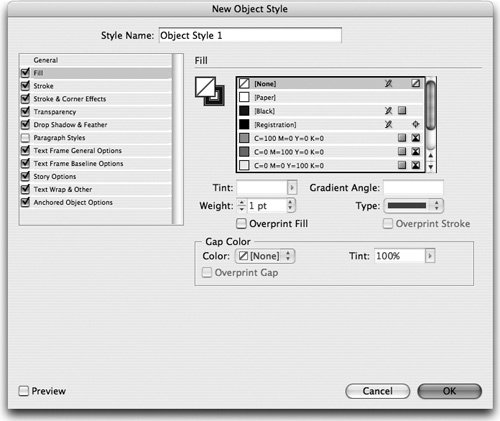 However, object styles differ in an important way from paragraph styles. Paragraph styles require that all the attributes of the text be defined within the style. Object styles can be set up in conjunction with independent (external) attributes, which can then be applied or changed separate from the style. For example, you can define an object style that contains all formatting except for one attribute, such as Stroke. Applying that object style to several objects formats all of them the same. But if you then change the settings for an object's stroke, the link to the object style remains intact. To choose whether to include an attribute in an object style, use the check boxes in the category list for object styles. If the box is checked, then that attribute will be governed by the object style. If unchecked, then the attribute can be formatted without being controlled by the object style. It is easy to redefine an object style. Double-click the name of the object style and change the settings or make local formatting changes to an object that has the style applied; when you're done, choose Redefine Object Style from the Object Styles palette menu. The Redefine Style command redefines only those attributes that are checked in the Object Style Options dialog box. So, for example, if you have made changes to the color of a stroke, but Stroke is not selected as part of the object style, then the stroke settings won't become part of the object style's definition, and applying the object style won't affect the stroke. Object Styles for Text FramesObject styles fall into 11 categories, but not all categories apply to all three types of objects (text, graphic, and unassigned frames), as shown in Table 8-2.
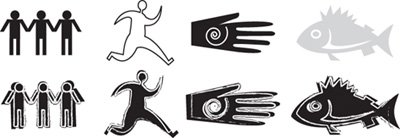
You can, however, use text-frame categories on styles applied to graphic and unassigned frames; the latter frames will ignore the text settings unless the frames are converted into text frames. This makes it easy to use an object style that governs both graphic and text frames. To apply the same stroke to images as well as text frames, use the same object style. When the style is applied to a text frame, the stroke is applied, as well as attributes such as text inset or baseline position. However, when the style is applied to a graphic frame, the text attributes are ignored, but the stroke is still applied. Illustrator Graphic StylesOriginally, the graphic styles in Illustrator were simply called styles. Adobe renamed them as graphic styles to avoid confusion when paragraph and character styles were added to Illustrator. More to tempt you to explore all the wonderful features in Illustrator than for practical uses, Illustrator includes two default sets of graphic styles. One set is displayed when you choose an RGB document, the other when you choose CMYK. Graphic styles in Illustrator make it easy to apply and change intricate formatting. Figure 8-10 demonstrates how graphic styles can quickly apply and change intricate formatting applied to paths. Figure 8-10. Original formatting applied to the objects on the top was quickly changed by applying a graphic style. Each style is displayed with a preview of its formatting. You can choose three display options for the Graphic Styles palette (Window > Graphic Styles).
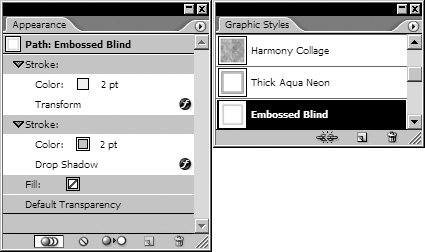
The Default style is the style that is automatically set when you click the Default Fill And Stroke button in the Tools palette. Applying the Default style clears all attributes that have been applied to objects and leaves only a plain white fill and black stroke. You're not limited to those attributes, however; you can easily redefine the Default style, as explained in the following section. You can delete all styles, except the [Default] style, by selecting the styles and clicking the Delete Graphic Style button in the Graphic Styles palette. Defining Graphic StylesYou define a graphic style in Illustrator by selecting an object and applying any combination of attributes including fills, strokes, effects, and transparency settings. These settings are displayed in the Appearance palette (Figure 8-11). Once you have formatted the object, click the New Graphic Styles button at the bottom of the Graphic Styles palette. The Graphic Styles Options dialog box appears, where you can name the style. Figure 8-11. Details of an Illustrator graphic style are displayed in the Appearance palette. Tip: Order of the attributes is important! Remember, the order in which attributes appear in the Appearance palette affects the object's appearance. Changing the order will also change the object's appearance. You can also create a new graphic style by dragging the preview of the attributes from the Appearance palette into the Graphic Styles palette. This creates a new graphic style with a default name. Redefining Graphic StylesRedefining graphic styles differs from how it is done for text styles. Simply select the object and then make whatever changes you want to its appearance. As you do, you will see the Appearance palette no longer displays the name of the graphic style. Once you have the object styled the way you want, hold down the Option/Alt key as you drag the preview of the object from the Appearance palette onto the position of the original graphic style in the Graphic Styles palette. This action updates the graphic style to the new appearance and automatically changes all objects that have had the graphic style applied. Unlinking and Merging Graphic StylesIllustrator offers a few special features for working with its graphic styles. For instance, you may want an object to keep the attributes of a specific style, but no longer be governed by changes made to the style. You do this by selecting Break Link To Graphic Style from the Graphic Styles palette menu. Illustrator doesn't let you base one graphic style on another. But you can merge the attributes of one style with another. Use the Command/Ctrl key to select the styles you want to merge. Then choose Merge Styles from the Graphic Styles palette menu to combine the attributes of both styles into a new style listed at the bottom of the Graphic Styles palette. Photoshop StylesSandee is a purist when it comes to styles and doesn't like it when a feature is called a style, but doesn't offer all of the benefits of a style. The Photoshop Styles palette contains collections of complex layer effects. For example, one of the styles that ships with Photoshop is called Blue Glass, which simulates the appearance of a three-dimensional, translucent, glass button. Instead of applying four separate layer effects (Inner Glow, Bevel And Emboss, Color Overlay, and Gradient Overlay) and setting the controls for each one, the Styles palette applies the effect with a single click. That is very useful and efficient; however, the effects lack one important feature, which would qualify them to be true styles. In a true style, modifying the definition of the style updates accordingly all objects or elements that have that style applied. Sadly, the styles in Photoshop do not globally change all layers if they are redefined. You must reapply a new style to change the style applied to a layer. Because of this, we consider the Photoshop styles to be more like presets of layer effects that can be applied as a convenience. For more information on working with layer effects in Photoshop, see Chapter 12, "Layers." |
EAN: 2147483647
Pages: 192