Images
Up to this point the focus has been on building a small framework to use for getting into full-screen mode. The Java2D API contains many classes and methods that support loading and manipulating image files of various formats. Typically, a game has to deal with only one type of image class. Fundamentally, three basic types of image classes exist: buffered, volatile, and managed. Each of these image types has its advantages and disadvantages. This section identifies how to load game images into the different types of image classes and how to draw them to the screen.
The BufferedImage Class
The BufferedImage class is particularly good at giving the programmer direct access to an image’s actual data. With this access, a programmer can change the color, add image filtering, or just modify a single pixel. This access could be thought of as free reign to change or modify any desired aspect of the image. Although this mechanism is great, the downside is that images must be held in system memory, which greatly reduces the computer’s performance.
The BufferedImage and ImageIO Classes
Let’s figure out how to get an image loaded and drawn to the screen. The BufferedExample class in the provided source code shows how to load an image into a BufferedImage object and use that object to display the image on the screen. One required variable is an imageResourceName, which will hold the name of the image file to load. The second is an image, which will be the handle to the image after is has been loaded. The loadImage method uses the read method of the javax.imageio.ImageIO class to load the image from disk. Multiple versions of the read method are available. The sample code uses the parameter list that takes a URL object as the location of the image to load.
// The resource location of the image to display private static final String imageResourceName = "/rock.png"; // The handle to the buffered image we will load and display private BufferedImage image = null; //Read in the image to display and put it in a BufferedImage private void loadImage() { try { URL imageURL = getClass().getResource(imageResourceName); if(imageURL==null) { System.out.println("Can’t load"+imageResourceName); return; } image = ImageIO.read(imageURL); } catch(IOException x) { x.printStackTrace(); } } Now that the image is loaded, it can be displayed. Putting an image on the screen is extremely simple using the Java Graphics class method drawImage(). Simply pass in the image object to be drawn, upper-left x-pixel coordinate, upper-left y-pixel coordinate, and a handle to an ImageObserver object. The ImageObserver object is used in circumstances where the image may not yet be completely loaded. Because this application used the ImageIO class to read in the image, this isn’t going to be a concern, and the this object is passed in the current window. Let’s draw something to the screen using this method.
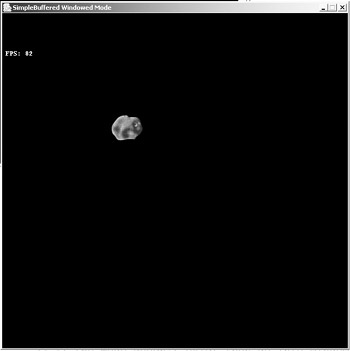
public boolean render(Graphics g) { super.render(g); if(image!=null) { g.drawImage(image,200,200,this); } return true; } When the source code for the SimpleBuffer example is executed, it should look something like the image shown in Figure 3.8.

Figure 3.8: A SimpleBuffer in action.
Now that one can be drawn, let’s draw 100 in random locations on the screen, as seen in the following BufferedExample source code:
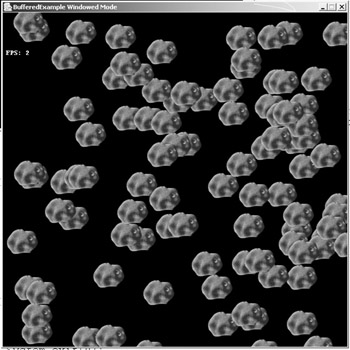
public boolean render(Graphics g) { super.render(g); Random rand = new Random(); if(image!=null) { for(int loop=0; loop<100; loop++) g.drawImage(image, rand.nextInt(getWidth()), rand.nextInt(getHeight()), this); } return true; } This example will be only a slightly more exciting one because of the limitations of the BufferedImage class. When the BufferedExample is run, it should look something like the image shown in Figure 3.9.

Figure 3.9: Results of running the BufferedExample code.
Running the BufferedExample program on the development machine gives a whopping performance of four frames per second in the video mode 1280 x 1024 x 32<60. This rate is extremely slow, given that the image is drawing only 100 times each frame. For a video game, this would be totally unacceptable. Luckily, there are ways to speed up things using the VolatileImage class.
The VolatileImage Class
The VolatileImage class gives the potential for hardware acceleration of image-drawing operations. It does this by storing the image data in the video card memory (VRAM) instead of on the computer’s main system memory. Therefore, when the image is drawn to the screen it can be retrieved directly by the video card from its own memory instead of having to be transferred to the card from the main memory. The BufferStrategy class uses volatile images behind the scenes whenever hardware acceleration is available. To load a volatile image use the same ImageIO method used previously, first loading the image into a BufferedImage. After the image is loaded, use the GraphicsConfiguration class’s method createCompatibleVolatileImage() to create a VolatileImage object that is compatible with the graphics device on which the game is running. The last step is to copy the contents of the BufferedImage object to the VolatileImage object.
// Read in the image,Put it in a VolatileImage object. private void loadImage() { try { URL imageURL = getClass().getResource(imageResourceName); if(imageURL==null) { System.out.println("Unable to locate the resource "+ imageResourceName); return; } bufferedImage = ImageIO.read(imageURL); image = getGraphicsConfiguration().createCompatibleVolatileImage( bufferedImage.getWidth(), bufferedImage.getHeight()); image.getGraphics().drawImage(bufferedImage,0,0,this); } catch(IOException x) { x.printStackTrace(); } } The VolatileImage class was aptly named. The downside of using this class is that under certain situations the image can be lost or invalidated. Unfortunately, the invalidation can’t be determined until after the game tries to draw to the screen. When using VolatileImage, check the image after it has been drawn to the back buffer. If it has been corrupted, completely redraw the frame. This step complicates the render method code a little bit, but not much. The new changes are shown in the following code:
public boolean render(Graphics g) { super.render(g); Random rand = new Random(); if(image!=null) { for(int loop=0; loop<100; loop++) { int returnCode = image.validate(getGraphicsConfiguration()); if (returnCode == VolatileImage.IMAGE_RESTORED){ // the contents need to be restored image.getGraphics().drawImage(bufferedImage,0,0,this); } else if (returnCode == VolatileImage.IMAGE_INCOMPATIBLE){ // the old volatile image is incompatible image = getGraphicsConfiguration().createCompatibleVolatileImage( bufferedImage.getWidth(),bufferedImage.getHeight()); image.getGraphics().drawImage(bufferedImage,0,0,this); } g.drawImage(image, rand.nextInt(getWidth()), rand.nextInt(getHeight()), this); } } return true; } The VolatileImage class’s validate method is called at the top of the loop each time through to determine if the image surface has been lost and to make sure the graphics configuration for the window is compatible with the image. If the image surface has been lost, it is restored so that it can be used again. This restoration causes the image to be corrupted, so the game will have to draw the BufferedImage back into the VolatileImage.
The graphics configuration can become incompatible with the image surface if, for example, it was created on one graphics device and now the user is trying to use it on a different device. In this case, create a new VolatileImage to match the graphics configuration and again draw the BufferedImage into the new VolatileImage.
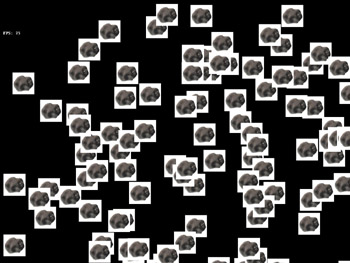
On the development machine, running the VolatileExample program gives 60 frames per second in the video mode 1280 x 1024 x 32<60. This speed is a substantial improvement over the buffered image example. You may have noticed that the rock image being drawn now has a large white area around it every time it is drawn. This white area results because volatile images do not support transparency, and the rock image contains large transparent areas. Figure 3.10 shows a picture from the VolatileExample program.

Figure 3.10: Results of running the VolatileExample code.
Unless you are writing programs that need graphics that are only rectangular, volatile images aren’t going to help you much. However, you can use them to draw only the rectangular portions of the display. Those portions would then be hardware accelerated.
At this point the discussion on images has revealed two techniques. The game can use slow, buffered images or fast, nontransparent, volatile images. Neither seems to fill the needs of a game programmer. This is where managed images come into the picture.
Managed Images
Managed images aren’t an official type of image in the API; they are images that can be accelerated behind the scenes by the API. You don’t have to do anything special to use them, which makes them easier to deal with than volatile images. Managed images also support transparency, which allows us to have nonrectangular objects drawn to the screen.
The ManagedExample class demonstrates how to use five methods of creating a managed image. These five methods are named loadImageN where N is 1 to 5. You can change the call in the constructor to call the one you want to try. The first three methods load and create a managed image in a single call.
//Read in the image to display using swing ImageIcon class private void loadImage1(URL imageURL) { image = new ImageIcon(imageURL).getImage(); } /* * Read in an image Toolkit’s createImage(URL) method */ private void loadImage2(URL imageURL) { image = Toolkit.getDefaultToolkit().createImage(imageURL); } /* Read in an image using Toolkit class’s method getImage(URL) */ private void loadImage3(URL imageURL) { image = Toolkit.getDefaultToolkit().getImage(imageURL); } The image-loading methods shown in the previous code all give about 20 frames per second with transparency, which is better than using the BufferedImage class. This performance still isn’t very good, and we would be hard-pressed to create a good game at these speeds. The last two methods give us a full 60 frames per second at a refresh rate of 60Hz. They both first use the loadBufferedImage method to load the rock image into a BufferedImage object, and then draw the image into a managed image that supports transparency.
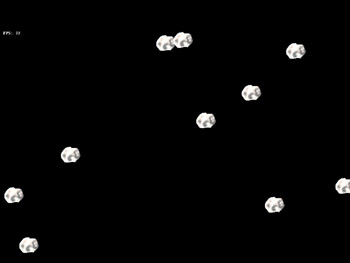
/** * Read in the image to display using the * Component class’s method createImage(width,height) */ private void loadImage4(URL imageURL) { pack(); // component must be displayable image = createImage(bufferedImage.getWidth(), bufferedImage.getHeight()); Graphics2D g2d = (Graphics2D)image.getGraphics(); g2d.setComposite(AlphaComposite.Src); g2d.drawImage(bufferedImage,0,0,this); } /** * Read in the image to using GraphicsConfiguration *createCompatibleImage(width,height,transparency)method */ private void loadImage5(URL imageURL) { image = getGraphicsConfiguration().createCompatibleImage( bufferedImage.getWidth(), bufferedImage.getHeight(), Transparency.BITMASK); image.getGraphics().drawImage(bufferedImage,0,0,this); } When the code from the ManagedExample is run, it should appear as shown in Figure 3.11.

Figure 3.11: Looking good with managed images.
Using managed images is a good general choice for most games.
EAN: 2147483647
Pages: 171