Project2.Romantic Night Shots
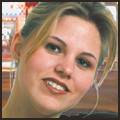
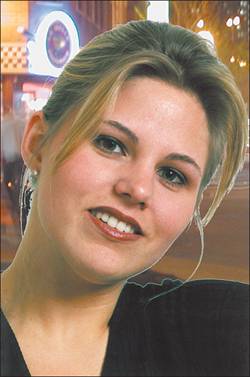
Project 2. Romantic Night ShotsSpeaking of romance and romantic shots, night shots are pretty cool. I remember the first time I set my camera on a tripod outside at night. It was close to the holidays and there was an ice castle display at the local park. It wasn't too cold, so I decided I could try some night shots. I took about a roll using various long exposure times, such as 8 seconds and 20 seconds. It was the first time I had done night shots and, back then, I had to wait for the film to be processed. I was quite surprised to see that there were no people visible in the photos. I remember people being there when I was shooting. The thing is, of course, that they were all moving through the exhibit and because of the time-delay photos, all of them simply disappeared. Now that's a cool effect, but not so when you actually want to see the people in your shots. And the truth is that nighttime scenes make great backdrops. The problem is how you can get the nighttime shot and the portrait when both have two distinct needs when it comes to photographing them. It's hard, for example, to get someone to sit still for 20 seconds while you take his photograph. But without that kind of delay, you'll get nothing but black in the background. One solution is offered by some camera/flash combinations that let you take the photo with the flash set to go off at the last moment. This can work, but you're still better off if the model sits still. Also, because of the flash and the dark, the dreaded red eye becomes a problem. The best solution? Blend the two images together after shooting each at its best setting. The images for this project are pretty easy to get. You'll need a portrait and a nighttime shot. The portrait can be something you get from your library, or even get by pointing the camera back at yourself. You'll want either a shot with someone who has light-colored hair or to shoot your portrait with some extra lighting. The idea is that you don't want the person to blend into the background too much. Of course, it partly depends on the background, too. You can use the images I'll be using (MelanieSMALL.tif and Night Downtown.tif) by grabbing them from the companion website. The portrait I'm using is a scan of a slide, and the nighttime grab is something I shot off the cuff, as it were. I had my new (back then anyway) 3.3Mp digital camera with me and I was downtown. The lights were calling to me and I wondered if I could handhold the camera against the door of the car with the window rolled down. The image is a little shaky, as you'll see, but it's also perfect for the effect I want for this project. You can see both images in Figure 6.5. Figure 6.5. The portrait and nighttime scene pre-digital-darkroom work. As you can see in Figure 6.5, I've already removed the background from the portrait. If you're planning this type of shot when you create the portrait, you might want to shoot against a solid-colored background to make it easier to remove the background. Be sure to visit Appendix B,"Paint Shop Pro X in a Nutshell," for some tips on removing backgrounds from your photos.
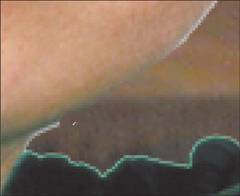
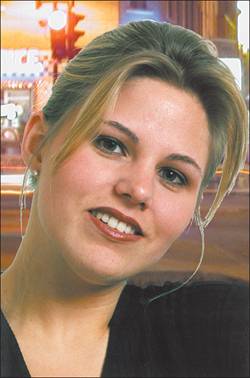
Repositioning the New Background and Cleaning UpIn the case of these two images, the portrait is a lot smaller than the nighttime shot. This gives us the freedom to move the new background around until we're satisfied with the placement. In Figure 6.6, you can see that I've tried to make it look as if the shot was taken at street level. There are a couple of small issues with this shot, as with any where the photo has something wispy like smoke or hair. You can see areas where the hair has a small fringe. As well, there's a fringe around the shoulder in the portrait. These can be dealt with using the Eraser tool and a little patience. How much patience is required is proportional to the inverse of how much time you spent removing the original background. In other words, the better you get at removing the background, the less time you'll have to spend cleaning up the image when you place it over a new background. Sometimes simply repositioning the new background can help (see Figure 6.7). Figure 6.7. Reposition the new background to help hide the haloing.
|


EAN: 2147483647
Pages: 109