| The manual build process that we described earlier in this chapter can become tedious if you need to do it over and over. In this section, we describe how you can automate the process. The material in this section is not required for working with JSF feel free to skip it if the manual build process doesn't bother you. We recommend the Ant tool for automating the building and deployment of JSF applications. Ant is not required to work with JSF, but we find it convenient and easy to learn. In fact, you need not know much about Ant at all if you simply want to use the build script that we prepared. Download Ant from http://ant.apache.org and install it in a directory of your choice. The page http://ant.apache.org/resources.html contains links to tutorials and other information about Ant. Ant takes directions from a build file. By default, the build file is named build.xml. We provide a build.xml file for building JSF applications. This file is contained inside the root of the corejsf-examples directory. The build.xml file contains the instructions for compiling, copying, zipping, and deploying to Tomcat, described in XML syntax. The file is rather long and we won't reproduce it in its entirety. Listing 1-7 contains the most important elements. Listing 1-7. build.xml 1. <project default="install"> 2. 3. <property file="build.properties"/> 4. <property name="appdir" value="${basedir}/${app}"/> 5. <property name="builddir" value="${appdir}/build"/> 6. <basename property="appname" file="${appdir}"/> 7. <property name="warfile" value="${builddir}/${appname}.war"/> 8. 9. <path > 10. <pathelement location="${servlet.api.jar}"/> 11. <pathelement location="${jsp.api.jar}"/> 12. <fileset dir="${builddir}/WEB-INF/lib"> 13. <include name="*.jar"/> 14. </fileset> 15. </path> 16. 17. <target name="init"> 18. <tstamp/> 19. <fail unless="app" message="Run ant -Dapp=..."/> 20. </target> 21. 22. <target name="prepare" depends="init" 23. description="Create build directory."> 24. <mkdir dir="${builddir}"/> 25. </target> 26. 27. <target name="copy" depends="prepare" 28. description="Copy files to build directory."> 29. <copy todir="${builddir}"> 30. <fileset dir="${appdir}"> 31. <exclude name="**/*.java"/> 32. <exclude name="build/**"/> 33. </fileset> 34. </copy> 35. <copy todir="${builddir}/WEB-INF/lib"> 36. <fileset dir="${jsf.lib.dir}" includes="${jsf.libs}"/> 37. <fileset dir="${jstl.lib.dir}" includes="${jstl.libs}"/> 38. <fileset dir="${commons.lib.dir}" includes="${commons.libs}"/> 39. </copy> 40. </target> 1. <target name="compile" depends="copy" 1. description="Compile source files."> 1. <javac 1. srcdir="${appdir}/WEB-INF/classes" 1. destdir="${builddir}/WEB-INF/classes" 1. debug="true" 1. deprecation="true"> 1. <include name="**/*.java"/> 1. <classpath ref/> 1. </javac> 1. </target> 1. 1. <target name="war" depends="compile" 1. description="Build WAR file."> 1. <delete file="${warfile}"/> 1. <jar jarfile="${warfile}" basedir="${builddir}"/> 1. </target> 1. 1. <target name="install" depends="war" 1. description="Deploy web application."> 1. <copy file="${warfile}" todir="${tomcat.dir}/webapps"/> 1. </target> 1. 1. </project>
To use this build file, you must customize the build.properties file that is contained in the same directory (see Listing 1-8). The default file looks like this. Listing 1-8. build.properties 1. jsf.dir=/usr/local/jsf-1_0 2. tomcat.dir=/usr/local/jakarta-tomcat-5.0.19 3. 4. username=me 5. password=secret 6. manager.url=http://localhost:8080/manager 7. 8. jsp.api.jar=${tomcat.dir}/common/lib/jsp-api.jar 9. jsp.api.jar=${jsp.lib.dir}/jsp-api.jar 10. 11. jsf.lib.dir=${jsf.dir}/lib 12. jstl.lib.dir=${tomcat.dir}/webapps/jsp-examples/WEB-INF/lib 13. commons.lib.dir=${tomcat.dir}/server/lib 14. 15. jsf.libs=jsf-api.jar,jsf-impl.jar 16. jstl.libs=jstl.jar,standard.jar 17. commons.libs=commons-beanutils.jar,commons-digester.jar
You need to change the directories for Tomcat and JSF to match your local installation. Simply edit the first two lines of build.properties. On Windows, remember to use forward slashes for file separators. Now you are ready to build the sample application (see Figure 1-15). Open a command shell and change into the corejsf-examples directory.
Run the command
apache-ant/bin/ant -Dapp=ch1/login
Here, apache-ant is the directory into which you installed Ant, such as c:\apache-ant-1.6.1.
Figure 1-15. Installing a Web Application with Ant 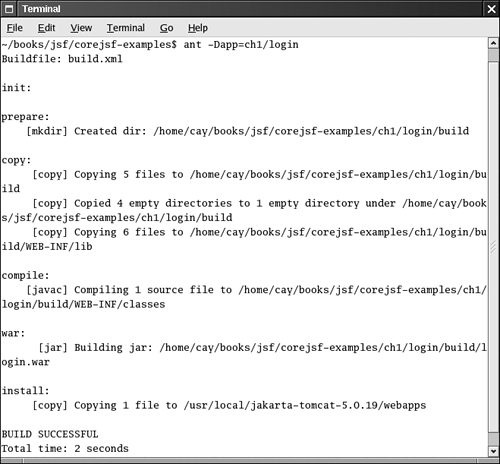
TIP  | You'll be running ant all the time. We suggest that you add the apache-ant/bin directory to the PATH environment variable. |
NOTE  | Our Ant script is a bit different from the scripts of the sample applications in the JSF distribution. We use a single script that can build almost all applications in the book. You use the -Dapp=... flag to specify the name of the application that you want to build. We think that approach is better than supplying lots of nearly identical scripts. Note that you call the script from the corejsf-examples directory, not the directory of the application. |
Using the Deployment Manager with Ant The build.xml file of the preceding section exactly imitates the manual deployment process by copying the WAR file to the Tomcat directory. This deployment method relies on the "auto deploy" feature of Tomcat. When "auto deploy" is turned on, Tomcat checks the timestamp of the WAR file before fulfilling a web request. When the WAR file has changed, Tomcat discards the old pages and Java classes and reads the new versions from the WAR file. This behavior is activated by default, but you can turn it off by editing the tomcat/conf/server.xml file. In our experience, automatic deployment works well most of the time, but there are occasional glitches. Sometimes, there is a slight delay before the new version of the application becomes available. Occasionally, you will find that Tomcat is in an inconsistent state, and you have to restart it. We prefer to use the Tomcat deployment manager instead. The build.xml file in in the corejsf-examples directory defines several tasks for this purpose (which are not shown in Listing 1-7). You need to carry out several configuration steps to activate them. Edit the file tomcat/conf/tomcat-users.xml. Anywhere inside the tomcat-users tag add the tag
<user username="me" password="secret" roles="manager"/>
This tag defines a user who is allowed to add and remove web applications. Of course, if your computer is publicly accessible, you should use secure values for the username and password.
If you changed the manager username and password, edit the build.properties file and update the username and password settings.
Copy the following file to the apache-ant/lib directory:
tomcat/server/lib/catalina-ant.jar
This file is required by the Ant tasks for installing web applications.
When you want to deploy a new web application, first make sure that Tomcat is running. Then issue the command
apache-ant/bin/ant -Dapp=ch1/login deploy
Your application will now be deployed to the servlet container. TIP | If Ant complains that it does not know the deploy task, double-check that you added catalina-ant.jar to the apache-ant/lib directory. |
If your application is already deployed and you try to deploy it again, the deploy task throws an exception. In that case, you need to undeploy it first. Use the command
apache-ant/bin/ant -Dapp=ch1/login undeploy
Then deploy the application again. TIP | We found it tedious to remember whether our application was currently deployed or not. Our Ant script contains a task redeploy that automatically undeploys and redeploys an application. However, undeploying a nonexistent application throws an exception that terminates Ant. We overcame that problem by using the handy ant-contrib library from http://ant-contrib.sourceforge.net. If you want to use the redeploy task, you need to download and install the library. Next, copy the JAR file in the lib subdirectory of the ant-contrib installation into the apache-ant/lib directory. Then simply issue the command
apache-ant/bin/ant -Dapp=chapter/appname redeploy
You need not worry whether or not the application was previously deployed. |
|