Understanding and Optimizing Keylight
| If you carefully followed the instructions in the previous section, your composite is now either closer to looking good or has an obvious problem. If you think it's looking good, focus in on a few details, and note if there are any problems with the following in your full motion preview:
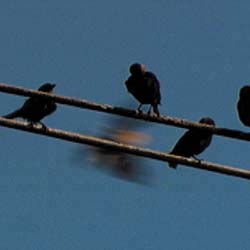
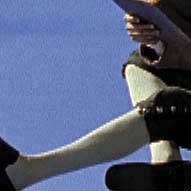
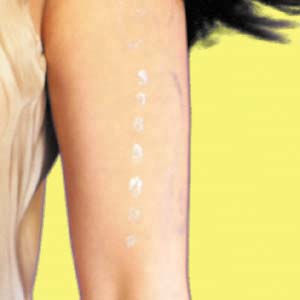
You are, of course, free to find niggling problems of your own and share them with your friends (Figures 6.21a through d). Figure 6.21a through d. Fun challenges you may encounter when pulling a color key include wispy hair (6.21a), motion blur (6.21b), contamination of foreground elements by the background color (6.21c), and shadows (6.21d).
Alternatively, there may be something fundamentally wrong with your matte, including
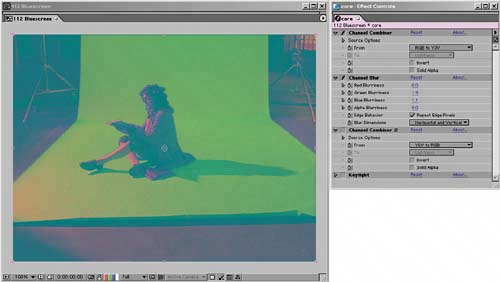
Keylight anticipates all of these issues, offering specific tools and techniques to address them. Before you delve into those (which I'm saving for the "Focusing In" section) take a look under the hood at how Keylight actually works. The Inner Workings of KeylightA few decisions are the key to Keylight, and most of the other controls compensate for how effectively you made those few decisions. This section offers a glimpse into the inner workings of Keylight, which will greatly aid your intuition when pulling a matte. The core of Keylight involves generating the screen matte, and the most essential step is choosing the screen color. From that one color choice, Keylight makes nonlinear comparisons between its saturation and hue and each pixel, as detailed in Table 6.1.
The main lesson of Table 6.1 is that a healthy background color is of a reasonably high saturation level and of a distinct hue. Those sound like vague criteria, not easily metand it's true, they are somewhat vague. That's why Keylight adds the Screen Strength, Screen Balance, and Alpha and Despill Bias controls just below Screen Colour. Screen Strength helps define the saturation of the background pixels, and Screen Balance delineates its hue. The Bias controls color correct the image. All of these controls differ from the controls below them in Keylight in that they work on the color comparison process itself, rather than the resulting matte. The major enemy of a successful blue-screen shot is muddy, desaturated colors. One clear symptom that saturation in your background isn't sufficiently high for an easy key is that areas of the background are of a consistent hue yet fail to key out. Similarly, a clear symptom that your foreground has become contaminated with reflected color from the background is that it becomes semi-opaque after setting the Screen Colour. In either case, the Screen Strength control becomes useful. The Screen Strength control boosts or reduces the saturation of each pixel before comparing it to the screen color. This effectively brings more desaturated background pixels into the keying range if raised or, if lowered, knocks back pixels in the foreground containing the background color. That takes care of saturation, but what about hue? Keylight is designed to expect one of the three color values to be much more prevalent than the other two. But it can do an even better job if it knows which of the two remaining colors is more prevalent. By default, the primary color is weighted evenly against the two other components of a pixel. In the real world, however, there might be far more of one than the other, and Screen Balance allows you to alert Keylight to this fact. A Rosco Ultimatte Blue screen will have quite a bit of green in itmuch more than red, unless someone has lit it wrong. Ultimatte Green screens are almost pure green (Figure 6.22). Figure 6.22. The Rosco colors: Ultimatte Blue, Ultimatte Green, and Ultimatte Super Blue. The blue colors are not pure blue, but contain twice as much blue as green, and twice as much green as red. The green is nearly pure, with only a quarter the amount of red and no blue whatsoever. Lighting will change their hue, which has also changed by being taken to print. They're called Ultimatte because that's the hardware system for which they were initially optimized.
On this theory, you would use a balance of 95% with blue screens and leave it at 50% for green screens. The true recommendation from The Foundry, however, is to put it near 0, put it near 100, and compare these to the default setting of 50 to evaluate which one works best. In other words, you should think of there being three settings to try (instead of 100): 5%, 50%, and 95%.
The Bias settings, Alpha Bias and Despill Bias, effectively color correct the image before the key is pulled, by scaling the primary color component up or down (enhancing or reducing its difference from the other two components). Use the Bias settings if the screen color has been infected with a secondary color, causing it to turn muddy, moving it toward gray. Focusing In: Clean-Up ToolsOnce you are satisfied that you have as good an edge matte as possible, you are ready to zoom in on a detail area and work on solving specific problems. If you see an area that looks like a candidate for refinement, save (so that you can Revert to this as your ultimate undo point), zoom in, and create a region of interest around the area in question.
Now take a look at some common problems you might encounter and the tools built into Keylight to solve them. Holes and EdgesThe double-matte method shortcuts a lot of the tug of war that would otherwise exist between filling holes in the foreground and increasing the chunkiness to the edge, which inevitably results. Even with this advantage, your edge matte probably will require adjustments to the Clip Black and Clip White controls that you used on the core matte to reduce noise in the background and make foreground edge detail more prominent.
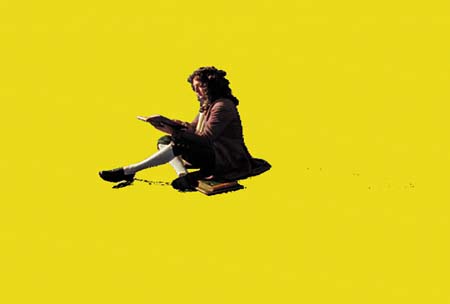
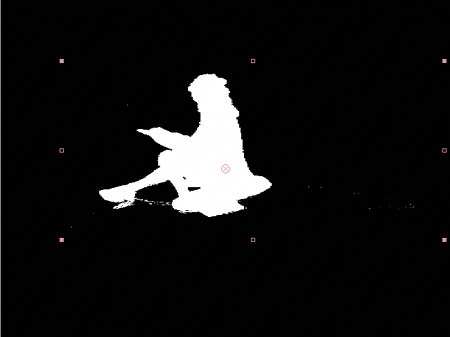
The game is to keep as large a difference between the two settings as possible. The closer those two numbers approach one another, the closer you are to having a bitmap alpha channel in which each pixel is either black or whitea bad thing (Figure 6.23). The delta, or difference between the clipping numbers, represents the area in which all your gray, semitransparent alpha pixels are allowed to exist, so the goal is to give them as much real estate as possible. Figure 6.23. This is why you divide difficult shots into pieces. Eliminating all the problems with this key has resulted in a chunky, chewy, quantized matte.
If you take the Clip controls too far and are looking for a way out of the corner without starting over, raise the Clip Rollback setting. This control is designed specifically to restore detail only to the edge, and used in moderation and with a close eye on the result it can be quite effective (Figure 6.24). Figure 6.24. In this case, raising the Clip Black setting and rolling it back, instead of raising Screen Strength (as was advocated for this shot in the step-by-step) gets the nod. The hair detail can be given a thicker matte without introducing noise into the background.
Here's how Clip Rollback works: The number assigned to this control is the number of pixels from the edge that are rolled back. The edge pixels reference the original, unhardened screen matte. So if your edges were looking nice and soft on the first pass but pulling noise out of the matte hardened them, this tool could help you out by restoring them. Noise SuppressionAre your mattes chattering? Keylight includes a Screen Pre-blur option that you should use only in the zoomed-in view and only with footage that has a clearly evident noise problem, such as source shot on miniDV. Essentially, this option is the same as blurring your source footage before keying it, so it adds error and is something of a desperation move. The result of the blurring does not appear in the footage itself; it is visible only internally to Keylight. A better alternative if your matte is fundamentally sound is Screen Softness, found under the Screen Matte controls. The difference is that Screen Softness blurs the matte itself after the key has already been pulled, so it has a much better chance of retaining detail. As was touched upon in Chapter 3, edges in nature are slightly soft for various reasons; so used to a modest degree (considering that it is introducing error into your key), this control can enhance the realism of your matte (Figures 6.25a, b, and c). Figure 6.25a, b, and c. Okay, you might have to squint your eyes, but look closely enough and you'll see how much more hair detail is retained using Screen Softness (6.25b) than Screen Pre-blur (6.25a). Both have a nicer look up so close than the unsoftened matte (6.25c).
A more drastic approach, when softening and blurring cannot reach larger chunks in the footage, is to use the Despot controls to simplify the matte. If you use these at all, use them at low levels. Crank them up, and you'll see that they cause an undesirable blobbiness in your matte. For this reason, I've never quite trusted these controls and usually leave them alone. A better approach, particularly with miniDV and HDV footage (which by the way are both guaranteed to add undesirable noise and are typically not recommended for blue-screen and green-screen shoots), is one that was refined to perfection by a member of the After Effects community at large, Mats Olsson (and drawn to my attention by Alex of Disciple Films in Paris). The steps are
YUV is a color space associated with broadcast video and used in component PAL television. It is functionally similar to YIQ, the NTSC variant. In After Effects YUV, the red channel actually displays the luminance value of the shot, while the green and blue channels display blue and red weighed against green. It's a complicated analog color method, which is why you may never have encountered it, but DV formats work in a similar manner, giving more weight and clarity to luminance than to color (and giving the least weight and clarity of all to the blue channel, an obvious drawback). Fringing and ChokingSometimes, despite all best efforts, you will work on a matte and find that you are left either with extra unwanted edge pixels (fringing) or that your keyed subject has lost all subtle edge detail because the matte is overchoked. On the one hand, Keylight does include the Screen Grow/Shrink control for such situations. On the other hand, if you find yourself having to shrink or expand your matte, it may be a symptom of other problems. Faced with the need to choke or spread my matte (another way of saying shrink or grow), I typically go back and try my initial key again, possibly breaking it down into more component parts using holdout masks. (More on choking and spreading coming up.) Spill SuppressionThe thing to understand about Keylight's suppression of color spill (foreground pixels contaminated by reflected color from the background) is that spill suppression in Keylight all happens when the matte is initially pulled. Whatever matte you get from Keylight's core controls has spill suppression. So spill-kill is practically automatic if you pull a good initial key (Figures 6.27a and b). Figure 6.27a and b. Setting the correct Screen Balance is critical not only to pulling a good key but to getting automatic spill suppression. If you see spill with Screen Balance at the default 50% (6.27a), just try 5% and 95% (6.27b) before you move on to more drastic measures.
When does this lovely elegant freebie disappear? First of all, when it's an unwanted by-product. There are situations when parts of the foreground that you want to keep are close enough in color range to the background that their color is suppressed. On The Day After Tomorrow our problem was that the helicopter pilots on their way to Balmoral were wearing blue uniforms, which would turn gray with spill suppression. For example, I had to rotoscope an epaulet to bring it back to blue. Furthermore, adjustments to the matte can expose areas of the clip that didn't get the spill suppression. Those are the green pixels in the Status view (back in Figure 6.20); these show the areas of the matte whose spill suppression may now be off. In such cases, you specify a Replace Method; Soft Colour set to medium gray is a good choice if the only affected pixels are at the edge. It is a cheat, but it will make your key look better by gently desaturating pixels that might otherwise pop. If too much of your edge will be affected for replacing in gray to work, you still have an option in Keylight: Uncheck the Lock Biases Together toggle and raise the Despill Bias, leaving the Alpha Bias at 0. This tells Keylight that there is more of the foreground color than expected to suppress, but that the areas that are contaminated with blue should not be made more transparent. Finally, in cases in which Keylight's spill suppression becomes unwieldy or not useful (as with the soldier in dress blues), there is an easy out. Create a good key without worrying about blue spill, pre-compose the result, and apply it as an alpha matte to the foreground source. You can then use one of the methods described in the next section to try and remove color spill without adversely affecting your footage. |


EAN: 2147483647
Pages: 156
- ERP System Acquisition: A Process Model and Results From an Austrian Survey
- The Effects of an Enterprise Resource Planning System (ERP) Implementation on Job Characteristics – A Study using the Hackman and Oldham Job Characteristics Model
- Distributed Data Warehouse for Geo-spatial Services
- Healthcare Information: From Administrative to Practice Databases
- Relevance and Micro-Relevance for the Professional as Determinants of IT-Diffusion and IT-Use in Healthcare