Water
| You've already examined the effect of water in its gaseous form (as fog, mist, or steam); what about water in its liquid and solid states? Although it's not possible to re-create The Perfect Storm or The Day After Tomorrow without elaborate 3D and practical effects, compositing plays a pivotal role in re-creating rain and snow and in enhancing practical and computer-generated scenes. Realistically, though, it's rare to do elaborate water effects without relying on some pretty elaborate practical or computer-generated source. I'll assume that you're trying to complete shots only in After Effects, but I'll focus on techniques that are equally valid even if your particle and water animations are coming from elsewhere. PrecipitationOne area where After Effects' built-in features fall short is particle generation. The Particle Playground effect, which ships with the program and hasn't changed much since around version 3.0, is slow, crude, and cumbersome. I have yet to work with anyone who had the patience to coax realistic effects out of this plug-in. If you're called upon to create rainfall or snowfall from scratch, I highly recommend taking a look at the Particular plug-in from Trapcode (a demo is included on the book's CD-ROM). Not only does it outdo Particle Playground in features and ease of use, but also, if set up correctly, it obviates the need for creating precipitation in a dedicated 3D program. It's nothing against dedicated 3D programs to note that a faster result, one that is better integrated with source footage, can be achieved in After Effects because of how directly you as a compositor can influence various factors in the scene. When you receive rain or snow elements from another artist working with 3D software (or even if you do them yourself), you may have to go through several rounds just to get the basic speed and density, wind, and turbulence even in the general range where the client wants them because it's so much harder to gain control of the match in 3D. Creating the ElementParticular has all the controls you need to create a great element of falling rain or snow. You could use a standard particle shape included with the effect, or you can create your own customized particles, such as irregular snowflake shapes. You have several choices of particle emitters; one great option is to use a spotlight as an emitter, so that all of the light layer's Transform controls are available to establish the position and direction of the particles (Figure 13.21). Figure 13.21. If you use a light as an emitter for Trapcode's Particular, you must begin its name with Emitter so the effect knows to use it. You are free to move the light in whatever position or direction you like in 3D space. You are not even limited to some relative size for the light as an emitter; here the emitter size has been raised on the X and Z axes to distribute particles across a wide area (with an optional Gaussian distribution).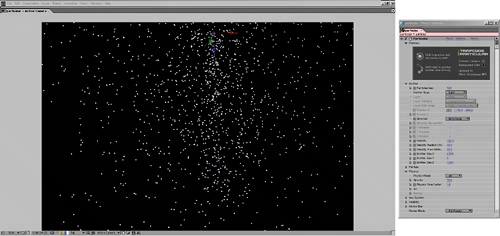 The most important settings to adjust are in the Emitter and Physics categories; the former is where you establish the amount, velocity, and direction of your particles (along with the size of the emitter, if you use a light), and the latter contains controls for the environment itself: gravity, air resistance, wind, turbulence, and spin. The Visibility category contains controls affecting the depth of your particles. In many scenes, the key to pulling off good-looking precipitation will be in creating at least three separate plains: foreground, mid-ground, and background. Separating these gives you far more control when adjusting the look than trying to do it all in one pass; you might find that the client likes the look of the snow except in one area of the shot (say, the foreground). Particular resides on a 2D layer, but the effect is 3D-aware, so if you add a camera to the composition, the particles will behave as if seen through that camera. Even shots that involve a 3D camera move or a particular lens are possible. Compositing the ElementWhen it comes time to integrate falling rain or snow with a background plate, you can do better than a simple A over B comp; in fact, the best way to display these elements might be to show their result in the scene rather than showing the elements themselves. Raindrops and snowflakes are translucent. Their appearance is heavily influenced by their backdrop. You might presume, therefore, to composite them in either by dialing down Opacity, using a blending mode such as Add or Screen, or a combination of the two. You could conceivably get away with this.
However, these individual bits of precipitation are actually like tiny lenses that diffract light, defocusing and lowering the contrast of whatever is behind them, but also picking up the ambient light themselves. Therefore, on The Day After Tomorrow our crew found success with using the rain or snow element as a track matte for an adjustment layer containing a Fast Blur and a Levels effect. The amount of blur should be set very high (200, for example), so that whatever is behind each individual raindrop or snowflake becomes a wash of color. The Levels effect is then set with a slightly lowered Output White value, and a very much raised Output Black value. The precipitation becomes visible by its effect on the scene, lightening dark areas of the background, darkening light ones, and creating diffusion throughout (Figure 13.22). Figure 13.22. Rain is difficult to see in a still shot because it has no color of its own. For that very reason, it is best applied as a track matte for an adjustment layer that you then set to blur and raise the black values of the plate footage. (It helps if the plate shot was taken under wet conditions as well.)
The best thing about this approach is that it works virtually regardless of what is in the background. There is no need to decide the color of the element for a given shot, and shots match by virtue of retaining their source colors, with precipitation having the same influence on each shot. |
EAN: 2147483647
Pages: 156