Monitoring VPN Usage with ASDM
| You can monitor the VPN client connections from three different sources:
VPN Client | Statistics PanelTo view VPN statistics of a VPN client from the PC, follow these steps:
This displays the panel shown in Figure 11-13. This panel displays the IP addresses of your client, packets in and out, connect information, and encryption protocol information. Monitor VPN Statistics from ASDMTo view the VPN tunnel information from the ASA/PIX Security Appliance, you need to view two ASDM sections:
The first option, Monitor VPN Statistics, is the more powerful of the two. For all tunnels terminating on the ASA/PIX Security Appliance, you can view the following:
By clicking Details, you can see the same information just mentioned as well as the following:
In addition to showing VPN statistics, the VPN Sessions panel enables you to perform some management of the VPN sessions. Various buttons on this panel enable you to control the VPN connections, as follows:
Figure 11-15 show the Sessions Panel. Figure 11-15. VPN Statistics Session Panel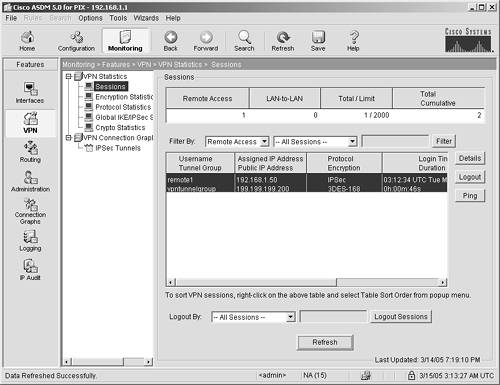 You can graph VPN tunnel statistics by navigating to Monitor > Features > VPN > VPN Statistics > IPSec Tunnels.
This view shows you the number of active tunnels and is updated every 10 seconds. (See Figure 11-16.) Figure 11-16. VPN Session Graph Panel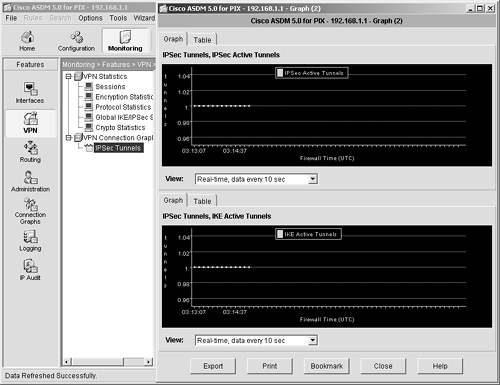 |
EAN: 2147483647
Pages: 120