2.5 Configuring Macromedia JRun
| To use JRun on your desktop, your first step is to download the free development version of JRun from http://www.macromedia.com/software/jrun/ and run the installation wizard. Most of the configuration settings are specified during installation. There are seven main settings you are likely to want to specify. The following list gives a quick summary; details are given in the subsections that follow the list.
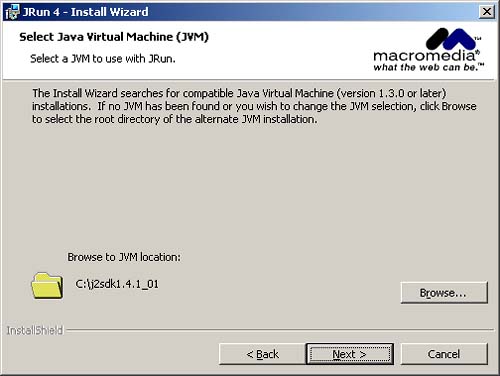
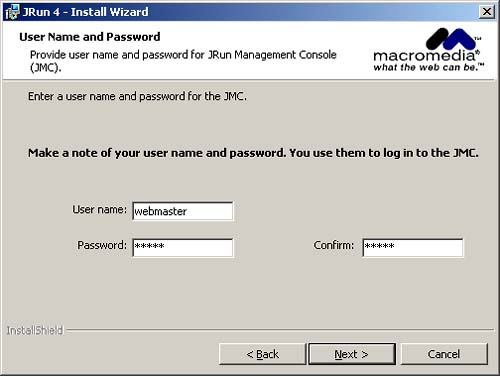
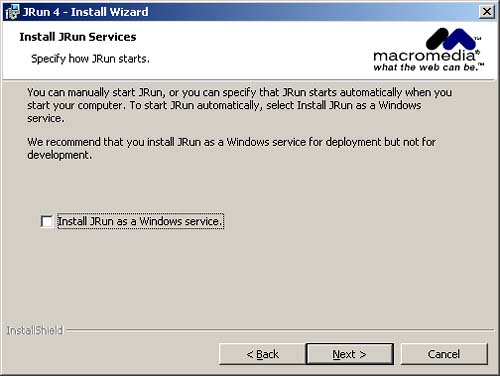
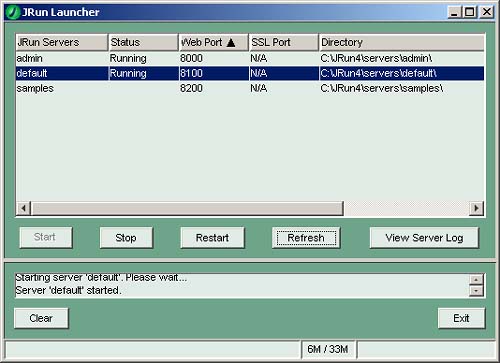
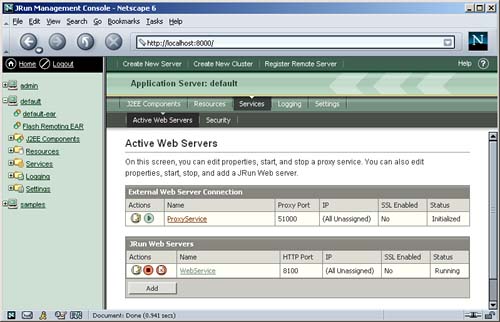
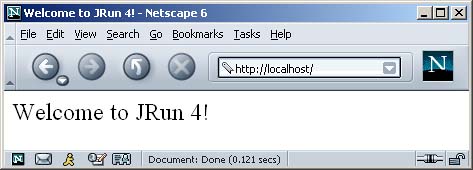
The JRun Serial NumberUsing JRun in development mode (i.e., where only requests from the local machine are accepted) does not require a serial number. So, unless you are using a full deployment version of the server, leave the serial number blank when prompted for it. You can upgrade to a deployment version later without reinstalling the server. See Figure 2-2. Figure 2-2. Omit the serial number if you are using the free development version of JRun. JRun User RestrictionsWhen you install JRun, you will be asked whether you want the server to be available to all users on your system or only to your account. See Figure 2-2. Select whichever is appropriate. The Java Installation LocationThe installation wizard will search for a Java installation and present its base directory as the default choice. If that choice refers to your most recent Java version, accept the default. However, if the installation wizard finds an older version of Java, choose Browse and select an alternative location. In such a case, make sure you supply the location of the base directory, not the bin subdirectory. Also, be sure that you designate the location of the full SDK (called "JDK" in Java 1.3 and earlier), not of the JRE (Java Runtime Environment)the JRE directory lacks the classes needed to compile JSP pages. See Figure 2-3. Figure 2-3. Be sure the JVM location refers to the base installation directory of your latest Java version. The Server Installation LocationYou can choose whatever directory you want for this option. Most users simply accept the default, which, on Windows, is C:\JRun4 . The Administrator Username and PasswordThe installation wizard will prompt you for a name and password. The values you supply are arbitrary, but be sure to remember what you specified; you will need them to customize the server later. See Figure 2-4. Figure 2-4. Be sure to remember the administrator username and password. The Autostart CapabilityWhen using JRun as a development server, you will find it much more convenient to start and stop JRun manually than to have the operating system start JRun automatically. So, when prompted whether you want JRun to be a Windows service, leave the choice unchecked. See Figure 2-5. Figure 2-5. Do not install JRun as a Windows service. The Server PortAfter completing the installation, go to the Start menu, select Programs, select Macromedia JRun 4, and choose JRun Launcher. Select the admin server and press Start. Do the same for the default server. See Figure 2-6. Figure 2-6. You use the JRun Launcher to start and stop the administration and default servers. Next, either open a browser and enter the URL http://localhost:8000/ or go to the Start menu, select Programs, select Macromedia JRun 4, and choose JRun Management Console. Either option will result in a Web page that prompts you for a username and password. Enter the values you specified during installation, then select Services under the default server in the left-hand pane. This will yield a result similar to Figure 2-7. Next, choose WebService, change the port from 8100 to 80, press Apply, and stop and restart the server. Figure 2-7. After selecting Services under the default server, choose WebService to edit the port of the default JRun server. Testing the Basic Server SetupTo verify that you have configured JRun successfully, open the JRun Launcher by going to the Start menu, selecting Programs, choosing Macromedia JRun 4, and designating JRun Launcher. If you just changed the server port, the server is probably already running. (Note that you do not need to start the admin server unless you want to modify additional server options.) Open a browser and enter http://localhost/ ( http://localhost:8100/ if you chose not to change the port to 80). You should see something similar to Figure 2-8. Shut down the server by pressing Stop in the JRun Launcher. Figure 2-8. The JRun home page. After you customize your development environment (see Section 2.7), be sure to perform the more exhaustive tests listed in Section 2.8. |

EAN: 2147483647
Pages: 194