18.3 Installing and Configuring Oracle9i Database
18.3 Installing and Configuring Oracle9i DatabaseOracle9i Database is a high-volume, production database deployed in many corporate enterprises for both Internet and intranet applications. Oracle9i Database provides all the functionality you would expect in a production database server, including stored procedures, views, triggers, enhanced security, and data recovery. Three different editions of Oracle9i Database Release 2 are available from Oracle, as described below. Oracle9i includes a large family of products (including Oracle9i Application Server and Oracle9i Developer Suite), but in the remaining sections we use "Oracle9i" to refer to Oracle9i Database.
For a more detailed summary of the three Oracle9i Database editions, see http://otn.oracle.com/products/oracle9i/pdf/9idb_rel2_prod_fam.pdf. To use Oracle9i, you must install the product, set up a database, and configure users' rights. In this section we provide information for downloading and installing Oracle9i Release 2 on Windows XP. For other platforms, you can find platform-specific installation instructions at http://otn.oracle.com/docs/products/oracle9i/. Below, we outline the four steps required to set up an Oracle9i, followed by a detailed description of each step.
Download and Install Oracle9iYou can download Oracle9i Database Release 2 from http://otn.oracle.com/software/products/oracle9i/. A registration is required for download of Oracle software; however, the registration is free. Be sure to read the license agreement if you plan on using Oracle9i for production purposes. Oracle products are free to download for a 30-day evaluation period. After 30 days, you must purchase a license. In the following instructions, we show you how to install Oracle9i Database Release 2 Personal Edition on the Windows XP platform. For installation instructions for other platforms, see the documentation at http://otn.oracle.com/docs/products/oracle9i/. Oracle9i Database Release 2 for Windows NT/2000/XP is bundled in three ZIP files : 92010NT_Disk1.zip (612,802,971 bytes), 92010NT_Disk2.zip (537,604,934 bytes), and 92010NT_Disk3.zip (254,458,106 bytes). The same install files are used for the Enterprise, Standard, and Personal editions. Follow the instructions on the download page and unzip the three files into corresponding directories named Disk1 , Disk2 , and Disk3 . Alternatively, instead of downloading the software, you can purchase a CD pack at http://oraclestore.oracle.com/. Oracle recommends the following minimum hardware requirements: Pentium 266, 256 Mbytes of RAM, and approximately 3 Gbytes of disk space for an NTFS partition. Exact requirements are available at http://otn.oracle.com/docs/products/oracle9i/doc_library/release2/A95493-01/html/reqs.htm. Following are the instructions to install Oracle9i Database Personal Edition on the C:\ drive of a Windows XP computer. To perform this installation, you must log in to the machine with local administrator rights. Core Warning
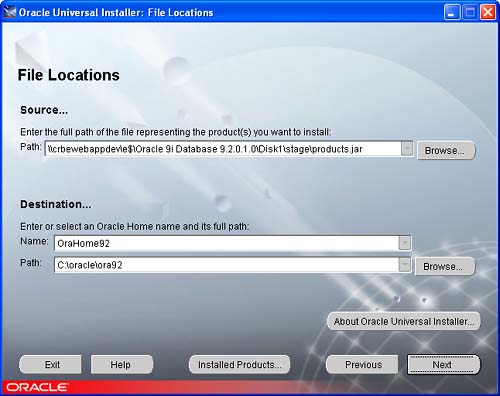
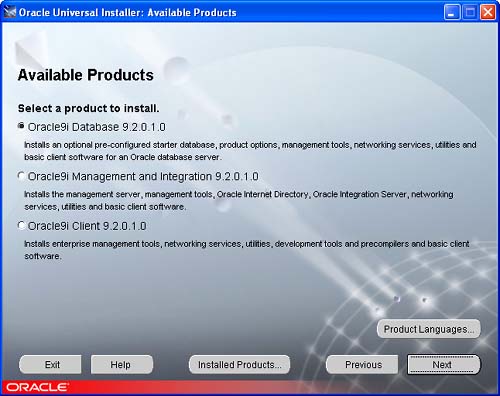
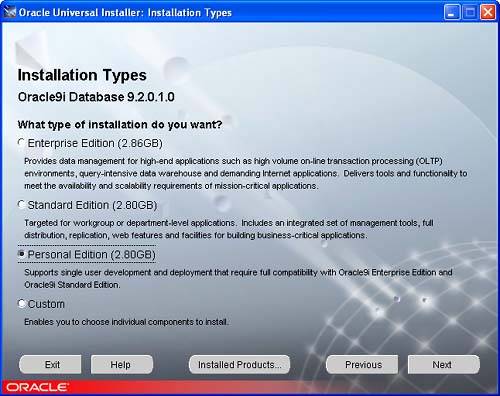
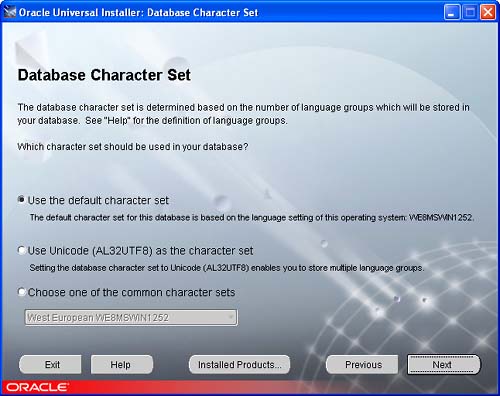
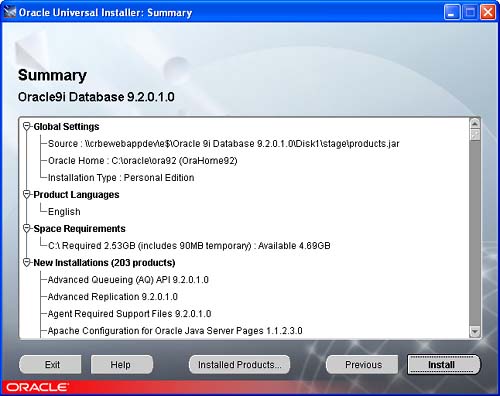
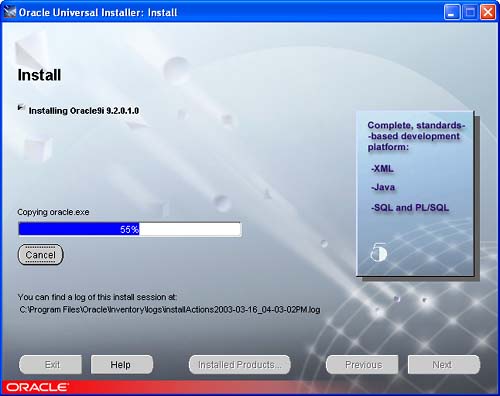
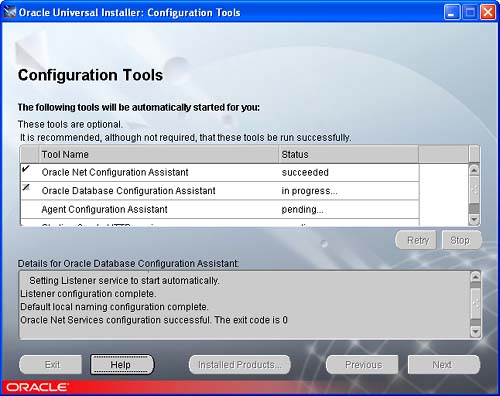
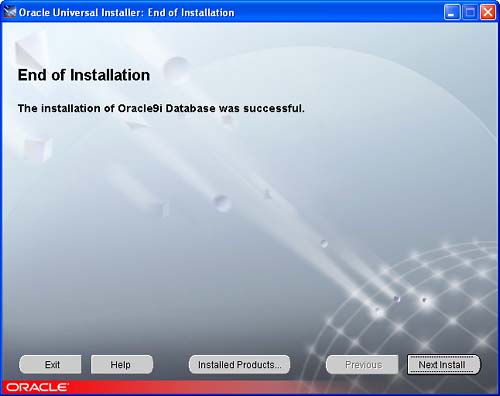
Steps to Install Oracle9i
Create a DatabaseTypically, you would create a starter database during installation of Oracle9i. However, if Oracle9i is already installed on the computer you are using, you may want to create a new database. You have two choices for creating a new database. The first choice is to use the Oracle Database Configuration Assistant, which is a graphical configuration tool. The second choice is to manually create the database. To give a better understanding of Oracle9i, we present both approaches for creating a new database. As with the Oracle9i installation, you must have local Windows administrative rights to create a new database. Core Warning
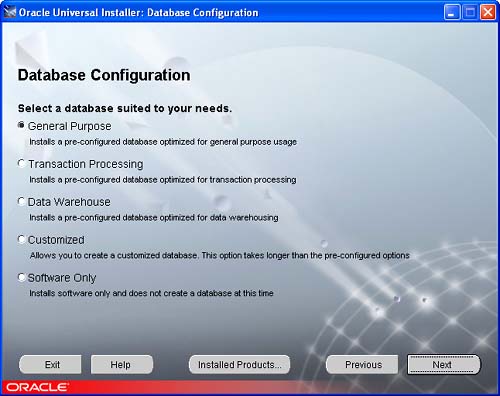
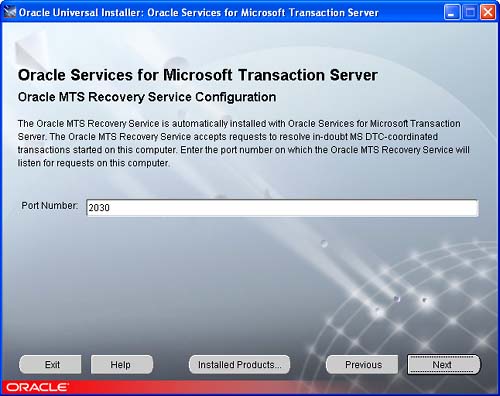
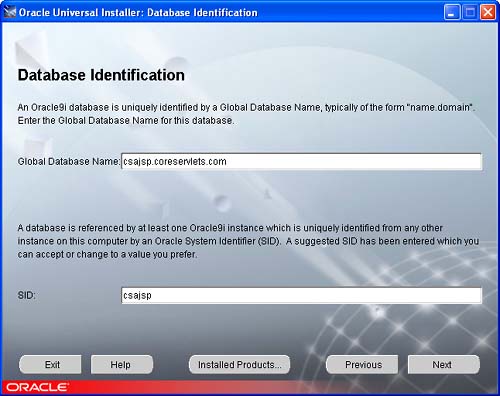
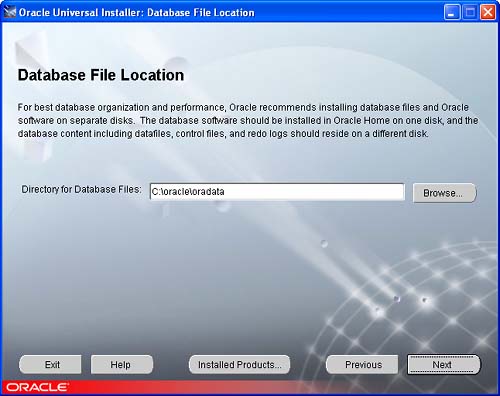
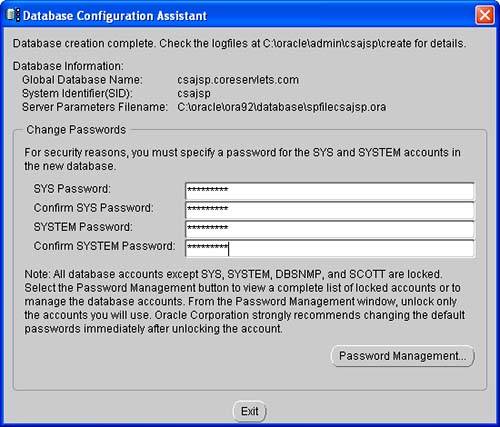
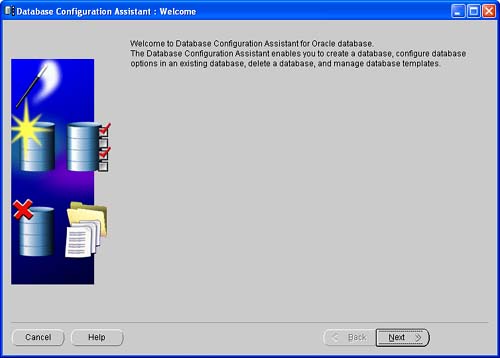
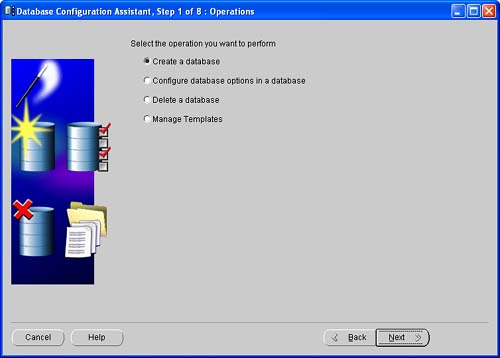
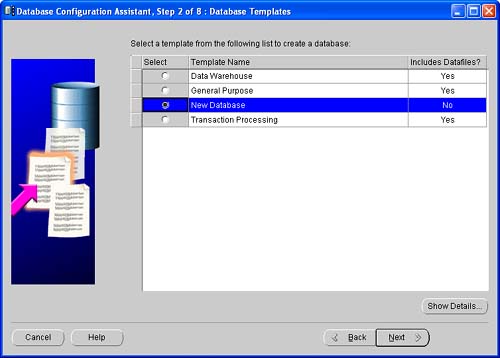
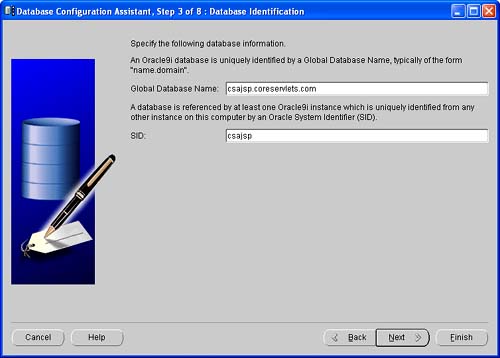
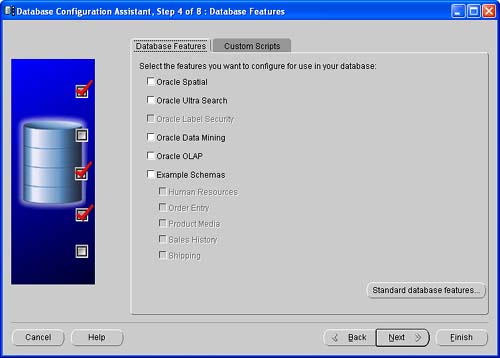
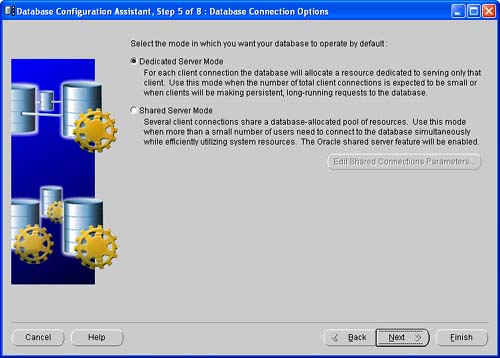
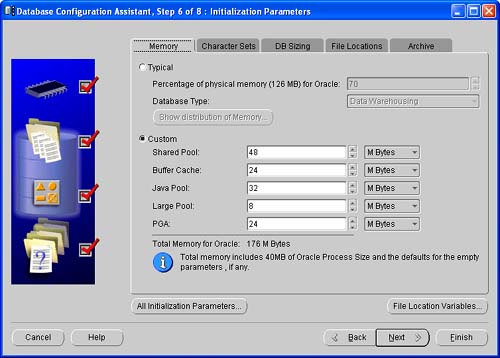
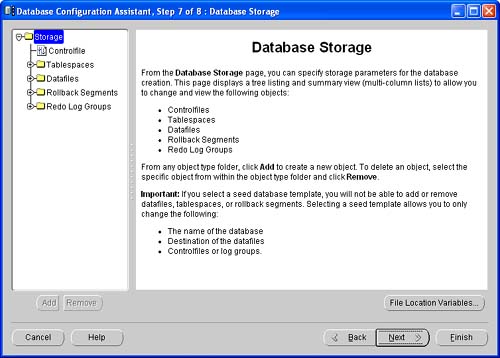
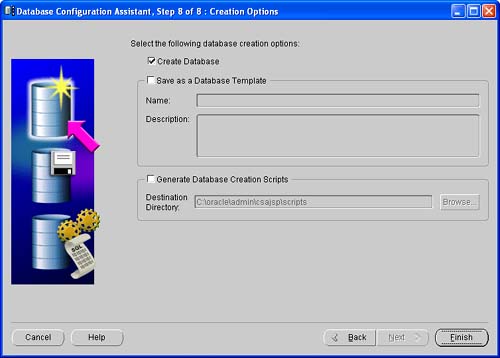
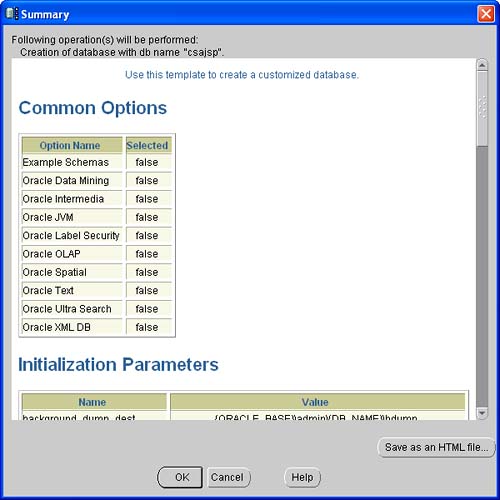
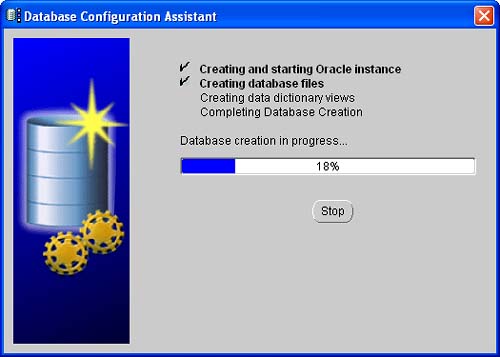
Create a Database with the Configuration AssistantThe process to create a new database is complicated, so Oracle strongly recommends using the Database Configuration Assistant (DBCA). Following are the steps to create a database with the DBCA.
Create a Database ManuallyYou usually use the Database Configuration Assistant (described in the previous subsection) to create new databases. However, for more complete control of the process, you occasionally want to do it manually. This section describes that manual process. The following list briefly outlines the steps to manually create an Oracle9i database. Detailed instructions follow the list.
Next, we provide detailed information about each step. Set Up Database DirectoriesBefore creating a new database, set up the directories for both the administrative and database files. Assuming that Oracle9i is installed on the C:\ drive, create the following directories: C:\oracle\admin\csajsp C:\oracle\admin\csajsp\bdump C:\oracle\admin\csajsp\cdump C:\oracle\admin\csajsp\pfile C:\oracle\admin\csajsp\udump C:\oracle\oradata\csajsp The bdump directory holds alert and trace files on behalf of background processes. The cdump directory stores a core dump file should the Oracle server fail and be unrecoverable. The udump directory holds trace files used on behalf of a user process. The oradata\csajsp directory contains the physical database. Create an Initialization Parameter FileFor the database to start up, Oracle must read an initialization parameter file. The parameters in this file initialize many of the memory and process settings of the Oracle instance. The standard naming convention for an initialization parameter file is init SID .ora , where SID is the system identifier for the database. An instance is a combination of the memory and background processes associated with the database. A significant component of the instance is the System Global Area (SGA) that is allocated when the instance is started. The SGA is a memory area that stores and processes data retrieved from the physical database. Core Note
In practice, most database administrators simply copy and modify an existing parameter file when they need to create a new database. Listing 18.1 presents an example initialization parameter file that creates a database named csajsp on Windows XP. Place this file in the C:\oracle\admin\csajsp\pfile directory. For more information on initialization parameters, see Chapter 1 of the online Oracle9i Database Reference at http://download-west.oracle.com/docs/cd/B10501_01/server.920/a96536/toc.htm. The minimum parameters that must be specified in an initialization parameter file are background_dump_dest , compatible , control_files , db_block_buffers , db_name , shared_pool_size , and user_dump_dest . Listing 18.1 initCSAJSP.ora (database initialization parameter file) # Initialization parameter file for Oracle9i database # on Windows XP. # Database Identification db_domain=coreservlets.com db_name=csajsp # Instance Identification instance_name=csajsp # Cache and I/O db_block_size=8192 db_cache_size=25165824 db_file_multiblock_read_count=16 # Cursors and Library Cache open_cursors=300 # Diagnostics and Statistics background_dump_dest=C:\oracle\admin\csajsp\bdump core_dump_dest=C:\oracle\admin\csajsp\cdump timed_statistics=TRUE user_dump_dest=C:\oracle\admin\csajsp\udump # File Configuration control_files=("C:\oracle\oradata\csajsp\CONTROL01.CTL", "C:\oracle\oradata\csajsp\CONTROL02.CTL", "C:\oracle\oradata\csajsp\CONTROL03.CTL") # Job Queues job_queue_processes=10 # MTS dispatchers="(PROTOCOL=TCP) (SERVICE=csajspXDB)" # Miscellaneous aq_tm_processes=1 compatible=9.2.0.0.0 # Optimizer hash_join_enabled=TRUE query_rewrite_enabled=FALSE star_transformation_enabled=FALSE # Pools java_pool_size=33554432 large_pool_size=8388608 shared_pool_size=50331648 # Processes and Sessions processes=150 # Redo Log and Recovery fast_start_mttr_target=300 # Security and Auditing remote_login_passwordfile=EXCLUSIVE # Sort, Hash Joins, Bitmap Indexes pga_aggregate_target=25165824 sort_area_size=524288 # System Managed Undo and Rollback Segments undo_management=AUTO undo_retention=10800 undo_tablespace=undotbs Create a Password FileIf the initialization parameter REMOTE_LOGIN_PASSWORDFILE is set to EXCLUSIVE , a password file must be created to authenticate administrators that have SYSDBA privileges. Connecting to an Oracle service with SYSDBA privileges gives the administrator unrestricted ability to perform any operation on the database. Using a password file to authenticate the administrator provides the greatest level of security. Use the ORAPWD command-line tool to create a password file. The command accepts three arguments: FILE , which specifies the location and filename of the password file; PASSWORD , which specifies the password to assign to user SYS for administering the database; and ENTRIES , which specifies the maximum number of users to whom you intend to grant SYSDBA privileges for administering the database (the user SYS already has SYSDBA privileges). For example, the following command, Prompt> ORAPWD FILE="C:\oracle\ora92\DATABASE\PWDcsajsp.ora" PASSWORD=csajspDBA ENTRIES=5 creates the password file named PWDcsajsp.ora , with csajspDBA as the SYS user password to administrate the database. The ENTRIES value of 5 defines a total of 5 users (administrators) with SYSDBA privileges in the password file. By convention, for Oracle9i, the password file is placed in the C:\oracle\ora92\DATABASE directory and the name of the password file is PWD database .ora , where database is the name (SID) of the database associated with the password file. Create an Oracle Service for the DatabaseBefore creating the database on Windows NT/2000/XP, you need to create an Oracle service to run the database. Creating an Oracle service avoids process termination of the database when the administrator logs out of the computer. To accomplish this step, use the oradim command-line utility. Assuming that the SID for your database is csajsp and the initialization parameter file is initCSAJSP.ora , located in C:\oracle\admin\csajsp\pfile , use the following command to create the Oracle service. Prompt> oradim -NEW -SID CSAJSP -STARTMODE MANUAL -PFILE "C:\oracle\admin\csajsp\pfile\initCSAJSP.ora" This command will create a service named OracleServiceCSAJSP , configured to start up manually. When first created, however, the service should start. To check that the service has started, issue the following command. Prompt> net start OracleServiceCSAJSP If you want the database service to start when the computer is rebooted, change the service startup type to automatic. To change the startup type on Windows XP, go to the Start menu, then Control Panel, then Performance and Maintenance, then Administrative Tools, Services, then right-click the service to change and select Properties. Next, simply change the Startup type from the available dropdown list. Declare the ORACLE_SID ValueThe ORACLE_SID is an environment variable used by various Oracle tools (e.g., SQL*Plus) to identify which database to operate upon. To set the ORACLE_SID to the csajsp database, enter the following command. Prompt> set ORACLE_SID=csajsp Note that there should be no spaces around the equal (=) character. Connect to the Oracle Service as SYSDBAThe next step is to use SQL*Plus to connect to the database service as a system DBA ( SYSDBA ) before creating the new database. First, start SQL*Plus with the nolog option, as below. Prompt> SQLPLUS /nolog Then, connect to the Oracle service as SYSDBA , using the following command, SQL> CONNECT SYS/ password AS SYSDBA where password is the SYS password you specified when creating the password file earlier. Note: by your setting of the ORACLE_SID environment variable, SQL*Plus automatically knows the database service in which to connect ( OracleServiceCSAJSP , in this case). Start the Oracle InstanceThe Oracle instance must be started to create a new database. To start the instance without mounting the database, issue the following command in SQL*Plus. SQL> STARTUP NOMOUNT PFILE="C:\oracle\admin\csajsp\pfile\initCSAJSP.ora" The PFILE must refer to the file containing the initialization parameters for the database. Starting the instance in NOMOUNT creates the SGA and starts background processes. However, the database cannot be accessed. Typically, you start a database in NOMOUNT only during creation of the database or during maintenance of the database (e.g., creating control files). Create the DatabaseTo create a new database, you issue the CREATE DATABASE SQL command in SQL*Plus. Listing 18.2 provides a CREATE DATABASE command to create the csajsp database on a Windows NT/2000/XP platform. To create the database, simply type (cut and paste) this command to SQL*Plus. Or alternatively, you can create the database by running the create_csajsp.sql script from SQL*Plus. To execute the script, use the following command. SQL> @create_csajsp.sql Note that you may need to specify the full path after the @ for SQL*Plus to find the script. Execution of this command (or script) creates the csajsp database in the C:\oracle\oradata\csajsp directory and automatically creates two user accounts, SYS and SYSTEM , to administer the database. SYS is the owner of the database dictionary (information about structure and users of the database), and SYSTEM is the owner of additional tables and views used by Oracle tools. If the database creation fails, examine the alert log file, C:\oracle\admin\csajsp\bdump\alert_csajsp.log , for errors. Correct the problem, delete all the files in the C:\oracle\oradata\csajsp directory, and reissue the command. Listing 18.2 create_csajsp.sql /* SQL command to create an Oracle9i database named csajsp. */ CREATE DATABASE csajsp USER SYS IDENTIFIED BY csajspDBA USER SYSTEM IDENTIFIED BY csajspMAN LOGFILE GROUP 1 ('C:\oracle\oradata\csajsp\redo01.log') SIZE 100M, GROUP 2 ('C:\oracle\oradata\csajsp\redo02.log') SIZE 100M, GROUP 3 ('C:\oracle\oradata\csajsp\redo03.log') SIZE 100M MAXLOGFILES 5 MAXDATAFILES 100 MAXINSTANCES 1 CHARACTER SET WE8MSWIN1252 NATIONAL CHARACTER SET AL16UTF16 DATAFILE 'C:\oracle\oradata\csajsp\system01.dbf' SIZE 325M REUSE AUTOEXTEND ON NEXT 10240K MAXSIZE UNLIMITED EXTENT MANAGEMENT LOCAL DEFAULT TEMPORARY TABLESPACE temp TEMPFILE 'C:\oracle\oradata\csajsp\temptbs01.dbf' SIZE 20M REUSE EXTENT MANAGEMENT LOCAL UNDO TABLESPACE undotbs DATAFILE 'C:\oracle\oradata\csajsp\undotbs01.dbf' SIZE 200M REUSE AUTOEXTEND ON NEXT 5120K MAXSIZE UNLIMITED; Create a User TablespaceBefore users can store information in a database, you must create a tablespace for them. All tables created by the user are placed in the tablespace. To create a user tablespace, enter the following command in SQL*Plus. SQL> CREATE TABLESPACE users DATAFILE 'C:\oracle\oradata\csajsp\users01.dbf' SIZE 15M REUSE AUTOEXTEND ON NEXT 1280K MAXSIZE UNLIMITED EXTENT MANAGEMENT LOCAL; This command creates a tablespace named users with an initial size of 15 Mbytes. The data is physically stored in the file users01.dbf . Run Scripts to Build Data Dictionary ViewsThe last step in creating the database is to run the catalog.sql and catproc.sql scripts from SQL*Plus. Enter the full path to the script preceded by an @ . SQL> @C:\oracle\rdbms\admin\catalog.sql SQL> @C:\oracle\rdbms\admin\catproc.sql The catalog.sql script creates views and synonyms for the data dictionary tables. The catproc.sql script runs all scripts required or used with Oracle PL/SQL. Both of these scripts generate considerable output, which can be ignored; error messages may occur as tables and views are first dropped before being created. Create a UserTo access the database from a Web application, you'll need to create a new user with the appropriate rights. From SQL*Plus, enter the following CREATE USER command, SQL> CREATE USER username IDENTIFIED BY password DEFAULT TABLESPACE users QUOTA UNLIMITED ON users TEMPORARY TABLESPACE temp; where username is the login name for the new user and password is the password for the new user. The default tablespace is where tables created by the user are placed, and the QUOTA clause grants unlimited use to store information in the users tablespace. If a QUOTA is not specified for the default tablespace, then the user cannot create any tables. A temporary tablespace is also assigned to the user for sorting data if required by the SQL query. Next, you need to grant the new user rights to connect to the database service and to create new tables. Issue the following SQL*Plus command, SQL> GRANT CREATE SESSION, CREATE TABLE TO username ; where username is the user requiring access to the database. Granting the CREATE TABLE privilege also enables the user to drop tables. Install the JDBC DriverIn our JDBC examples, we use the Oracle Thin JDBC driver, which establishes a direct TCP connection to the Oracle database server. Oracle JDBC drivers are downloadable from http://otn.oracle.com/software/tech/java/sqlj_jdbc/. Download the appropriate version, bundled as classes12.zip (for use with JDK 1.2 and JDK 1.3) or ojdbc14.jar (for use with the JDK 1.4) and place it in your CLASSPATH for development and in your application's WEB-INF/lib directory for deployment. If multiple applications on the Web server access Oracle databases, the Web administrator may choose to move the JAR file to a common directory on the container. For example, with Tomcat, JAR files used by multiple applications can be placed in the install_dir /common/lib directory. If your Web application server does not recognize ZIP files located in the WEB-INF/lib directory, you can change the extension of the file to .jar ; ZIP and JAR compression algorithms are compatible (JAR files simply include a manifest with metainformation about the archive). However, some developers choose to unzip the file and then create an uncompressed JAR file by using the jar tool with the -0 command option. Both compressed and uncompressed JAR files are supported in a CLASSPATH , but classes from an uncompressed JAR file can load faster. See http://java.sun.com/j2se/1.4.1/docs/tooldocs/tools.html for platform-specific documentation on the Java archive tool. As a final note, if security is also important in your database transmissions, see http://download-west.oracle.com/docs/cd/B10501_01/java.920/a96654/advanc.htm, for ways to encrypt traffic over your JDBC connections. To encrypt the traffic from the Web server to the client browser, use SSL (for details, see the chapters on Web application security in Volume 2 of this book). |

EAN: 2147483647
Pages: 194