| The next procedure that you need to learn is how to create JSP pages and servlets using the IDE. These types of programs are different from Java applications in that they normally run as part of a set of components instead of as a single class file. The first step to creating a JSP is to create a new project. To do this, choose New Project from the File menu and name the project JPPJSP1. The next step is to specify which version of the Tomcat Server you want to use to run your JSP. You do this by selecting Project Properties from the Project menu and selecting the Server tab. Click the Single Server for All Services in Project radio button to select it. Next, choose a server from the list. Normally, the most recent release is best. Figure A.26 shows this Tabbed Pane. Figure A.26. The server tab gives you an opportunity to change the server and the options. 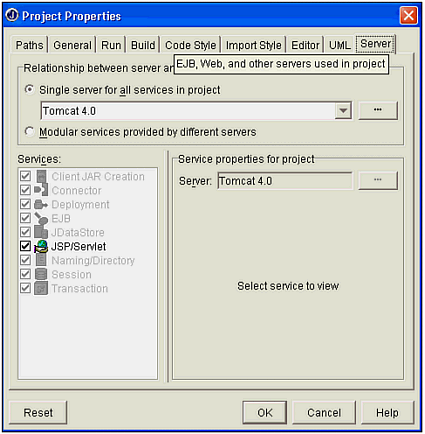 The next step is to create the WebApp for this application. The WebApp is a kind of subproject that is required for JSP and Servlet applications. The WebApp is a directory tree containing all the content used in your application. When you deploy the application, a file called web.xml is created based on the information contained in the WebApp. The web.xml file is called a deployment descriptor. It provides the metadata needed by the Web server to run your application properly. You create the WebApp by choosing New from the File menu. This will open the Object Gallery, which is shown here in Figure A.27. Figure A.27. The Object Gallery will enable you to create a number of different types of Java objects. 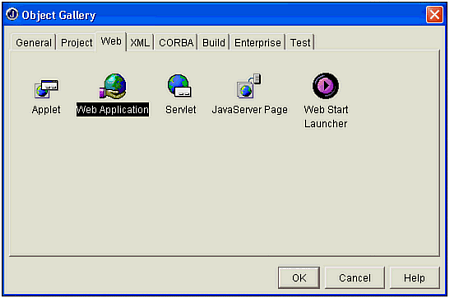 Click the Web tab, choose the Web Application icon and click the OK button. This will open the dialog shown in Figure A.28. Figure A.28. The WebApp contains metadata about your Web project. 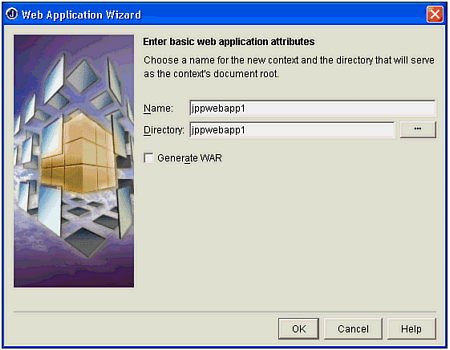 Enter the names as shown here. Leave the Generate WAR check box blank and click the OK button. Next, we need to create the JSP. To do this, select New from the File menu again. Click the Web tab again, but this time select the JavaServer Page icon and click the OK button. This will open the wizard shown here in Figure A.29. Figure A.29. The JSP Wizard leads you through the creation of your JSP. 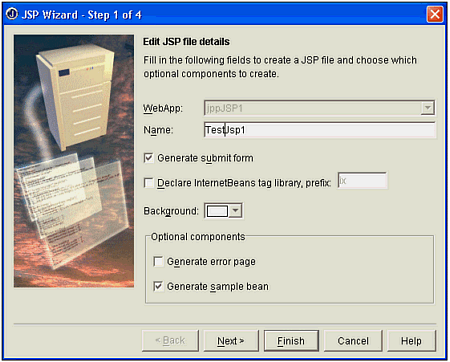 Name your JSP TestJsp1 and make sure that the Generate Submit Form and the Generate Sample Bean check boxes are checked. This will provide you with some of the structure needed to create the project. Click the Finish button, which will generate the JSP file shown in Listing A.2. Listing A.2 The TestJsp1.jsp File html> <head> <title> TestJsp1 </title> </head> <jsp:useBean scope="session" /> <jsp:setProperty name="TestJsp1BeanId" property="*" /> <body> <h1> JBuilder Generated JSP </h1> <form method="post"> <br>Enter new value : <input name="sample"><br> <br><br> <input type="submit" name="Submit" value="Submit"> <input type="reset" value="Reset"> <br> Value of Bean property is :<jsp:getProperty name="TestJsp1BeanId" property="sample" /> </form> </body> </html> The most interesting part of this JSP is the useBean tag. It provides us access to the Bean that was created for this class. <jsp:useBean scope="session" /> The source code for this Bean is shown in Listing A.3. Listing A.3 The TestJsp1Bean.java File package jppjsp1; public class TestJsp1Bean { private String sample = "Start value"; //Access sample property public String getSample() { return sample; } //Access sample property public void setSample(String newValue) { if (newValue!=null) { sample = newValue; } } } This JSP and Bean combination is ready to run without modification. All that you have to do is to expand the WebApp icon in the Project Pane until you see the Root Directory entry. Under it you will see the TestJsp1.jsp listing. Right click this filename and choose Web Run Using TestJsp1 from the menu. This will start up the JSP and display its screen in the Content Pane, as shown in Figure A.30. Figure A.30. The JSP runs in the Content Pane of the IDE. 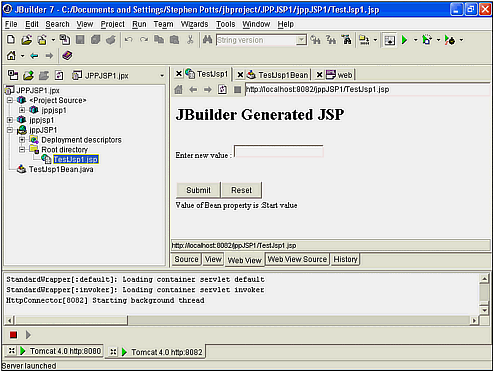 This is a fully functioning JSP. When you enter data in the Text field and click the Submit button, the data that you entered is shown beneath the buttons, as shown in Figure A.31. Figure A.31. The JSP is fully functional when it is generated by the servlet. 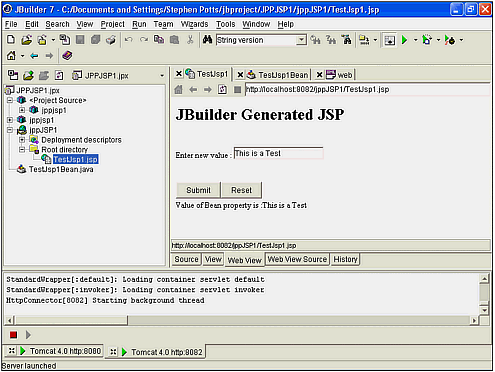 The JSP and the Bean are ready for you to add your code to. Chapter 22, "JavaServer Pages" and Chapter 23, "Component-based JSP Pages," will provide you with instructions on how to create JSPs that solve business problems. | 