Adding Borders to Cells

Adding Borders to Cells

As you work with your worksheet onscreen, you'll notice that each cell is identified by gridlines that surround the cell. By default, these gridlines do not print; even if you choose to print them, they don't look very good on the printed page. To create well-defined lines on the printout (and onscreen, for that matter), you can add borders to selected cells or entire cell ranges. A border can appear on all four sides of a cell or only on selected sides; it's up to you.

graphics/tip_icon.gif

Printing the Gridlines It's true that gridlines do not print by default. But if you want to try printing your worksheet with gridlines, just to see what it looks like, open the File menu, select Page Setup , click the Sheet tab, check the Gridlines box, and click OK .


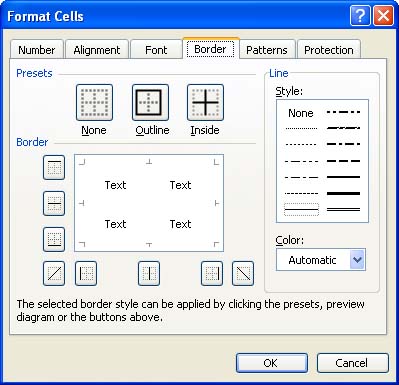
To add borders to a cell or range, perform the following steps:

  1. Select the cell(s) around which you want a border to appear.

  2. Open the Format menu and choose Cells . The Format Cells dialog box appears.

  3. Click the Border tab to see the Border options shown in Figure 10.1.

    Figure 10.1. Choose Border options from the Format Cells dialog box.

    graphics/67fig01.jpg

  4. Select the desired position, style ( thickness ), and color for the border. The position of the border is selected using the buttons along the left of the Border box. You can also click inside the Border box itself to place the border.

  5. Click OK or press Enter .

When you're adding borders to a worksheet, hiding the gridlines onscreen gives you a preview of how the borders will look when printed. To hide gridlines, select the Tools menu, select Options (this opens the Options dialog box), and then select the View tab. Remove the check mark from the Gridlines check box, and then click OK to return to the worksheet. Selecting this option has no effect on whether the gridlines actually print, only on whether they are displayed onscreen.

graphics/tip_icon.gif

Add Borders from the Toolbar graphics/borders.gif You can use the Borders button on the Formatting toolbar to add a border to cells or cell ranges. Select the cells, and then click the Borders drop-down arrow on the Formatting toolbar to select a border type.


Microsoft Office 2003 All-in-One
ISBN: B005HKSHB2
EAN: N/A
Year: 2002
Pages: 660
Authors: Joe Habraken

flylib.com © 2008-2017.
If you may any questions please contact us: flylib@qtcs.net