Aligning Text in Cells
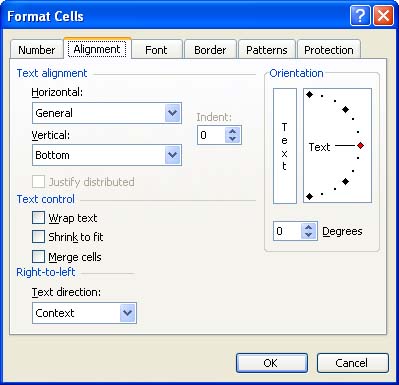
Aligning Text in CellsWhen you enter data into a cell , that data is aligned automatically. Text is aligned on the left, and numbers are aligned on the right (values resulting from a formula or function are also right-aligned). Both text and numbers are initially set at the bottom of the cells. However, you can change both the vertical and the horizontal alignment of data in your cells. Follow these steps to change the alignment:
Aligning Text from the ToolbarAs with the font attributes such as bold and italic, you can also select certain alignment options directly from the Formatting toolbar. Table 9.2 lists the buttons that enable you to align the text. Table 9.2. Alignment Buttons
Excel also enables you to indent your text within a cell. If you're typing a paragraph's worth of information into a single cell, for example, you can indent that paragraph by selecting Left Alignment from the Horizontal list box in the Format Cells dialog box (as explained earlier). After selecting Left Alignment, set the amount of indent you want with the Indent spin box in the Format Cells dialog box. In addition, you can add an indent quickly by clicking the buttons on the Formatting toolbar, as listed in Table 9.3. Table 9.3. Indent Buttons
Combining Cells and Wrapping TextAs shown in Table 9.2 in the last section, you can center text across a range of cells or merge several cells to hold a sheet title or other text information. If you want to center a title or other text over a range of cells, select the entire range of blank cells in which you want the text centered. This should include the cell that contains the text you want to center (which should be in the cell on the far left of the cell range). Then, click the Merge and Center button on the Formatting toolbar. Combining a group of cells also allows you to place a special heading or other text into the cells (this works well in cases where you use a large font size for the text). Select the cells that you want to combine. Then, select Format, Cells and select the Alignment tab of the Format Cells dialog box. Click the Merge Cells check box and then click OK . The cells are then merged. If you have a cell or a group of merged cells that holds a large amount of text (such as an explanation), you might want to wrap the text within the cell or merged cells. Click the cell that holds the text entry, and then select Format, Cells . Select the Alignment tab of the Format Cells dialog box. Click the Wrap Text checkbox. Then click OK . |
EAN: N/A
Pages: 660
- Integration Strategies and Tactics for Information Technology Governance
- Assessing Business-IT Alignment Maturity
- Measuring and Managing E-Business Initiatives Through the Balanced Scorecard
- A View on Knowledge Management: Utilizing a Balanced Scorecard Methodology for Analyzing Knowledge Metrics
- Measuring ROI in E-Commerce Applications: Analysis to Action
- Chapter I e-Search: A Conceptual Framework of Online Consumer Behavior
- Chapter IV How Consumers Think About Interactive Aspects of Web Advertising
- Chapter V Consumer Complaint Behavior in the Online Environment
- Chapter VII Objective and Perceived Complexity and Their Impacts on Internet Communication
- Chapter XV Customer Trust in Online Commerce