Setting E-Mail Options
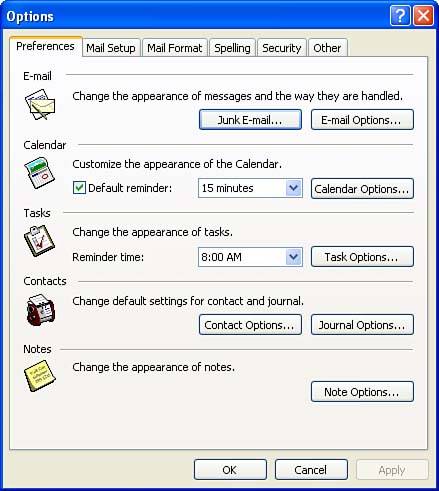
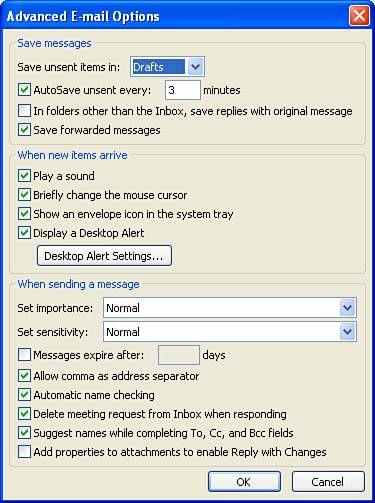
| E-Mail, Calendar, Tasks, Contacts, Journal, and Notes options are set on the Preferences tab of the Options dialog box. To open a more specific dialog box related to the features of each of the Outlook item types, click the appropriate button on the Preferences tab (see Figure 20.2). Figure 20.2. Customize E-Mail, Calendar, Tasks, Journal, and Notes options on the Preferences tab. To set e-mail options, click the E-Mail Options button. The E-Mail Options dialog box appears. This dialog box allows you to set items using check boxes and drop-down menus ; buttons also exist for Advanced E-Mail Options and Tracking Options. In the Message Handling box of the E-Mail Options dialog box, check the boxes of the options you want to activate, such as Close Original Message on Reply, Forward , and Save Copies of Messages in Sent Items Folder . Two drop-down boxes in the On Replies and Forwards section provide you with options for replying to and forwarding messages. You can choose whether you want to include the original message text with replies and forwards or attach the original message as an attached file. You can also set Advanced E-Mail options and Tracking options in this dialog box. When you click the Advanced E-Mail Options button, the Advanced E-Mail Options dialog box appears (see Figure 20.3). This dialog box allows you to control how unsent messages are handled, what happens when new mail arrives, and the default importance level of new messages that you send. When you've finished setting options in this dialog box, click OK . Figure 20.3. Options related to the saving of unsent messages and received messages are set in the Advanced E-Mail Options dialog box. The Tracking Options button in the E-Mail Options dialog box opens the Tracking Options dialog box. In this box, you can set options that notify you when e-mail you send is received and when that e-mail is read. After setting options in this dialog box, click OK . Click OK again to close the E-Mail Options dialog box.
There are other tabs on the Options dialog box that allow you to configure settings related to e-mail such as your e-mail accounts and the format of your e-mail messages. We look at these tabs in the next two sections. Setting Mail Setup OptionsThe Mail Setup tab of the Options dialog box allows you to access existing e-mail accounts or create new accounts (look back at Figure 20.1). This tab also controls other options, such as which e-mail accounts are accessed when you use the Send and Receive command on the Outlook toolbar. An additional set of options related to your Outlook data files, such as your archive files and files that hold your personal folders, can also be accessed on this tab.
To set up a new e-mail account or edit a current e-mail account, click the E-Mail Accounts button. The E-Mail Accounts dialog box opens, providing you with options for creating a new e-mail account, editing an existing account, adding a new address book, or editing an existing address book. This dialog box can also be reached from Outlook by selecting Tools, E-Mail Accounts . Creating e-mail accounts is covered in detail in Lesson 2, "Understanding the Outlook E-Mail Configurations." When you have finished creating a new account or editing an existing account, you are returned to the Mail Setup tab. To set options related to the Outlook Send/Review command, click the Send/Receive button on the Mail Setup tab. The Send/Receive Groups dialog box opens. By default, all accounts are included in an All Accounts group and checked for new messages, and any messages created using the account are also sent when you use the Send/Receive command (either on the Outlook toolbar or by selecting Tools, Send/Receive, Send All ). New groups of e-mail accounts can be created using this dialog box (click New to create the group). After a new group has been created, you can double-click the group name to see a list of all e-mail accounts. Select the accounts you want to place in the new group. Setting Mail Format OptionsThe Mail Format tab on the Options dialog box (see Figure 20.4) allows you to choose your message format, such as HTML, rich text, or plain text. You can also select whether to use Microsoft Word as your e-mail editor. The mail format that you use dictates any special fonts or stationery templates that are available to you (only HTML supports different stationery for your e-mail messages). Figure 20.4. The Mail Format tab allows you to choose your message format and select Word as your e-mail editor. To set the format for your messages, use the Compose in This Message Format drop-down list. If you want to use Word as your e-mail editor, click the Use Microsoft Word to Edit E-Mail Messages check box. If you use HTML as the format for your messages, you can select a stationery type. Select stationery using the Use This Stationery by Default drop-down list. If you want to view the stationery, select the Stationery Picker button. In the Stationery Picker dialog box, select a stationery in the Stationery list to view it. When you have finished selecting your stationery, click OK to close the Stationery Picker dialog box.
|

EAN: N/A
Pages: 660