| You can create an appointment on any day in the Outlook Calendar. When you create an appointment, you can add the subject, location, starting time, category, and even an alarm to remind you ahead of time. Follow these steps to create an appointment: -
On the Calendar in the Navigation pane, select the month and the date for which you want to create an appointment. -
In the Schedule pane, double-click next to the time at which the appointment is scheduled to begin. The Untitled - Appointment dialog box appears, with the Appointment tab displayed (see Figure 12.2). Figure 12.2. Enter all the details you need when scheduling an appointment. 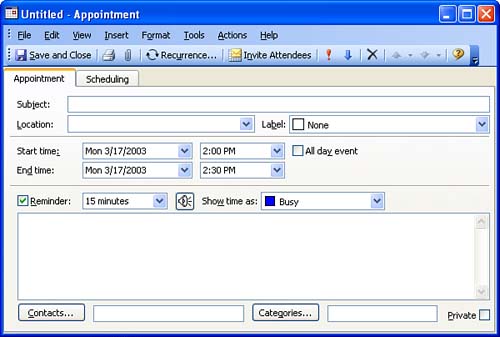 -
Enter the subject of the appointment in the Subject text box (you can use a person's name , a topic, or other information). -
In the Location text box, enter the meeting place or other text that will help you identify the meeting when you see it in your calendar. -
Enter dates and times in the Start Time and End Time boxes (or click the drop-down arrows and select the dates and times).  | Autodate It! You can use Outlook's Autodate feature: Enter a text phrase such as next Friday into the Start time or End time box, and then press Enter ; Outlook figures out the date for you and places it into the appropriate box. |
-
If you want your PC to let you know when you're due for the appointment, select the Reminder check box and enter the amount of time before the appointment occurs that you want to be notified. If you want to set an audio alarm, click the Alarm Bell button and browse your hard drive to select a specific sound file for Outlook to play as your reminder. -
From the Show Time As drop-down list, you can select how the appointment time block should be marked on the calendar. The default is Busy. But you can also block out the specified time as Free, Tentative, or Out of Office. The drop-down list uses different colors and patterns to specify each of the different appointment types. -
In the large text box near the bottom of the Appointment tab, enter any text that you want to include, such as text to identify the appointment, reminders for materials to take, and so on. -
Click the Categories button and assign a category (or categories) to the appointment. -
Click the Save and Close button to return to the Calendar. The Scheduling tab of the Appointment dialog box enables you to schedule a meeting with co-workers and enter the meeting on your calendar. See Lesson 13, "Planning a Meeting," for more information.  |