Differences in Materials
| |
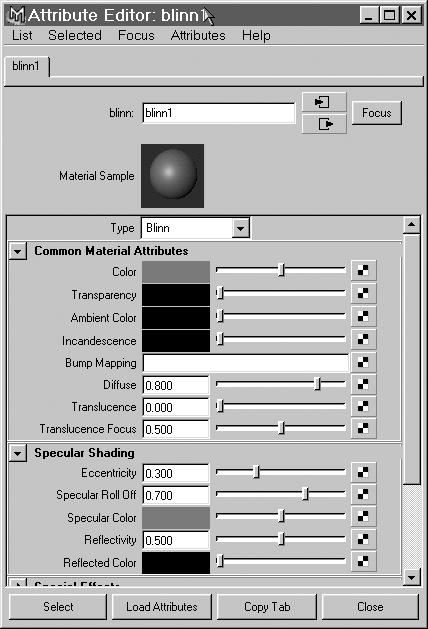
| Materials Maya's Material Editor is completely different from max's. Called Hypershade, it's under Window Rendering Editors Hypershade. Instead of having a fixed number of swatches where editing is performed, Maya's interface is completely freeform, with any number of materials appearing in an open palette. In general, you create a source material type, such as Blinn or Lambert, and then assign maps to the various channels. To do that easily, MMB-drag from the palette of map types onto the material source. Then you're prompted as to which channel it's assigned to: Color , Bump, and so forth. Material libraries Hypershade works with materials (called shaders in Maya) saved as .ma or .mb (Maya ASCII or Maya binary) files. In the Hypershade window, you can load these materials into the current scene and assign them. Tabs in the Hypershade window can contain material libraries. More details on creating and editing material libraries is included in Chapter 8, "Materials." Maps When you are viewing a material in the Attribute Editor, a checkerboard icon appears next to any mappable variable (see Figure A.20); this icon is identical to the map button in max that shows "none" when unmapped. Most of the map types should be familiar to max users if you translate as follows for a common Blinn-type material: Figure A.20. Blinn material in the Attribute Editor; checkerboard icons denote variables that can be mapped.
Maya adds new map channels called Diffuse, Translucence, Incandescence, and Reflectivity:
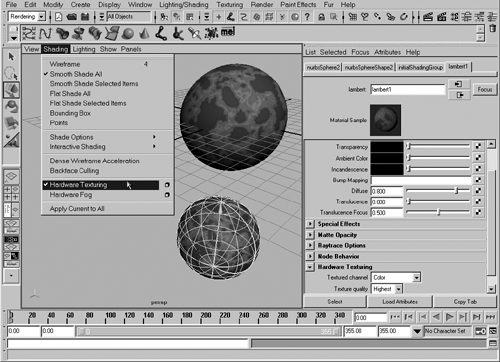
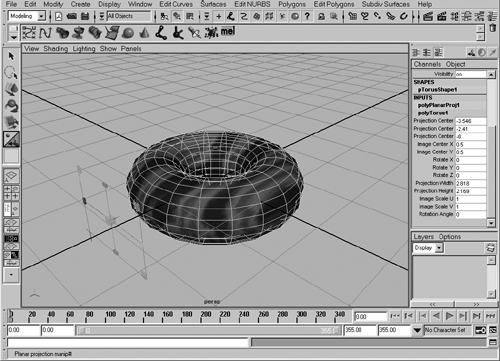
Refraction is much more complex in Maya than in max, and its many mappable variables appear under raytrace options in the material's Attribute Editor. Procedural textures Maya offers a full suite of 2D and 3D procedural textures. You can view and place them in a shaded viewport on any NURBS or polygonal object. Showing textures in viewports Any map can be displayed in the Maya panels, just as in max. Only one can be shown at a time. To enable hardware texturing, switch to Shaded mode by choosing Shading Smooth Shade All, and then choose Shading Hardware Texturing (see Figure A.21). You can also do this with the hotkey 6 for a selected 3D view panel. Now you can choose any applied texture in the Attribute Editor (under Hardware Texturing) for a material, and it will appear in all shaded panels with hardware texturing enabled. Unlike max, you can individually choose the texture's quality level, from default to low, medium, high, and highest. Figure A.21. Showing textures in shaded panels. Placing textures in viewports For polygonal objects, you can apply mapping and adjust it much as you do with the gizmo method in max. Once you have a polygonal object in a shaded, hardware-textured view, and a material with a displayed texture channel, you apply a mapping gizmo by switching to Modeling mode (hotkey: F3 ), choosing Edit Polygons Texture, and selecting a mapping type. A transformable gizmo appears, and you can get instant feedback as you adjust it (see Figure A.22). If you click off the object, the gizmo disappears. To get it back, select the object, and then find the projection type in the Channel Box and click on the name (for example, polyPlanarProj1). If the gizmo is not visible, click the Show Manipulator button, which is with the transform buttons in the Tool Box, just below the Scale button. Figure A.22. Maya offers interactive texture placement in a manner similar to max. Note that Maya does not use UV mapping channel numbers as max does. Instead, each mapping type assigned to an object is named. To pick the UV mode currently being edited, right-click the object and look under UV Sets. Every UV mapping that has been applied to the object will appear here, and you can select which one is currently active. Maya's UV Texture Editor (choose Window UV Texture Editor on the menu) is similar to the texture editor added in 3ds max 5. |
EAN: 2147483647
Pages: 201


