Types of Animation
| |
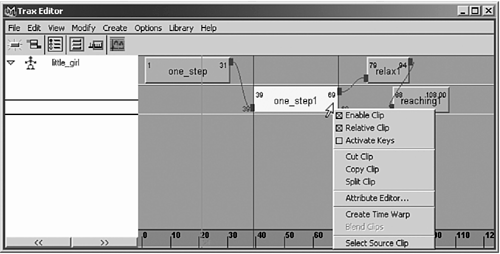
| You can use several different methods to animate your scene. Each method has advantages and disadvantages, of course, so before deciding which method to use, let's quickly review in the following sections what each method is capable of. Path AnimationYou got a glimpse of path animation in Chapter 4, "Diving In: Your First Animation." Generally , in this method, you create a NURBS-based curve and then attach it to an object in your scene (in Chapter 4, the object was the boat). The object then follows the curved path to simulate motion. You can choose at which time the object is positioned at any point along the path, so the object can reverse itself, pause, or oscillate, if you want. You'll revisit this method in Chapter 12, "Cameras and Rendering," to fly the camera along a path toward the house. Nonlinear AnimationNonlinear animation (known in Maya as the Trax Editor) is a more advanced method of animation. Unlike keyframing , nonlinear animation is completely independent of time. You blend and layer animation sequencescalled clipsto set up the motion for characters . A character is a defined set of related objects you specify in Maya (see Figure 10.5). A timeline lets you drop clips of animation in wherever you like and blends clips that overlap. In addition, you can stretch or shrink clips to make the animation keys within them occur faster or slower. Figure 10.5. Trax allows you to add and blend motion clips and poses at any point in your timelinea novel way to build animation. You can also use this method to explore variations in parts of the animation without losing your previous work or affecting other parts of the animation. For example, if you want a character to run rather than walk, you can make the walking part of the animation a clip and then adjust the leg motion without affecting the way the rest of the character moves. If you're satisfied with the changes to the leg motion, you can make that running motion a clip and blend it with the rest of the character's animation without losing your previous work on the character. The Trax Editor is explored in more detail in Chapter 11, "Character Animation." Keyframe AnimationKeyframe animation is the standard animation method, and the one you'll use in this chapter. In this method, you set keys for an object's extreme positions and let the computer fill in the in-between motion. For instance, if you're animating an arm that will bend, you set a key with the arm fully extended and another key with the arm in a flexed position. Maya then fills in the motionknown as the in-betweens between the two extremes. Keyframing also depends on time. Simply put, a key is an anchor point for a particular attribute at a designated time. When the animation reaches that specified time, the object's attribute will be at the value you set (keyed). When preparing an animation, generally you specify the range first, as you did in the previous section. You can then place keys for numeric values throughout the range by using the Channel Box or hotkeys. As you set keys, you specify the time at which those changes in the attribute's value take place. To set keys with the auto keyframe method, you click the Auto Keyframe button in the Range Slider (it turns red to indicate it's enabled). The idea with auto keyframing is that anything that changes creates a key. With auto keyframing, you can animate quickly by simply dragging the Time Slider to a given frame and then changing an attribute. However, you must set one initial keyframe on an attribute for the auto keyframe method to "activate" for that attribute. note Maya offers the option to change an attribute based on other keyed attributes. This is called set driven key animation (discussed in Chapter 15, "Your Next Steps: Efficiency and Artistry"). For example, you could tie a bouncing ball's motion to the intensity of the light shining on it, so that the ball is more brightly lit when it bounces to its highest point. Tutorial: The House Is AliveTo see how keyframe animation works, you're going to bring your house to life. In this tutorial, you'll key specific attributes for a bend deformer. We've already applied the bend deformer so that you'll get reliable results in this tutorial. The bend deformer lets you twist the house into different shapes to create the effect of a kind of haunted house. You'll start by loading the scene file noted below the CD icon. This scene contains your fully textured house with the lighting added and includes the imported objects on the Maya Fundamentals CD-ROMin particular, the ground object that provides a landscape for the house to sit on.
|
EAN: 2147483647
Pages: 201