| Although a form doesn't have to include all the fields from the underlying table, when it is intended as the primary method of creating new records, it usually does. The quickest way to create a form that includes all the fields from one table is to use the Form button, as you did in the first exercise in this chapter. Another method, which provides more control over the creation of the form, is to use a wizard. In either case you can easily customize the forms created. In this exercise, you will use a wizard to create a form that displays information about each of the product categories. USE the 06_CreateWizard database. This practice file is located in the Chapter05 subfolder under SBS_Access2007. OPEN the 06_CreateWizard database. Then open the Categories table in Datasheet view.
1. | On the Create tab, in the Forms group, click the More Forms button and then in the list, click Form Wizard.
 The Form wizard starts.
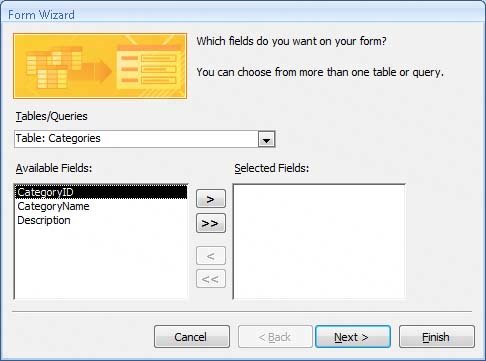 | 2. | With the Categories table selected in the Tables/Queries list, click the Move All button to move all the table fields to the Selected Fields list, and then click Next.
Move All  On the second page of the wizard, you choose the layout of the fields in the new form. When you select an option on the right side of the page, the preview area on the left side shows what the form layout will look like with that option applied.
| 3. | With the Columnar option selected, click Next.
On the third page of the wizard, you can select a style option to see how the style will look when applied to the form.
| 4. | In the list of styles, click Office, and then click Next.
Access suggests the base table name as the form's title.
| 5. | With the Open the form to view or enter information option selected, click Finish.
The new Categories form opens, displaying the first category record in the Categories table.
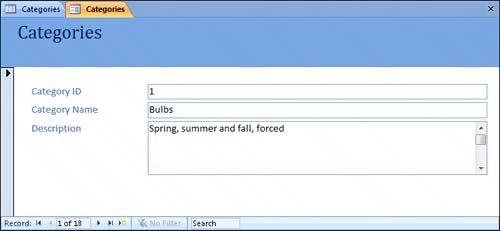 | 6. | Scroll through a few records by using the navigation controls at the bottom of the form.
Tip To change the style of a form after you create it, switch to Design view, and on the Arrange tab, in the AutoFormat group, click AutoFormat. In the list displayed, click the style you would like to use. | 7. | Switch to Design view so that you can make a few more changes.
| 8. | Delete the word Category from the Category Name label.
| 9. | You don't want to expose the CategoryID field to form users, because that value should never be changed. Click the CategoryID text box, and if the control's Property Sheet pane isn't open, press  to display it. to display it.
| 10. | In the Property Sheet pane, on the Data tab, change Enabled to No. Then press to close the Property Sheet pane.
Disabling the CategoryID text box changes it, and the label text, to gray.
| 11. | Switch to Form view, and then scroll through a few categories. Try to edit entries in the CategoryID field to confirm that you can't.
| 12. | You don't need scroll bars or a record selector in this form, so return to Design view, and then display the form's Property Sheet pane by clicking the Form selector (the box in the upper-left corner) and pressing .
| 13. | In the Property Sheet pane, on the Format tab, change Scroll Bars to Neither and Record Selectors to No. Then close the Property Sheet pane.
| 14. | Switch to Form view to see the effect of your changes.
|
CLOSE the Categories form, saving your changes, and then close the 06_CreateWizard database.
Simultaneously Creating Forms and Subforms If you know when you create a form that you are going to add a subform, you can create the form and its subform by using the Form wizard. To do so: 1. | On the Create tab, in the Forms group, click the More Forms button, and then in the list, click Form Wizard.
| 2. | In the Form wizard, in the Tables/Queries list, click the table on which you want to base the form. Then click the Move All button to include all the table fields in the new form.
| 3. | In the Tables/Queries list, click the table on which you want to base the subform.
 | 4. | In the Available Fields list, double-click the fields you want to include in the subform to move them to the Selected Fields list, and then click Next.
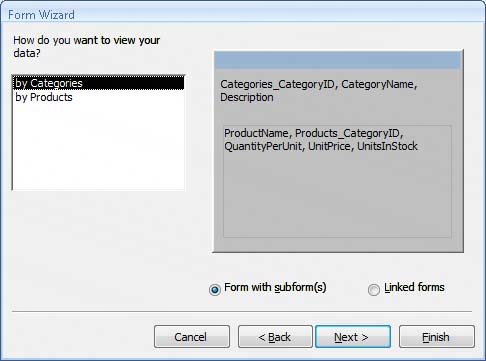 | 5. | With your primary table and Form with subform(s) selected, click Next.
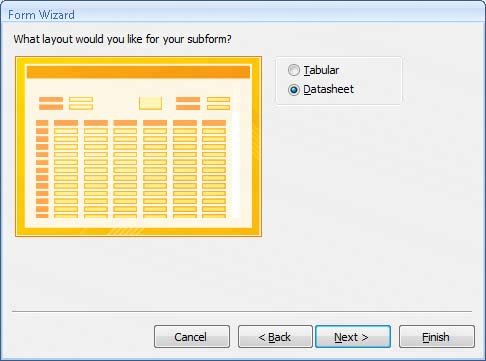 | 6. | With Datasheet selected, click Next.
| 7. | On the last page of the wizard, select a style, and then click Finish.
The wizard creates and opens the form and subform.
|
You can edit the form created by the Form wizard to suit your needs. If there is only one one-to-many relationship between the tables you want to include in the form, and that relationship has been defined in the Relationships window, the fastest way to create the form and its subform is by using the Form tool. Simply select the primary table then on the Create tab, in the Forms group, click Form. The Form tool creates and displays a form and subform, each containing all the fields of its source table. Troubleshooting If the relationship between the selected tables has not been defined, Access displays a message containing a link to the Relationships window. If this occurs, you will need to define the relationship and then re-start the wizard.
|
|