Additional Windows XP Photo Features
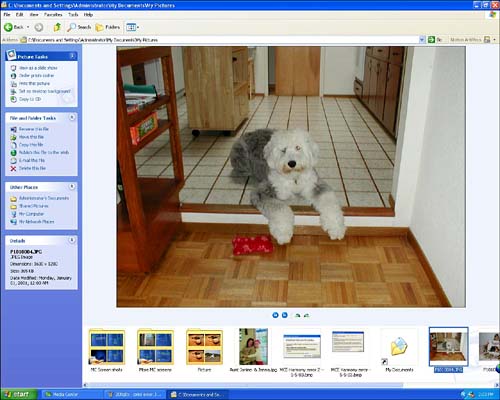
| Now that you have mastered the image- related capabilities inside the My Pictures interface, you may want to venture outside Media Center to take advantage of some of the expanded image manipulation and output tools that your Windows XP operating system places at your disposal. Picture TasksTo get started, exit or minimize Media Center and select My Pictures from the Start menu in the Windows XP desktop. The Filmstrip ViewA handy way to use the photo-handling features provided by XP is via the Filmstrip view (see Figure 19.6). This view allows you to view thumbnail images along the bottom of the screen while simultaneously viewing a large image (nearly 900x700 pixels) at the top center of your screen. Figure 19.6. The My Pictures folder in Filmstrip view offers various photo-handling options not available within the Media Center interface. This large picture is the active image, and any of the options you select on the screen will be applied to that image file. The options available include icons that advance to the next or the last image in the directory, alongside icons that will rotate the image 90 degrees to the right or left. These icons, centered directly below the large image, work exactly as the controls in the My Pictures Picture Details screen described earlier in this chapter. The more interesting options are located along the left margin of this screen, under the heading of Picture Tasks. The tasks listed may actually vary, depending on the extent to which your PC manufacturer has customized the menu. Hewlett-Packard, for instance, typically includes various advanced image-handling capabilities on the Picture Task menu (see Figure 19.7). Figure 19.7. This example from the My Pictures display on an HP Media Center includes options to create fun backgrounds and greeting cards with your pictures. Although your actual results may vary, the more common picture tasks available from the My Pictures display generally include the following:
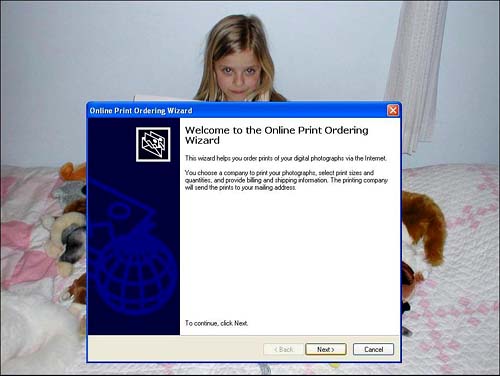
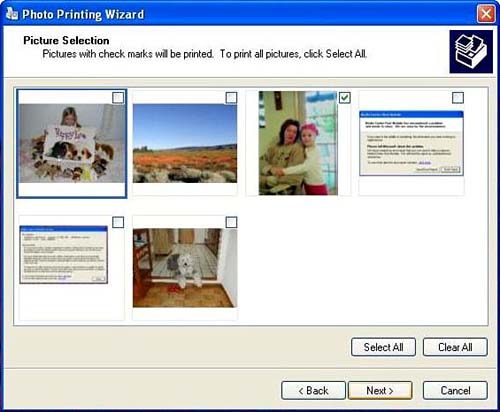
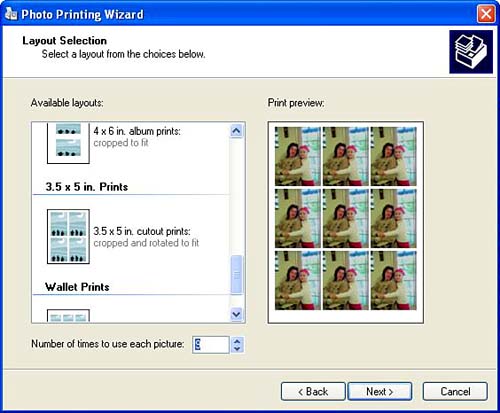
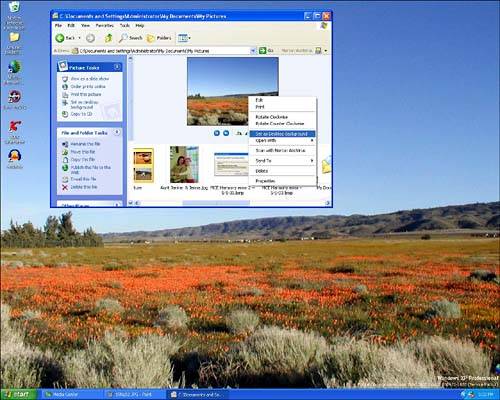
View as a Slide ShowThe slide show option in Picture Tasks is convenient , but rather rudimentary compared to the slide show capabilities found in Media Center's My Pictures interface. The most obvious feature lacking here is the choice of transitions, particularly the animated transition (described in Chapter 18). However, as a tool to quickly view and inventory the images placed in your My Pictures folder, the slide show feature available here is quite adequate. Order Prints OnlineWhen you select the Order Prints Online option, Windows XP immediately launches the Online Print Ordering Wizard (see Figure 19.8). This wizard guides you through the process of designating print size and quantity, choosing a company to print your photos, and providing that company with your billing and delivery address information. Prices are generally comparable to having prints made at a retail camera shop or drug store. Figure 19.8. When you choose to order prints online, this wizard screen appears to help you send your photos out via the Web. Print This PictureWhereas the Print Picture option in My Pictures only allows you to print one full-size copy on your currently selected default printer, the Print This Picture feature in Windows XP gives you access to a full range of printing options. These are presented via another wizard, aptly called the Photo Printing Wizard. By following the onscreen prompts, you'll be able to select the photo or photos you want to print (see Figure 19.9), choose and configure the printer you want to use, and set your printing preferences. You can choose the images you want to print individually, or click on Select All. Figure 19.9. The Photo Printing Wizard begins by showing you thumbnails of the available images in your My Pictures folder. In the Printing Preferences menu, you'll be able to select from several layouts, ranging from a full-page shot, to a contact sheet containing 35 thumbnail images on a single page, to a sheet of wallet-size photos (see Figure 19.10) or standard 3.5x5-inch prints. Figure 19.10. Choosing the Printing Preferences button from the Photo Printing Wizard lets you choose from nine photo layouts. Set as Desktop BackgroundThe Set as Desktop Background option allows you to proudly display any picture you have in your computer as a background on the desktop. You can activate the feature in one step by clicking on the Set as Desktop Background option shown in the Picture Tasks menu on the left side of the screen, or you can right-click on the image and select Set as Desktop Background from the pop-up menu (see Figure 19.11). tip
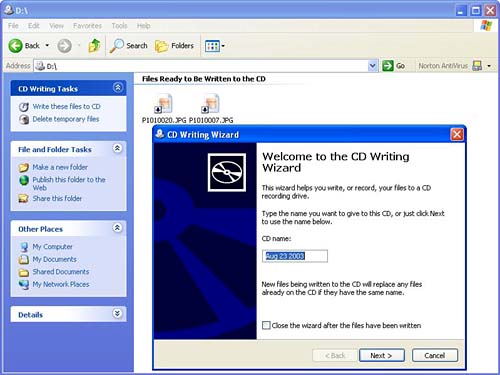
Copy to CDMaking the transition from analog to digital photography requires that you develop a new routine for saving those old photosbecause there's no way to just toss your digital images into an old shoe box. One of the best ways to archive your digital images for posterityor just to free up some space on your hard driveis to store the pictures on a CD. When you click on Copy to CD in Picture Tasks, Windows XP automatically places a temporary copy in a directory called CD Burning. Files will be stored there until you are ready to copy, or "burn" them, to a recordable CD. Figure 19.11. Choosing the Set as Desktop Background option gives you a one-step way to freshen up your XP desktop, and show off a favorite picture. Burning Your Photos onto a CDAfter you've selected photos to burn onto a recordable CD, you can finish the process by using the CD Writing Wizard (see Figure 19.12). You can launch the wizard by inserting a blank disc into your computer, or by clicking on the My Computer link listed on the left under the heading Other Places, and then double-clicking on the icon that is shown for your system's recordable or rewritable CD (CD-R/CD-RW) drive. Figure 19.12. The first screen of the CD Writing Wizard prompts you to enter a name for your new CD. You can use the current date or any name you want.
When you open the window for your CD-R/CD-RW drive, a menu for CD Writing Tasks will appear in the upper left of the screen. Click on Write These Files to CD to launch the CD Writing Wizard, and follow the onscreen instructions. After you have burned your images onto a CD, you can delete them from your computer to make more room on your system's hard drive.
|

EAN: 2147483647
Pages: 159