1.3 Linking a Custom Style with a Tool
1.3 Linking a Custom Style with a Tool
In our first example we shall begin by defining a style. (A style gathers together a collection of format information such as font, alignment, border, and color . Styles can be used for formatting cells.) Then we shall record a macro that assigns this style to selected cells. Then a new tool will be added to the toolbar, which will be linked to this macro. We will then be able to format previously selected cells with the style that we have defined by clicking on the new tool.
| Note | All the examples in this chapter can also be found in the example files at http://www.apress.com. |
Before You Begin
We begin with three tips that will simplify your programming with Excel 2000:
-
With Excel 2002 the default setting for the security of macros is High. This means that VBA code can be executed only when the Excel file comes from a trustworthy source and is signed.
This is not the case for Excel files that one develops oneself, nor for the example files in this book. To develop and test your own VBA-Code you must therefore set the macro security to Medium in the menu ToolsMacroSecurity. (Further information on security can be found in the last section of Chapter 4.)
-
A new feature of Office 2000 that drives every user to despair is dealing with menus : In the default settings, only the most important menu items are shown, which, moreover, appear only after some time. To bring this nonsense to an end, execute View Toolbars Customize, click on the Options tab, and there deactivate the option Menus Show Recently Used Commands. From now on the full menus will be shown in all your Office applications.
-
In the VBA development environment (which you may invoke by pressing Alt+F11 ) there are also some options whose preset values are a bit weird. You can reach the options form (dialog) by executing ToolsOptions. When you get there, deactivate Auto Syntax Check. (Syntax will still be checked; lines containing errors will be marked in red. But you will be spared the burdensome announcement of the error accompanied by a beep.)
Then activate the option Require Variable Declaration. (Extensive justification for this will be given in the first section of Chapter 4.)
In the dialog page General deactivate Compile On Demand (see Section 3.2). Finally, on the page Docking deactivate all of the options fields. (You will thereby obtain the result that in the development environment you will be able to place windows on top of each other. In the default setting the environment behaves as in Windows 1.0 ”and one would have thought that those times were long gone!)
Step 1: Definition of the Custom Style "Result"
We would like cells that contain an (intermediate) result of a calculation to look as follows :
-
Font: Arial, 14 point, bold
-
Border: double line below
-
Number format: two decimal places
If you wished, you could, of course, choose other formatting characteristics. The only point of the particular choice in this example is to define a new uniquely recognizable style.
To define a style, open a new workbook by executing FileNew, type a number in an arbitrary cell, and format this cell according to the characteristics given above. Then execute the command FormatStyle. In the dialog that appears give the style the name "Result" and click first ADD and then OK.
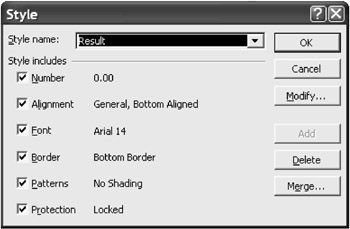
Figure 1-1: Defining a new style
Step 2: Recording a Macro
We would like the steps that we have just taken to format a test cell to be carried out in the future by a macro. Why should we have to do all the work? For this to happen we must first record these steps with the macro recorder. Move the pointer into a new cell and input a number (in order to verify the result). Terminate input by hitting Return, and move the pointer if necessary back into the cell that you have just altered . Now select the command ToolsMacroRecord New Macro, and give the macro the name "FormatAsResult"(see Figure 1-2).
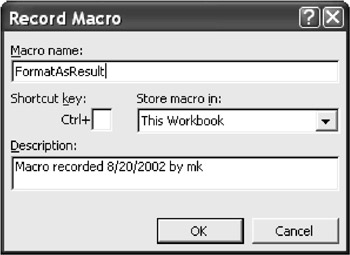
Figure 1-2: Form for recording macros
As soon as you click on OK, Excel begins to record your new macro. Format the currently active cell with the style "Result"(just as you did at the end of Step 1 when you were testing the new style). Terminate the recording of the macro with ToolsMacroStop Recording or by clicking on the small square that appeared on the little "Stop Recording" tool window that opened when you started recording.
Now you can view the code of the completed macro by hitting Alt+F11 to switch into the development environment and there examining "Module1." (This module was created automatically during the recording of the macro. If "Module1" already exists, then Excel creates a new module with the name "Module2.") The new module will look something like the following:
'sample: format.xlsSub Sub FormatAsResult() ' FormatAsResult macro ' Macro recorded 2/25/2000 by David Kramer Selection.Style = "Result" End Sub
We would now like to test the new macro. Return to your worksheet, input a number into an arbitrary cell, and terminate input by hitting Return. Execute TOOLSMACROMACROS and select the macro "FormatAsResult." Excel executes your macro, and the cell should appear in the now familiar format.
Step 3: Defining a New Tool
In order to make the macro easier to summon when you need it, we would like to create a new toolbar. On this toolbar we will place a tool to invoke our macro. Executing ViewToolbarsCustomize in Excel (not the VBA editor) brings up the form that we require. By pushing the button labeled New after clicking the Toolbars tab, you create a new empty toolbar, which for this example you can name "Intro1." Now click on the Commands tab in the Customize form. Select the category "Macros" and then with the mouse drag the command "Custom Button" into your new toolbar.
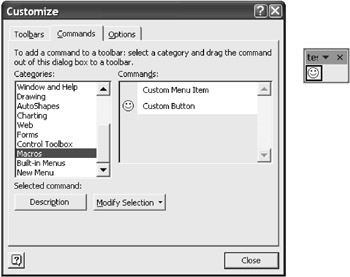
Figure 1-3: The form for changing menus and toolbars
Now the new tool must be modified and correctly labeled. Furthermore, it must be set to point to our macro FormatAsResult . These steps are accomplished by clicking on the tool with the right mouse button. (The CUSTOMIZE form will remain open during this operation.)
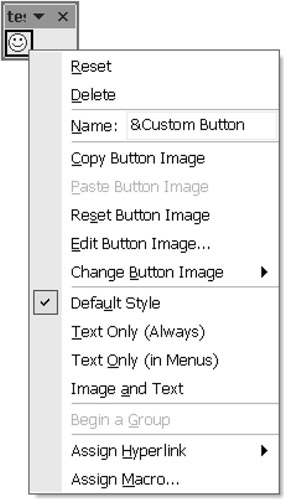
Figure 1-4: Modifying a tool
The label is changed in the field Name. For example, you could give it the name "Style Result." (This text will appear in a yellow information field whenever the user pauses momentarily over the tool with the mouse.) Assigning the tool to a macro is accomplished by clicking on Assign Macro. This opens a form in which are shown all the macros available to you. Select "FormatAsResult" and click OK.
Step 4: Modify the Tool to Your Specifications
Since you will probably forget after a few days the precise meaning of the default smiley face tool, you should find a suitable graphical representation for the functionality of the tool. In the pop-up menu that you obtained by clicking on the new tool with the right mouse button you may select Edit Button Image to enter a simple image editor. There we shall try to represent the formatting features of the style (boldface, double underline) on our button.
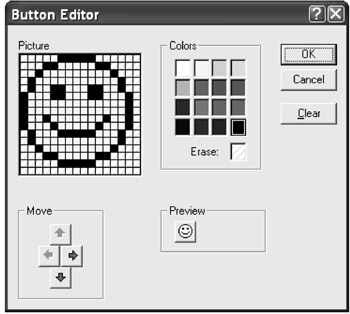
Figure 1-5: Button editor
Deleting the New Toolbar
When you have finished with this example, your new tool will probably be in your way. With ViewToolbarsCustomize you can select the new toolbar and delete it.
Remarks for Advanced Users
Although our example was quite simple, it raises some interesting problems. One cannot simply save all the information of this example (the definition of the style, the new tool, and the macro) in a workbook in such a way that another Excel user can use the new tool for formatting cells in his or her own spreadsheet. Even if they want to use the button only to format a cell in another workbook, they will get an error message. The reasons are these:
-
Styles apply to a single workbook, and cannot be easily transferred to other workbooks. (The macro could, of course, be modified so that it first copies the style into the other workbook. But that would go beyond the bounds of a simple introductory example.)
-
Tools are normally saved in their own file and belong to Excel's own configuration data. (Under Windows 2000, Documents and Settings\username\Application Data\Microsoft\Excel\Excel.xlb is used. Details as to the locations of the configuration files can be found in Chapter 5.)
-
The newly defined tool is available only if you log in under your own name. Other users of the same computer can use the new tool only if you link the toolbar to the workbook: To do this you execute in Excel the command VIEWTOOLBARSCUSTOMIZEATTACH for the toolbar in question.
The sample file format.xls contains two procedures in the module "ThisWorkbook" that deal with automatically showing the toolbar when the file is opened and removing it when the file is closed. We will not go into more detail in this introductory example. Detailed information on event procedures and on dealing with custom menus and toolbars can be found in Chapters 4 and 8.
EAN: 2147483647
Pages: 134