Section F. Showing and hiding elements
F. Showing and hiding elementsIn many cases, you want to show and hide elements based on user actions. These cases may be complicated, like Usable Forms, or they may be extremely simple, such as a menu that folds in or out when the user clicks on a header.
Simple show/hide scriptsSimple show/hide scripts display or conceal only one element per user action. Most of these scripts change the style.display property of the element. Mostly this method is used out of tradition: when people started writing show/hide scripts, class changes weren't yet possible in Netscape 4 (an important browser back then). Besides, show/hide scripts generally change only one CSS property: display. Therefore, this is a typical example of a show/hide script. It uses style-property changes throughout, and doesn't touch the class names of the elements: <h3>Header</h3> <div > <p>Content</p> <p>Content</p> </div> window.onload = function () { var x = document.getElementsByTagName('div'); for (var i=0;i<x.length;i++) { if (x[i].className != 'content') continue; x[i].style.display = 'none'; var header = x[i].previousSibling; if (header.nodeType != 1) header = header.previousSibling; header.relatedTag = x[i]; header.onclick = openClose; } } function openClose() { var currentValue = this.relatedTag.style.display; var newValue = (currentValue == 'none') ? 'block' : 'none'; this.relatedTag.style.display = newValue; } The script goes through all <div>s in the document, and ignores those that don't have a class="content". Then it sets their display to none (styles that hide content should be set in JavaScript!). Then the script finds the header the <div> is related to. In principle, this is the previousSibling of the <div>, but as we saw in 8H there may be empty text nodes between the header and the <div>. Therefore, the script goes back through the document tree until it finds a node with nodeType 1 (i.e., an element node). This is the header it's looking for. Once it finds this header, it sets its relatedTag property to point to the <div>, and the header gets an onclick event handler. When the user clicks on the header, the openClose() function reads out the current display of the header's relatedTag (i.e., the <div> that should be opened or closed), and sets its display to the opposite value.
Note a few important points:
This simple example of a show/hide script can be used in many circumstances. Showing and hiding table rowsIn my script I used <div>s as example tags, but of course you can write a show/hide script for any tag you like. Showing and hiding <ul>s or <li>s in a navigation could also be useful; in fact, Dropdown Menu does exactly that (though in a more complicated way than the simple script we just reviewed). Warning Browser incompatibilities ahead One case deserves special attention: showing and hiding table rows. Hiding table rows is done through display: none, obviously, but how do you show them? Table elements ought to have the special display value table-row, but unfortunately Explorer uses display: block instead.
All browsers are strict about what they allow. If they expect table-row, they'll choke on block, and vice versa. For instance, the following line makes Explorer restore the <tr> to view, but the other browsers literally make the <tr> a block that doesn't pay attention to the rest of the table: var tr = [the tr you want to show]; tr.style.display = 'block'; Figure 9.3. I gave the middle <tr> display: block. Mozilla takes me at my word; it makes the tr a block, and the vertical alignment of <td>s is lost.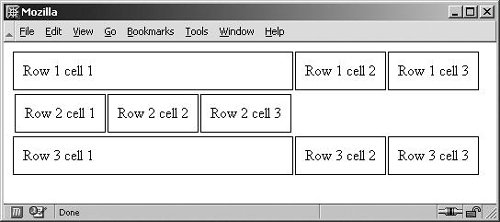 Conversely, if you use the correct table-row value, the other browsers restore the <tr>, but Explorer Windows gives an error: tr.style.display = 'table-row'; What now? Do we have to use a browser detect to decide between block and table-row? Fortunately, no. Every browser has a default style sheet that declares all default styles of all elements, and this style sheet includes the default display value of a <tr>. This default style sheet contains either block or table-row, depending on the browser. If you allow this sheet to take over once more, the problem is solved; all browsers will restore the <tr> to view. How do you do this? As we saw at the start of this chapter, the style property sets the inline style of an element. If we remove the inline value entirely, the browser once again takes its display instructions from the default style sheet, and the problem is solved: tr.style.display = ''; By removing the inline style entirely, the default style sheet takes over and the <tr> becomes visible in all browsers. Better still, you don't have to know whether the browser needs 'block' or 'table-row'. |
EAN: N/A
Pages: 116